# Timescaledb - Hypertables
**Pages:** 103
---
## chunks_detailed_size()
**URL:** llms-txt#chunks_detailed_size()
**Contents:**
- Samples
- Required arguments
- Returns
Get information about the disk space used by the chunks belonging to a
hypertable, returning size information for each chunk table, any
indexes on the chunk, any toast tables, and the total size associated
with the chunk. All sizes are reported in bytes.
If the function is executed on a distributed hypertable, it returns
disk space usage information as a separate row per node. The access
node is not included since it doesn't have any local chunk data.
Additional metadata associated with a chunk can be accessed
via the `timescaledb_information.chunks` view.
## Required arguments
|Name|Type|Description|
|---|---|---|
| `hypertable` | REGCLASS | Name of the hypertable |
|Column|Type|Description|
|---|---|---|
|chunk_schema| TEXT | Schema name of the chunk |
|chunk_name| TEXT | Name of the chunk|
|table_bytes|BIGINT | Disk space used by the chunk table|
|index_bytes|BIGINT | Disk space used by indexes|
|toast_bytes|BIGINT | Disk space of toast tables|
|total_bytes|BIGINT | Total disk space used by the chunk, including all indexes and TOAST data|
|node_name| TEXT | Node for which size is reported, applicable only to distributed hypertables|
If executed on a relation that is not a hypertable, the function
returns `NULL`.
===== PAGE: https://docs.tigerdata.com/api/hypertable/create_hypertable_old/ =====
**Examples:**
Example 1 (sql):
```sql
SELECT * FROM chunks_detailed_size('dist_table')
ORDER BY chunk_name, node_name;
chunk_schema | chunk_name | table_bytes | index_bytes | toast_bytes | total_bytes | node_name
-----------------------+-----------------------+-------------+-------------+-------------+-------------+-----------------------
_timescaledb_internal | _dist_hyper_1_1_chunk | 8192 | 32768 | 0 | 40960 | data_node_1
_timescaledb_internal | _dist_hyper_1_2_chunk | 8192 | 32768 | 0 | 40960 | data_node_2
_timescaledb_internal | _dist_hyper_1_3_chunk | 8192 | 32768 | 0 | 40960 | data_node_3
```
---
## add_columnstore_policy()
**URL:** llms-txt#add_columnstore_policy()
**Contents:**
- Samples
- Arguments
Create a [job][job] that automatically moves chunks in a hypertable to the columnstore after a
specific time interval.
You enable the columnstore a hypertable or continuous aggregate before you create a columnstore policy.
You do this by calling `CREATE TABLE` for hypertables and `ALTER MATERIALIZED VIEW` for continuous aggregates. When
columnstore is enabled, [bloom filters][bloom-filters] are enabled by default, and every new chunk has a bloom index.
If you converted chunks to columnstore using TimescaleDB v2.19.3 or below, to enable bloom filters on that data you have
to convert those chunks to the rowstore, then convert them back to the columnstore.
Bloom indexes are not retrofitted, meaning that the existing chunks need to be fully recompressed to have the bloom
indexes present. Please check out the PR description for more in-depth explanations of how bloom filters in
TimescaleDB work.
To view the policies that you set or the policies that already exist,
see [informational views][informational-views], to remove a policy, see [remove_columnstore_policy][remove_columnstore_policy].
A columnstore policy is applied on a per-chunk basis. If you remove an existing policy and then add a new one, the new policy applies only to the chunks that have not yet been converted to columnstore. The existing chunks in the columnstore remain unchanged. This means that chunks with different columnstore settings can co-exist in the same hypertable.
Since [TimescaleDB v2.18.0](https://github.com/timescale/timescaledb/releases/tag/2.18.0)
To create a columnstore job:
1. **Enable columnstore**
Create a [hypertable][hypertables-section] for your time-series data using [CREATE TABLE][hypertable-create-table].
For [efficient queries][secondary-indexes] on data in the columnstore, remember to `segmentby` the column you will
use most often to filter your data. For example:
* [Use `CREATE TABLE` for a hypertable][hypertable-create-table]
If you are self-hosting TimescaleDB v2.19.3 and below, create a [Postgres relational table][pg-create-table],
then convert it using [create_hypertable][create_hypertable]. You then enable hypercore with a call
to [ALTER TABLE][alter_table_hypercore].
* [Use `ALTER MATERIALIZED VIEW` for a continuous aggregate][compression_continuous-aggregate]
1. **Add a policy to move chunks to the columnstore at a specific time interval**
* 60 days after the data was added to the table:
* 3 months prior to the moment you run the query:
* With an integer-based time column:
* Older than eight weeks:
* Control the time your policy runs:
When you use a policy with a fixed schedule, TimescaleDB uses the `initial_start` time to compute the
next start time. When TimescaleDB finishes executing a policy, it picks the next available time on the
schedule,
skipping any candidate start times that have already passed.
When you set the `next_start` time, it only changes the start time of the next immediate execution. It does not
change the computation of the next scheduled execution after that next execution. To change the schedule so a
policy starts at a specific time, you need to set `initial_start`. To change the next immediate
execution, you need to set `next_start`. For example, to modify a policy to execute on a fixed schedule 15 minutes past the hour, and every
hour, you need to set both `initial_start` and `next_start` using `alter_job`:
1. **View the policies that you set or the policies that already exist**
See [timescaledb_information.jobs][informational-views].
Calls to `add_columnstore_policy` require either `after` or `created_before`, but cannot have both.
| Name | Type | Default | Required | Description |
|-------------------------------|--|------------------------------------------------------------------------------------------------------------------------------|----------|----------------------------------------------------------------------------------------------------------------------------------------------------------------------------------------------------------------------------------------------------------------------------------------------------------------------------------------------------------------------------------------------------------------------------------------------------------------------------|
| `hypertable` |REGCLASS| - | ✔ | Name of the hypertable or continuous aggregate to run this [job][job] on. |
| `after` |INTERVAL or INTEGER| - | ✖ | Add chunks containing data older than `now - {after}::interval` to the columnstore. Use an object type that matchs the time column type in `hypertable`:
TIMESTAMP, TIMESTAMPTZ, or DATE: use an INTERVAL type.
Integer-based timestamps : set an integer type using the [integer_now_func][set_integer_now_func].
`after` is mutually exclusive with `created_before`. |
| `created_before` |INTERVAL| NULL | ✖ | Add chunks with a creation time of `now() - created_before` to the columnstore. `created_before` is
Not supported for continuous aggregates.
Mutually exclusive with `after`.
|
| `schedule_interval` |INTERVAL| 12 hours when [chunk_time_interval][chunk_time_interval] >= `1 day` for `hypertable`. Otherwise `chunk_time_interval` / `2`. | ✖ | Set the interval between the finish time of the last execution of this policy and the next start. |
| `initial_start` |TIMESTAMPTZ| The interval from the finish time of the last execution to the [next_start][next-start]. | ✖ | Set the time this job is first run. This is also the time that `next_start` is calculated from. |
| `next_start` |TIMESTAMPTZ| -| ✖ | Set the start time of the next immediate execution. It does not change the computation of the next scheduled time after the next execution. |
| `timezone` |TEXT| UTC. However, daylight savings time(DST) changes may shift this alignment. | ✖ | Set to a valid time zone to mitigate DST shifting. If `initial_start` is set, subsequent executions of this policy are aligned on `initial_start`. |
| `if_not_exists` |BOOLEAN| `false` | ✖ | Set to `true` so this job fails with a warning rather than an error if a columnstore policy already exists on `hypertable` |
===== PAGE: https://docs.tigerdata.com/api/hypercore/hypertable_columnstore_settings/ =====
**Examples:**
Example 1 (sql):
```sql
CREATE TABLE crypto_ticks (
"time" TIMESTAMPTZ,
symbol TEXT,
price DOUBLE PRECISION,
day_volume NUMERIC
) WITH (
tsdb.hypertable,
tsdb.partition_column='time',
tsdb.segmentby='symbol',
tsdb.orderby='time DESC'
);
```
Example 2 (sql):
```sql
ALTER MATERIALIZED VIEW assets_candlestick_daily set (
timescaledb.enable_columnstore = true,
timescaledb.segmentby = 'symbol' );
```
Example 3 (unknown):
```unknown
* 3 months prior to the moment you run the query:
```
Example 4 (unknown):
```unknown
* With an integer-based time column:
```
---
## Create distributed hypertables
**URL:** llms-txt#create-distributed-hypertables
**Contents:**
- Creating a distributed hypertable
[Multi-node support is sunsetted][multi-node-deprecation].
TimescaleDB v2.13 is the last release that includes multi-node support for Postgres
versions 13, 14, and 15.
If you have a [multi-node environment][multi-node], you can create a distributed
hypertable across your data nodes. First create a standard Postgres table, and
then convert it into a distributed hypertable.
You need to set up your multi-node cluster before creating a distributed
hypertable. To set up multi-node, see the
[multi-node section](https://docs.tigerdata.com/self-hosted/latest/multinode-timescaledb/).
### Creating a distributed hypertable
1. On the access node of your multi-node cluster, create a standard
[Postgres table][postgres-createtable]:
1. Convert the table to a distributed hypertable. Specify the name of the table
you want to convert, the column that holds its time values, and a
space-partitioning parameter.
===== PAGE: https://docs.tigerdata.com/self-hosted/distributed-hypertables/foreign-keys/ =====
**Examples:**
Example 1 (sql):
```sql
CREATE TABLE conditions (
time TIMESTAMPTZ NOT NULL,
location TEXT NOT NULL,
temperature DOUBLE PRECISION NULL,
humidity DOUBLE PRECISION NULL
);
```
Example 2 (sql):
```sql
SELECT create_distributed_hypertable('conditions', 'time', 'location');
```
---
## show_chunks()
**URL:** llms-txt#show_chunks()
**Contents:**
- Samples
- Required arguments
- Optional arguments
Get list of chunks associated with a hypertable.
Function accepts the following required and optional arguments. These arguments
have the same semantics as the `drop_chunks` [function][drop_chunks].
Get list of all chunks associated with a table:
Get all chunks from hypertable `conditions` older than 3 months:
Get all chunks from hypertable `conditions` created before 3 months:
Get all chunks from hypertable `conditions` created in the last 1 month:
Get all chunks from hypertable `conditions` before 2017:
## Required arguments
|Name|Type|Description|
|-|-|-|
|`relation`|REGCLASS|Hypertable or continuous aggregate from which to select chunks.|
## Optional arguments
|Name|Type|Description|
|-|-|-|
|`older_than`|ANY|Specification of cut-off point where any chunks older than this timestamp should be shown.|
|`newer_than`|ANY|Specification of cut-off point where any chunks newer than this timestamp should be shown.|
|`created_before`|ANY|Specification of cut-off point where any chunks created before this timestamp should be shown.|
|`created_after`|ANY|Specification of cut-off point where any chunks created after this timestamp should be shown.|
The `older_than` and `newer_than` parameters can be specified in two ways:
* **interval type:** The cut-off point is computed as `now() -
older_than` and similarly `now() - newer_than`. An error is returned if an
INTERVAL is supplied and the time column is not one of a TIMESTAMP,
TIMESTAMPTZ, or DATE.
* **timestamp, date, or integer type:** The cut-off point is explicitly given
as a TIMESTAMP / TIMESTAMPTZ / DATE or as a SMALLINT / INT / BIGINT. The
choice of timestamp or integer must follow the type of the hypertable's time
column.
The `created_before` and `created_after` parameters can be specified in two ways:
* **interval type:** The cut-off point is computed as `now() -
created_before` and similarly `now() - created_after`. This uses
the chunk creation time for the filtering.
* **timestamp, date, or integer type:** The cut-off point is
explicitly given as a `TIMESTAMP` / `TIMESTAMPTZ` / `DATE` or as a
`SMALLINT` / `INT` / `BIGINT`. The choice of integer value
must follow the type of the hypertable's partitioning column. Otherwise
the chunk creation time is used for the filtering.
When both `older_than` and `newer_than` arguments are used, the
function returns the intersection of the resulting two ranges. For
example, specifying `newer_than => 4 months` and `older_than => 3
months` shows all chunks between 3 and 4 months old.
Similarly, specifying `newer_than => '2017-01-01'` and `older_than
=> '2017-02-01'` shows all chunks between '2017-01-01' and
'2017-02-01'. Specifying parameters that do not result in an
overlapping intersection between two ranges results in an error.
When both `created_before` and `created_after` arguments are used, the
function returns the intersection of the resulting two ranges. For
example, specifying `created_after`=> 4 months` and `created_before`=> 3
months` shows all chunks created between 3 and 4 months from now.
Similarly, specifying `created_after`=> '2017-01-01'` and `created_before`
=> '2017-02-01'` shows all chunks created between '2017-01-01' and
'2017-02-01'. Specifying parameters that do not result in an
overlapping intersection between two ranges results in an error.
The `created_before`/`created_after` parameters cannot be used together with
`older_than`/`newer_than`.
===== PAGE: https://docs.tigerdata.com/api/hypertable/merge_chunks/ =====
**Examples:**
Example 1 (sql):
```sql
SELECT show_chunks('conditions');
```
Example 2 (sql):
```sql
SELECT show_chunks('conditions', older_than => INTERVAL '3 months');
```
Example 3 (sql):
```sql
SELECT show_chunks('conditions', created_before => INTERVAL '3 months');
```
Example 4 (sql):
```sql
SELECT show_chunks('conditions', created_after => INTERVAL '1 month');
```
---
## Optimize time-series data in hypertables
**URL:** llms-txt#optimize-time-series-data-in-hypertables
**Contents:**
- Prerequisites
- Create a hypertable
- Speed up data ingestion
- Optimize cooling data in the columnstore
- Alter a hypertable
- Add a column to a hypertable
- Rename a hypertable
- Drop a hypertable
Hypertables are designed for real-time analytics, they are Postgres tables that automatically partition your data by
time. Typically, you partition hypertables on columns that hold time values.
[Best practice is to use `timestamptz`][timestamps-best-practice] column type. However, you can also partition on
`date`, `integer`, `timestamp` and [UUIDv7][uuidv7_functions] types.
To follow the steps on this page:
* Create a target [Tiger Cloud service][create-service] with the Real-time analytics capability.
You need [your connection details][connection-info]. This procedure also
works for [self-hosted TimescaleDB][enable-timescaledb].
## Create a hypertable
Create a [hypertable][hypertables-section] for your time-series data using [CREATE TABLE][hypertable-create-table].
For [efficient queries][secondary-indexes] on data in the columnstore, remember to `segmentby` the column you will use
most often to filter your data:
If you are self-hosting TimescaleDB v2.19.3 and below, create a [Postgres relational table][pg-create-table],
then convert it using [create_hypertable][create_hypertable]. You then enable hypercore with a call
to [ALTER TABLE][alter_table_hypercore].
To convert an existing table with data in it, call `create_hypertable` on that table with
[`migrate_data` to `true`][api-create-hypertable-arguments]. However, if you have a lot of data, this may take a long time.
## Speed up data ingestion
When you set `timescaledb.enable_direct_compress_copy` your data gets compressed in memory during ingestion with `COPY` statements.
By writing the compressed batches immediately in the columnstore, the IO footprint is significantly lower.
Also, the [columnstore policy][add_columnstore_policy] you set is less important, `INSERT` already produces compressed chunks.
Please note that this feature is a **tech preview** and not production-ready.
Using this feature could lead to regressed query performance and/or storage ratio, if the ingested batches are not
correctly ordered or are of too high cardinality.
To enable in-memory data compression during ingestion:
**Important facts**
- High cardinality use cases do not produce good batches and lead to degreaded query performance.
- The columnstore is optimized to store 1000 records per batch, which is the optimal format for ingestion per segment by.
- WAL records are written for the compressed batches rather than the individual tuples.
- Currently only `COPY` is support, `INSERT` will eventually follow.
- Best results are achieved for batch ingestion with 1000 records or more, upper boundary is 10.000 records.
- Continous Aggregates are **not** supported at the moment.
## Optimize cooling data in the columnstore
As the data cools and becomes more suited for analytics, [add a columnstore policy][add_columnstore_policy] so your data
is automatically converted to the columnstore after a specific time interval. This columnar format enables fast
scanning and aggregation, optimizing performance for analytical workloads while also saving significant storage space.
In the columnstore conversion, hypertable chunks are compressed by up to 98%, and organized for efficient,
large-scale queries. This columnar format enables fast scanning and aggregation, optimizing performance for analytical
workloads.
To optimize your data, add a columnstore policy:
You can also manually [convert chunks][convert_to_columnstore] in a hypertable to the columnstore.
## Alter a hypertable
You can alter a hypertable, for example to add a column, by using the Postgres
[`ALTER TABLE`][postgres-altertable] command. This works for both regular and
distributed hypertables.
### Add a column to a hypertable
You add a column to a hypertable using the `ALTER TABLE` command. In this
example, the hypertable is named `conditions` and the new column is named
`humidity`:
If the column you are adding has the default value set to `NULL`, or has no
default value, then adding a column is relatively fast. If you set the default
to a non-null value, it takes longer, because it needs to fill in this value for
all existing rows of all existing chunks.
### Rename a hypertable
You can change the name of a hypertable using the `ALTER TABLE` command. In this
example, the hypertable is called `conditions`, and is being changed to the new
name, `weather`:
Drop a hypertable using a standard Postgres [`DROP TABLE`][postgres-droptable]
command:
All data chunks belonging to the hypertable are deleted.
===== PAGE: https://docs.tigerdata.com/use-timescale/hypertables/improve-query-performance/ =====
**Examples:**
Example 1 (sql):
```sql
CREATE TABLE conditions (
time TIMESTAMPTZ NOT NULL,
location TEXT NOT NULL,
device TEXT NOT NULL,
temperature DOUBLE PRECISION NULL,
humidity DOUBLE PRECISION NULL
) WITH (
tsdb.hypertable,
tsdb.partition_column='time',
tsdb.segmentby = 'device',
tsdb.orderby = 'time DESC'
);
```
Example 2 (sql):
```sql
SET timescaledb.enable_direct_compress_copy=on;
```
Example 3 (sql):
```sql
CALL add_columnstore_policy('conditions', after => INTERVAL '1d');
```
Example 4 (sql):
```sql
ALTER TABLE conditions
ADD COLUMN humidity DOUBLE PRECISION NULL;
```
---
## add_reorder_policy()
**URL:** llms-txt#add_reorder_policy()
**Contents:**
- Samples
- Required arguments
- Optional arguments
- Returns
Create a policy to reorder the rows of a hypertable's chunks on a specific index. The policy reorders the rows for all chunks except the two most recent ones, because these are still getting writes. By default, the policy runs every 24 hours. To change the schedule, call [alter_job][alter_job] and adjust `schedule_interval`.
You can have only one reorder policy on each hypertable.
For manual reordering of individual chunks, see [reorder_chunk][reorder_chunk].
When a chunk's rows have been reordered by a policy, they are not reordered
by subsequent runs of the same policy. If you write significant amounts of data into older chunks that have
already been reordered, re-run [reorder_chunk][reorder_chunk] on them. If you have changed a lot of older chunks, it is better to drop and recreate the policy.
Creates a policy to reorder chunks by the existing `(device_id, time)` index every 24 hours.
This applies to all chunks except the two most recent ones.
## Required arguments
|Name|Type| Description |
|-|-|--------------------------------------------------------------|
|`hypertable`|REGCLASS| Hypertable to create the policy for |
|`index_name`|TEXT| Existing hypertable index by which to order the rows on disk |
## Optional arguments
|Name|Type| Description |
|-|-|-------------------------------------------------------------------------------------------------------------------------------------------------------------------------------------------------------------------------------------------------------------------------------------------------------------------------------------------------------------------------------------------------------------------------------------------------------------------------------------------------------------------------------------------------------------------------------------------------------------------------|
|`if_not_exists`|BOOLEAN| Set to `true` to avoid an error if the `reorder_policy` already exists. A notice is issued instead. Defaults to `false`. |
|`initial_start`|TIMESTAMPTZ| Controls when the policy first runs and how its future run schedule is calculated.
If omitted or set to NULL (default):
The first run is scheduled at now() + schedule_interval (defaults to 24 hours).
The next run is scheduled at one full schedule_interval after the end of the previous run.
If set:
The first run is at the specified time.
The next run is scheduled as initial_start + schedule_interval regardless of when the previous run ends.
|
|`timezone`|TEXT| A valid time zone. If `initial_start` is also specified, subsequent runs of the reorder policy are aligned on its initial start. However, daylight savings time (DST) changes might shift this alignment. Set to a valid time zone if this is an issue you want to mitigate. If omitted, UTC bucketing is performed. Defaults to `NULL`. |
|Column|Type|Description|
|-|-|-|
|`job_id`|INTEGER|TimescaleDB background job ID created to implement this policy|
===== PAGE: https://docs.tigerdata.com/api/hypertable/hypertable_detailed_size/ =====
**Examples:**
Example 1 (sql):
```sql
SELECT add_reorder_policy('conditions', 'conditions_device_id_time_idx');
```
---
## split_chunk()
**URL:** llms-txt#split_chunk()
**Contents:**
- Samples
- Required arguments
- Returns
Split a large chunk at a specific point in time. If you do not specify the timestamp to split at, `chunk`
is split equally.
* Split a chunk at a specific time:
* Split a chunk in two:
For example, If the chunk duration is, 24 hours, the following command splits `chunk_1` into
two chunks of 12 hours each.
## Required arguments
|Name|Type| Required | Description |
|---|---|---|----------------------------------|
| `chunk` | REGCLASS | ✔ | Name of the chunk to split. |
| `split_at` | `TIMESTAMPTZ`| ✖ |Timestamp to split the chunk at. |
This function returns void.
===== PAGE: https://docs.tigerdata.com/api/hypertable/attach_chunk/ =====
**Examples:**
Example 1 (sql):
```sql
CALL split_chunk('chunk_1', split_at => '2025-03-01 00:00');
```
Example 2 (sql):
```sql
CALL split_chunk('chunk_1');
```
---
## timescaledb_information.chunk_columnstore_settings
**URL:** llms-txt#timescaledb_information.chunk_columnstore_settings
**Contents:**
- Samples
- Returns
Retrieve the compression settings for each chunk in the columnstore.
Since [TimescaleDB v2.18.0](https://github.com/timescale/timescaledb/releases/tag/2.18.0)
To retrieve information about settings:
- **Show settings for all chunks in the columnstore**:
* **Find all chunk columnstore settings for a specific hypertable**:
| Name | Type | Description |
|--|--|--|--|--|
|`hypertable`|`REGCLASS`| The name of the hypertable in the columnstore. |
|`chunk`|`REGCLASS`| The name of the chunk in the `hypertable`. |
|`segmentby`|`TEXT`| The list of columns used to segment the `hypertable`. |
|`orderby`|`TEXT`| The list of columns used to order the data in the `hypertable`, along with the ordering and `NULL` ordering information. |
|`index`| `TEXT` | The sparse index details. |
===== PAGE: https://docs.tigerdata.com/api/hypercore/add_columnstore_policy/ =====
**Examples:**
Example 1 (sql):
```sql
SELECT * FROM timescaledb_information.chunk_columnstore_settings
```
Example 2 (sql):
```sql
hypertable | chunk | segmentby | orderby
------------+-------+-----------+---------
measurements | _timescaledb_internal._hyper_1_1_chunk| | "time" DESC
```
Example 3 (sql):
```sql
SELECT *
FROM timescaledb_information.chunk_columnstore_settings
WHERE hypertable::TEXT LIKE 'metrics';
```
Example 4 (sql):
```sql
hypertable | chunk | segmentby | orderby
------------+-------+-----------+---------
metrics | _timescaledb_internal._hyper_2_3_chunk | metric_id | "time"
```
---
## Alter and drop distributed hypertables
**URL:** llms-txt#alter-and-drop-distributed-hypertables
[Multi-node support is sunsetted][multi-node-deprecation].
TimescaleDB v2.13 is the last release that includes multi-node support for Postgres
versions 13, 14, and 15.
You can alter and drop distributed hypertables in the same way as standard
hypertables. To learn more, see:
* [Altering hypertables][alter]
* [Dropping hypertables][drop]
When you alter a distributed hypertable, or set privileges on it, the commands
are automatically applied across all data nodes. For more information, see the
section on
[multi-node administration][multinode-admin].
===== PAGE: https://docs.tigerdata.com/self-hosted/distributed-hypertables/create-distributed-hypertables/ =====
---
## Can't create unique index on hypertable, or can't create hypertable with unique index
**URL:** llms-txt#can't-create-unique-index-on-hypertable,-or-can't-create-hypertable-with-unique-index
You might get a unique index and partitioning column error in 2 situations:
* When creating a primary key or unique index on a hypertable
* When creating a hypertable from a table that already has a unique index or
primary key
For more information on how to fix this problem, see the
[section on creating unique indexes on hypertables][unique-indexes].
===== PAGE: https://docs.tigerdata.com/_troubleshooting/explain/ =====
---
## merge_chunks()
**URL:** llms-txt#merge_chunks()
**Contents:**
- Since2180
- Samples
- Arguments
Merge two or more chunks into one.
The partition boundaries for the new chunk is the union of all partitions of the merged chunks.
The new chunk retains the name, constraints, and triggers of the _first_ chunk in the partition order.
You can only merge chunks that have directly adjacent partitions. It is not possible to merge
chunks that have another chunk, or an empty range between them in any of the partitioning
dimensions.
Chunk merging has the following limitations. You cannot:
* Merge chunks with tiered data
* Read or write from the chunks while they are being merged
Refer to the installation documentation for detailed setup instructions.
- Merge more than two chunks:
You can merge either two chunks, or an arbitrary number of chunks specified as an array of chunk identifiers.
When you call `merge_chunks`, you must specify either `chunk1` and `chunk2`, or `chunks`. You cannot use both
arguments.
| Name | Type | Default | Required | Description |
|--------------------|-------------|--|--|------------------------------------------------|
| `chunk1`, `chunk2` | REGCLASS | - | ✖ | The two chunk to merge in partition order |
| `chunks` | REGCLASS[] |- | ✖ | The array of chunks to merge in partition order |
===== PAGE: https://docs.tigerdata.com/api/hypertable/add_dimension/ =====
**Examples:**
Example 1 (sql):
```sql
CALL merge_chunks('_timescaledb_internal._hyper_1_1_chunk', '_timescaledb_internal._hyper_1_2_chunk');
```
Example 2 (sql):
```sql
CALL merge_chunks('{_timescaledb_internal._hyper_1_1_chunk, _timescaledb_internal._hyper_1_2_chunk, _timescaledb_internal._hyper_1_3_chunk}');
```
---
## disable_chunk_skipping()
**URL:** llms-txt#disable_chunk_skipping()
**Contents:**
- Samples
- Required arguments
- Optional arguments
- Returns
Disable range tracking for a specific column in a hypertable **in the columnstore**.
In this sample, you convert the `conditions` table to a hypertable with
partitioning on the `time` column. You then specify and enable additional
columns to track ranges for. You then disable range tracking:
Best practice is to enable range tracking on columns which are correlated to the
partitioning column. In other words, enable tracking on secondary columns that are
referenced in the `WHERE` clauses in your queries.
Use this API to disable range tracking on columns when the query patterns don't
use this secondary column anymore.
## Required arguments
|Name|Type|Description|
|-|-|-|
|`hypertable`|REGCLASS|Hypertable that the column belongs to|
|`column_name`|TEXT|Column to disable tracking range statistics for|
## Optional arguments
|Name|Type|Description|
|-|-|-|
|`if_not_exists`|BOOLEAN|Set to `true` so that a notice is sent when ranges are not being tracked for a column. By default, an error is thrown|
|Column|Type|Description|
|-|-|-|
|`hypertable_id`|INTEGER|ID of the hypertable in TimescaleDB.|
|`column_name`|TEXT|Name of the column range tracking is disabled for|
|`disabled`|BOOLEAN|Returns `true` when tracking is disabled. `false` when `if_not_exists` is `true` and the entry was
not removed|
To `disable_chunk_skipping()`, you must have first called [enable_chunk_skipping][enable_chunk_skipping]
and enabled range tracking on a column in the hypertable.
===== PAGE: https://docs.tigerdata.com/api/hypertable/remove_reorder_policy/ =====
**Examples:**
Example 1 (sql):
```sql
SELECT create_hypertable('conditions', 'time');
SELECT enable_chunk_skipping('conditions', 'device_id');
SELECT disable_chunk_skipping('conditions', 'device_id');
```
---
## Optimize your data for real-time analytics
**URL:** llms-txt#optimize-your-data-for-real-time-analytics
**Contents:**
- Prerequisites
- Optimize your data with columnstore policies
- Reference
[Hypercore][hypercore] is the hybrid row-columnar storage engine in TimescaleDB used by hypertables. Traditional
databases force a trade-off between fast inserts (row-based storage) and efficient analytics
(columnar storage). Hypercore eliminates this trade-off, allowing real-time analytics without sacrificing
transactional capabilities.
Hypercore dynamically stores data in the most efficient format for its lifecycle:
* **Row-based storage for recent data**: the most recent chunk (and possibly more) is always stored in the rowstore,
ensuring fast inserts, updates, and low-latency single record queries. Additionally, row-based storage is used as a
writethrough for inserts and updates to columnar storage.
* **Columnar storage for analytical performance**: chunks are automatically compressed into the columnstore, optimizing
storage efficiency and accelerating analytical queries.
Unlike traditional columnar databases, hypercore allows data to be inserted or modified at any stage, making it a
flexible solution for both high-ingest transactional workloads and real-time analytics—within a single database.
When you convert chunks from the rowstore to the columnstore, multiple records are grouped into a single row.
The columns of this row hold an array-like structure that stores all the data. For example, data in the following
rowstore chunk:
| Timestamp | Device ID | Device Type | CPU |Disk IO|
|---|---|---|---|---|
|12:00:01|A|SSD|70.11|13.4|
|12:00:01|B|HDD|69.70|20.5|
|12:00:02|A|SSD|70.12|13.2|
|12:00:02|B|HDD|69.69|23.4|
|12:00:03|A|SSD|70.14|13.0|
|12:00:03|B|HDD|69.70|25.2|
Is converted and compressed into arrays in a row in the columnstore:
|Timestamp|Device ID|Device Type|CPU|Disk IO|
|-|-|-|-|-|
|[12:00:01, 12:00:01, 12:00:02, 12:00:02, 12:00:03, 12:00:03]|[A, B, A, B, A, B]|[SSD, HDD, SSD, HDD, SSD, HDD]|[70.11, 69.70, 70.12, 69.69, 70.14, 69.70]|[13.4, 20.5, 13.2, 23.4, 13.0, 25.2]|
Because a single row takes up less disk space, you can reduce your chunk size by up to 98%, and can also
speed up your queries. This saves on storage costs, and keeps your queries operating at lightning speed.
For an in-depth explanation of how hypertables and hypercore work, see the [Data model][data-model].
This page shows you how to get the best results when you set a policy to automatically convert chunks in a hypertable
from the rowstore to the columnstore.
To follow the steps on this page:
* Create a target [Tiger Cloud service][create-service] with real-time analytics enabled.
You need your [connection details][connection-info].
The code samples in this page use the [crypto_sample.zip](https://assets.timescale.com/docs/downloads/candlestick/crypto_sample.zip) data from [this key features tutorial][ingest-data].
## Optimize your data with columnstore policies
The compression ratio and query performance of data in the columnstore is dependent on the order and structure of your
data. Rows that change over a dimension should be close to each other. With time-series data, you `orderby` the time
dimension. For example, `Timestamp`:
| Timestamp | Device ID | Device Type | CPU |Disk IO|
|---|---|---|---|---|
|12:00:01|A|SSD|70.11|13.4|
This ensures that records are compressed and accessed in the same order. However, you would always have to
access the data using the time dimension, then filter all the rows using other criteria. To make your queries more
efficient, you segment your data based on the following:
- The way you want to access it. For example, to rapidly access data about a
single device, you `segmentby` the `Device ID` column. This enables you to run much faster analytical queries on
data in the columnstore.
- The compression rate you want to achieve. The [lower the cardinality][cardinality-blog] of the `segmentby` column, the better compression results you get.
When TimescaleDB converts a chunk to the columnstore, it automatically creates a different schema for your
data. It also creates and uses custom indexes to incorporate the `segmentby` and `orderby` parameters when
you write to and read from the columnstore.
To set up your hypercore automation:
1. **Connect to your Tiger Cloud service**
In [Tiger Cloud Console][services-portal] open an [SQL editor][in-console-editors]. You can also connect to your service using [psql][connect-using-psql].
1. **Enable columnstore on a hypertable**
Create a [hypertable][hypertables-section] for your time-series data using [CREATE TABLE][hypertable-create-table].
For [efficient queries][secondary-indexes] on data in the columnstore, remember to `segmentby` the column you will
use most often to filter your data. For example:
* [Use `CREATE TABLE` for a hypertable][hypertable-create-table]
If you are self-hosting TimescaleDB v2.19.3 and below, create a [Postgres relational table][pg-create-table],
then convert it using [create_hypertable][create_hypertable]. You then enable hypercore with a call
to [ALTER TABLE][alter_table_hypercore].
* [Use `ALTER MATERIALIZED VIEW` for a continuous aggregate][compression_continuous-aggregate]
Before you say `huh`, a continuous aggregate is a specialized hypertable.
1. **Add a policy to convert chunks to the columnstore at a specific time interval**
Create a [columnstore_policy][add_columnstore_policy] that automatically converts chunks in a hypertable to the columnstore at a specific time interval. For example, convert yesterday's crypto trading data to the columnstore:
TimescaleDB is optimized for fast updates on compressed data in the columnstore. To modify data in the
columnstore, use standard SQL.
1. **Check the columnstore policy**
1. View your data space saving:
When you convert data to the columnstore, as well as being optimized for analytics, it is compressed by more than
90%. This helps you save on storage costs and keeps your queries operating at lightning speed. To see the amount of space
saved:
You see something like:
| before | after |
|---------|--------|
| 194 MB | 24 MB |
1. View the policies that you set or the policies that already exist:
See [timescaledb_information.jobs][informational-views].
1. **Pause a columnstore policy**
See [alter_job][alter_job].
1. **Restart a columnstore policy**
See [alter_job][alter_job].
1. **Remove a columnstore policy**
See [remove_columnstore_policy][remove_columnstore_policy].
1. **Disable columnstore**
If your table has chunks in the columnstore, you have to
[convert the chunks back to the rowstore][convert_to_rowstore] before you disable the columnstore.
See [alter_table_hypercore][alter_table_hypercore].
For integers, timestamps, and other integer-like types, data is compressed using [delta encoding][delta],
[delta-of-delta][delta-delta], [simple-8b][simple-8b], and [run-length encoding][run-length]. For columns with few
repeated values, [XOR-based][xor] and [dictionary compression][dictionary] is used. For all other types,
[dictionary compression][dictionary] is used.
===== PAGE: https://docs.tigerdata.com/use-timescale/hypercore/compression-methods/ =====
**Examples:**
Example 1 (sql):
```sql
CREATE TABLE crypto_ticks (
"time" TIMESTAMPTZ,
symbol TEXT,
price DOUBLE PRECISION,
day_volume NUMERIC
) WITH (
tsdb.hypertable,
tsdb.partition_column='time',
tsdb.segmentby='symbol',
tsdb.orderby='time DESC'
);
```
Example 2 (sql):
```sql
ALTER MATERIALIZED VIEW assets_candlestick_daily set (
timescaledb.enable_columnstore = true,
timescaledb.segmentby = 'symbol' );
```
Example 3 (unknown):
```unknown
TimescaleDB is optimized for fast updates on compressed data in the columnstore. To modify data in the
columnstore, use standard SQL.
1. **Check the columnstore policy**
1. View your data space saving:
When you convert data to the columnstore, as well as being optimized for analytics, it is compressed by more than
90%. This helps you save on storage costs and keeps your queries operating at lightning speed. To see the amount of space
saved:
```
Example 4 (unknown):
```unknown
You see something like:
| before | after |
|---------|--------|
| 194 MB | 24 MB |
1. View the policies that you set or the policies that already exist:
```
---
## Triggers
**URL:** llms-txt#triggers
**Contents:**
- Create a trigger
- Creating a trigger
TimescaleDB supports the full range of Postgres triggers. Creating, altering,
or dropping triggers on a hypertable propagates the changes to all of the
underlying chunks.
This example creates a new table called `error_conditions` with the same schema
as `conditions`, but that only stores records which are considered errors. An
error, in this case, is when an application sends a `temperature` or `humidity`
reading with a value that is greater than or equal to 1000.
### Creating a trigger
1. Create a function that inserts erroneous data into the `error_conditions`
table:
1. Create a trigger that calls this function whenever a new row is inserted
into the hypertable:
1. All data is inserted into the `conditions` table, but rows that contain errors
are also added to the `error_conditions` table.
TimescaleDB supports the full range of triggers, including `BEFORE INSERT`,
`AFTER INSERT`, `BEFORE UPDATE`, `AFTER UPDATE`, `BEFORE DELETE`, and
`AFTER DELETE`. For more information, see the
[Postgres docs][postgres-createtrigger].
===== PAGE: https://docs.tigerdata.com/use-timescale/schema-management/foreign-data-wrappers/ =====
**Examples:**
Example 1 (sql):
```sql
CREATE OR REPLACE FUNCTION record_error()
RETURNS trigger AS $record_error$
BEGIN
IF NEW.temperature >= 1000 OR NEW.humidity >= 1000 THEN
INSERT INTO error_conditions
VALUES(NEW.time, NEW.location, NEW.temperature, NEW.humidity);
END IF;
RETURN NEW;
END;
$record_error$ LANGUAGE plpgsql;
```
Example 2 (sql):
```sql
CREATE TRIGGER record_error
BEFORE INSERT ON conditions
FOR EACH ROW
EXECUTE PROCEDURE record_error();
```
---
## copy_chunk()
**URL:** llms-txt#copy_chunk()
**Contents:**
- Required arguments
- Required settings
- Failures
- Sample usage
[Multi-node support is sunsetted][multi-node-deprecation].
TimescaleDB v2.13 is the last release that includes multi-node support for Postgres
versions 13, 14, and 15.
TimescaleDB allows you to copy existing chunks to a new location within a
multi-node environment. This allows each data node to work both as a primary for
some chunks and backup for others. If a data node fails, its chunks already
exist on other nodes that can take over the responsibility of serving them.
Experimental features could have bugs. They might not be backwards compatible,
and could be removed in future releases. Use these features at your own risk, and
do not use any experimental features in production.
## Required arguments
|Name|Type|Description|
|-|-|-|
|`chunk`|REGCLASS|Name of chunk to be copied|
|`source_node`|NAME|Data node where the chunk currently resides|
|`destination_node`|NAME|Data node where the chunk is to be copied|
When copying a chunk, the destination data node needs a way to
authenticate with the data node that holds the source chunk. It is
currently recommended to use a [password file][password-config] on the
data node.
The `wal_level` setting must also be set to `logical` or higher on
data nodes from which chunks are copied. If you are copying or moving
many chunks in parallel, you can increase `max_wal_senders` and
`max_replication_slots`.
When a copy operation fails, it sometimes creates objects and metadata on
the destination data node. It can also hold a replication slot open on the
source data node. To clean up these objects and metadata, use
[`cleanup_copy_chunk_operation`][cleanup_copy_chunk].
===== PAGE: https://docs.tigerdata.com/api/distributed-hypertables/alter_data_node/ =====
---
## hypertable_detailed_size()
**URL:** llms-txt#hypertable_detailed_size()
**Contents:**
- Samples
- Required arguments
- Returns
Get detailed information about disk space used by a hypertable or
continuous aggregate, returning size information for the table
itself, any indexes on the table, any toast tables, and the total
size of all. All sizes are reported in bytes. If the function is
executed on a distributed hypertable, it returns size information
as a separate row per node, including the access node.
When a continuous aggregate name is provided, the function
transparently looks up the backing hypertable and returns its statistics
instead.
For more information about using hypertables, including chunk size partitioning,
see the [hypertable section][hypertable-docs].
Get the size information for a hypertable.
The access node is listed without a user-given node name. Normally,
the access node holds no data, but still maintains, for example, index
information that occupies a small amount of disk space.
## Required arguments
|Name|Type|Description|
|---|---|---|
| `hypertable` | REGCLASS | Hypertable or continuous aggregate to show detailed size of. |
|Column|Type|Description|
|-|-|-|
|table_bytes|BIGINT|Disk space used by main_table (like `pg_relation_size(main_table)`)|
|index_bytes|BIGINT|Disk space used by indexes|
|toast_bytes|BIGINT|Disk space of toast tables|
|total_bytes|BIGINT|Total disk space used by the specified table, including all indexes and TOAST data|
|node_name|TEXT|For distributed hypertables, this is the user-given name of the node for which the size is reported. `NULL` is returned for the access node and non-distributed hypertables.|
If executed on a relation that is not a hypertable, the function
returns `NULL`.
===== PAGE: https://docs.tigerdata.com/api/continuous-aggregates/show_policies/ =====
**Examples:**
Example 1 (sql):
```sql
-- disttable is a distributed hypertable --
SELECT * FROM hypertable_detailed_size('disttable') ORDER BY node_name;
table_bytes | index_bytes | toast_bytes | total_bytes | node_name
-------------+-------------+-------------+-------------+-------------
16384 | 40960 | 0 | 57344 | data_node_1
8192 | 24576 | 0 | 32768 | data_node_2
0 | 8192 | 0 | 8192 |
```
---
## Limitations
**URL:** llms-txt#limitations
**Contents:**
- Hypertable limitations
While TimescaleDB generally offers capabilities that go beyond what
Postgres offers, there are some limitations to using hypertables.
## Hypertable limitations
* Time dimensions (columns) used for partitioning cannot have NULL values.
* Unique indexes must include all columns that are partitioning dimensions.
* `UPDATE` statements that move values between partitions (chunks) are not
supported. This includes upserts (`INSERT ... ON CONFLICT UPDATE`).
* Foreign key constraints from a hypertable referencing another hypertable are not supported.
===== PAGE: https://docs.tigerdata.com/use-timescale/tigerlake/ =====
---
## remove_retention_policy()
**URL:** llms-txt#remove_retention_policy()
**Contents:**
- Samples
- Required arguments
- Optional arguments
Remove a policy to drop chunks of a particular hypertable.
Removes the existing data retention policy for the `conditions` table.
## Required arguments
|Name|Type|Description|
|---|---|---|
| `relation` | REGCLASS | Name of the hypertable or continuous aggregate from which to remove the policy |
## Optional arguments
|Name|Type|Description|
|---|---|---|
| `if_exists` | BOOLEAN | Set to true to avoid throwing an error if the policy does not exist. Defaults to false.|
===== PAGE: https://docs.tigerdata.com/api/hypertable/create_table/ =====
**Examples:**
Example 1 (sql):
```sql
SELECT remove_retention_policy('conditions');
```
---
## show_tablespaces()
**URL:** llms-txt#show_tablespaces()
**Contents:**
- Samples
- Required arguments
Show the tablespaces attached to a hypertable.
## Required arguments
|Name|Type|Description|
|---|---|---|
| `hypertable` | REGCLASS | Hypertable to show attached tablespaces for.|
===== PAGE: https://docs.tigerdata.com/api/hypertable/disable_chunk_skipping/ =====
**Examples:**
Example 1 (sql):
```sql
SELECT * FROM show_tablespaces('conditions');
show_tablespaces
------------------
disk1
disk2
```
---
## Hypertables and chunks
**URL:** llms-txt#hypertables-and-chunks
**Contents:**
- The hypertable workflow
Tiger Cloud supercharges your real-time analytics by letting you run complex queries continuously, with near-zero latency. Under the hood, this is achieved by using hypertables—Postgres tables that automatically partition your time-series data by time and optionally by other dimensions. When you run a query, Tiger Cloud identifies the correct partition, called chunk, and runs the query on it, instead of going through the entire table.

Hypertables offer the following benefits:
- **Efficient data management with [automated partitioning by time][chunk-size]**: Tiger Cloud splits your data into chunks that hold data from a specific time range. For example, one day or one week. You can configure this range to better suit your needs.
- **Better performance with [strategic indexing][hypertable-indexes]**: an index on time in the descending order is automatically created when you create a hypertable. More indexes are created on the chunk level, to optimize performance. You can create additional indexes, including unique indexes, on the columns you need.
- **Faster queries with [chunk skipping][chunk-skipping]**: Tiger Cloud skips the chunks that are irrelevant in the context of your query, dramatically reducing the time and resources needed to fetch results. Even more—you can enable chunk skipping on non-partitioning columns.
- **Advanced data analysis with [hyperfunctions][hyperfunctions]**: Tiger Cloud enables you to efficiently process, aggregate, and analyze significant volumes of data while maintaining high performance.
To top it all, there is no added complexity—you interact with hypertables in the same way as you would with regular Postgres tables. All the optimization magic happens behind the scenes.
Inheritance is not supported for hypertables and may lead to unexpected behavior.
For more information about using hypertables, including chunk size partitioning,
see the [hypertable section][hypertable-docs].
## The hypertable workflow
Best practice for using a hypertable is to:
1. **Create a hypertable**
Create a [hypertable][hypertables-section] for your time-series data using [CREATE TABLE][hypertable-create-table].
For [efficient queries][secondary-indexes] on data in the columnstore, remember to `segmentby` the column you will
use most often to filter your data. For example:
If you are self-hosting TimescaleDB v2.19.3 and below, create a [Postgres relational table][pg-create-table],
then convert it using [create_hypertable][create_hypertable]. You then enable hypercore with a call
to [ALTER TABLE][alter_table_hypercore].
1. **Set the columnstore policy**
===== PAGE: https://docs.tigerdata.com/api/hypercore/ =====
**Examples:**
Example 1 (sql):
```sql
CREATE TABLE conditions (
time TIMESTAMPTZ NOT NULL,
location TEXT NOT NULL,
device TEXT NOT NULL,
temperature DOUBLE PRECISION NULL,
humidity DOUBLE PRECISION NULL
) WITH (
tsdb.hypertable,
tsdb.partition_column='time',
tsdb.segmentby = 'device',
tsdb.orderby = 'time DESC'
);
```
Example 2 (sql):
```sql
CALL add_columnstore_policy('conditions', after => INTERVAL '1d');
```
---
## Create foreign keys in a distributed hypertable
**URL:** llms-txt#create-foreign-keys-in-a-distributed-hypertable
**Contents:**
- Creating foreign keys in a distributed hypertable
[Multi-node support is sunsetted][multi-node-deprecation].
TimescaleDB v2.13 is the last release that includes multi-node support for Postgres
versions 13, 14, and 15.
Tables and values referenced by a distributed hypertable must be present on the
access node and all data nodes. To create a foreign key from a distributed
hypertable, use [`distributed_exec`][distributed_exec] to first create the
referenced table on all nodes.
## Creating foreign keys in a distributed hypertable
1. Create the referenced table on the access node.
1. Use [`distributed_exec`][distributed_exec] to create the same table on all
data nodes and update it with the correct data.
1. Create a foreign key from your distributed hypertable to your referenced
table.
===== PAGE: https://docs.tigerdata.com/self-hosted/distributed-hypertables/triggers/ =====
---
## CREATE TABLE
**URL:** llms-txt#create-table
**Contents:**
- Samples
- Arguments
- Returns
Create a [hypertable][hypertable-docs] partitioned on a single dimension with [columnstore][hypercore] enabled, or
create a standard Postgres relational table.
A hypertable is a specialized Postgres table that automatically partitions your data by time. All actions that work on a
Postgres table, work on hypertables. For example, [ALTER TABLE][alter_table_hypercore] and [SELECT][sql-select]. By default,
a hypertable is partitioned on the time dimension. To add secondary dimensions to a hypertable, call
[add_dimension][add-dimension]. To convert an existing relational table into a hypertable, call
[create_hypertable][create_hypertable].
As the data cools and becomes more suited for analytics, [add a columnstore policy][add_columnstore_policy] so your data
is automatically converted to the columnstore after a specific time interval. This columnar format enables fast
scanning and aggregation, optimizing performance for analytical workloads while also saving significant storage space.
In the columnstore conversion, hypertable chunks are compressed by up to 98%, and organized for efficient,
large-scale queries. This columnar format enables fast scanning and aggregation, optimizing performance for analytical
workloads. You can also manually [convert chunks][convert_to_columnstore] in a hypertable to the columnstore.
Hypertable to hypertable foreign keys are not allowed, all other combinations are permitted.
The [columnstore][hypercore] settings are applied on a per-chunk basis. You can change the settings by calling [ALTER TABLE][alter_table_hypercore] without first converting the entire hypertable back to the [rowstore][hypercore]. The new settings apply only to the chunks that have not yet been converted to columnstore, the existing chunks in the columnstore do not change. Similarly, if you [remove an existing columnstore policy][remove_columnstore_policy] and then [add a new one][add_columnstore_policy], the new policy applies only to the unconverted chunks. This means that chunks with different columnstore settings can co-exist in the same hypertable.
TimescaleDB calculates default columnstore settings for each chunk when it is created. These settings apply to each chunk, and not the entire hypertable. To explicitly disable the defaults, set a setting to an empty string.
`CREATE TABLE` extends the standard Postgres [CREATE TABLE][pg-create-table]. This page explains the features and
arguments specific to TimescaleDB.
Since [TimescaleDB v2.20.0](https://github.com/timescale/timescaledb/releases/tag/2.20.0)
- **Create a hypertable partitioned on the time dimension and enable columnstore**:
1. Create the hypertable:
1. Enable hypercore by adding a columnstore policy:
- **Create a hypertable partitioned on the time with fewer chunks based on time interval**:
- **Create a hypertable partitioned using [UUIDv7][uuidv7_functions]**:
- **Enable data compression during ingestion**:
When you set `timescaledb.enable_direct_compress_copy` your data gets compressed in memory during ingestion with `COPY` statements.
By writing the compressed batches immediately in the columnstore, the IO footprint is significantly lower.
Also, the [columnstore policy][add_columnstore_policy] you set is less important, `INSERT` already produces compressed chunks.
Please note that this feature is a **tech preview** and not production-ready.
Using this feature could lead to regressed query performance and/or storage ratio, if the ingested batches are not
correctly ordered or are of too high cardinality.
To enable in-memory data compression during ingestion:
**Important facts**
- High cardinality use cases do not produce good batches and lead to degreaded query performance.
- The columnstore is optimized to store 1000 records per batch, which is the optimal format for ingestion per segment by.
- WAL records are written for the compressed batches rather than the individual tuples.
- Currently only `COPY` is support, `INSERT` will eventually follow.
- Best results are achieved for batch ingestion with 1000 records or more, upper boundary is 10.000 records.
- Continous Aggregates are **not** supported at the moment.
1. Create a hypertable:
1. Copy data into the hypertable:
You achieve the highest insert rate using binary format. CSV and text format are also supported.
- **Create a Postgres relational table**:
| Name | Type | Default | Required | Description |
|--------------------------------|------------------|-----------------------------------------------------------------------------------------------------------------------------------------------------------------------------------------------------------------------------------|-------------------------------------------------------------|-------------------------------------------------------------------------------------------------------------------------------------------------------------------------------------------------------------------------------------------------------------------------------------------------------------------------------------------------------------------------------------------------------------------------------------------------------------------------------------------------------------------------------------------------------------------------------------------------------------------------------------------------|
| `tsdb.hypertable` |BOOLEAN| `true` | ✖ | Create a new [hypertable][hypertable-docs] for time-series data rather than a standard Postgres relational table. |
| `tsdb.partition_column` |TEXT| `true` | ✖ | Set the time column to automatically partition your time-series data by. |
| `tsdb.chunk_interval` |TEXT| `7 days` | ✖ | Change this to better suit your needs. For example, if you set `chunk_interval` to 1 day, each chunk stores data from the same day. Data from different days is stored in different chunks. |
| `tsdb.create_default_indexes` | BOOLEAN | `true` | ✖ | Set to `false` to not automatically create indexes. The default indexes are:
On all hypertables, a descending index on `partition_column`
On hypertables with space partitions, an index on the space parameter and `partition_column`
|
| `tsdb.associated_schema` |REGCLASS| `_timescaledb_internal` | ✖ | Set the schema name for internal hypertable tables. |
| `tsdb.associated_table_prefix` |TEXT| `_hyper` | ✖ | Set the prefix for the names of internal hypertable chunks. |
| `tsdb.orderby` |TEXT| Descending order on the time column in `table_name`. | ✖| The order in which items are used in the columnstore. Specified in the same way as an `ORDER BY` clause in a `SELECT` query. Setting `tsdb.orderby` automatically creates an implicit min/max sparse index on the `orderby` column. |
| `tsdb.segmentby` |TEXT| TimescaleDB looks at [`pg_stats`](https://www.postgresql.org/docs/current/view-pg-stats.html) and determines an appropriate column based on the data cardinality and distribution. If `pg_stats` is not available, TimescaleDB looks for an appropriate column from the existing indexes. | ✖| Set the list of columns used to segment data in the columnstore for `table`. An identifier representing the source of the data such as `device_id` or `tags_id` is usually a good candidate. |
|`tsdb.sparse_index`| TEXT | TimescaleDB evaluates the columns you already have indexed, checks which data types are a good fit for sparse indexing, then creates a sparse index as an optimization. | ✖ | Configure the sparse indexes for compressed chunks. Requires setting `tsdb.orderby`. Supported index types include:
`bloom()`: a probabilistic index, effective for `=` filters. Cannot be applied to `tsdb.orderby` columns.
`minmax()`: stores min/max values for each compressed chunk. Setting `tsdb.orderby` automatically creates an implicit min/max sparse index on the `orderby` column.
Define multiple indexes using a comma-separated list. You can set only one index per column. Set to an empty string to avoid using sparse indexes and explicitly disable the default behavior. |
TimescaleDB returns a simple message indicating success or failure.
===== PAGE: https://docs.tigerdata.com/api/hypertable/drop_chunks/ =====
**Examples:**
Example 1 (sql):
```sql
CREATE TABLE crypto_ticks (
"time" TIMESTAMPTZ,
symbol TEXT,
price DOUBLE PRECISION,
day_volume NUMERIC
) WITH (
tsdb.hypertable,
tsdb.partition_column='time',
tsdb.segmentby='symbol',
tsdb.orderby='time DESC'
);
```
Example 2 (sql):
```sql
CALL add_columnstore_policy('crypto_ticks', after => INTERVAL '1d');
```
Example 3 (sql):
```sql
CREATE TABLE IF NOT EXISTS hypertable_control_chunk_interval(
time int4 NOT NULL,
device text,
value float
) WITH (
tsdb.hypertable,
tsdb.partition_column='time',
tsdb.chunk_interval=3453
);
```
Example 4 (sql):
```sql
-- For optimal compression on the ID column, first enable UUIDv7 compression
SET enable_uuid_compression=true;
-- Then create your table
CREATE TABLE events (
id uuid PRIMARY KEY DEFAULT generate_uuidv7(),
payload jsonb
) WITH (tsdb.hypertable, tsdb.partition_column = 'id');
```
---
## Dropping chunks times out
**URL:** llms-txt#dropping-chunks-times-out
When you drop a chunk, it requires an exclusive lock. If a chunk is being
accessed by another session, you cannot drop the chunk at the same time. If a
drop chunk operation can't get the lock on the chunk, then it times out and the
process fails. To resolve this problem, check what is locking the chunk. In some
cases, this could be caused by a continuous aggregate or other process accessing
the chunk. When the drop chunk operation can get an exclusive lock on the chunk,
it completes as expected.
For more information about locks, see the
[Postgres lock monitoring documentation][pg-lock-monitoring].
===== PAGE: https://docs.tigerdata.com/_troubleshooting/hypertables-unique-index-partitioning/ =====
---
## Create a data retention policy
**URL:** llms-txt#create-a-data-retention-policy
**Contents:**
- Add a data retention policy
- Adding a data retention policy
- Remove a data retention policy
- See scheduled data retention jobs
Automatically drop data once its time value ages past a certain interval. When
you create a data retention policy, TimescaleDB automatically schedules a
background job to drop old chunks.
## Add a data retention policy
Add a data retention policy by using the
[`add_retention_policy`][add_retention_policy] function.
### Adding a data retention policy
1. Choose which hypertable you want to add the policy to. Decide how long
you want to keep data before dropping it. In this example, the hypertable
named `conditions` retains the data for 24 hours.
1. Call `add_retention_policy`:
A data retention policy only allows you to drop chunks based on how far they are
in the past. To drop chunks based on how far they are in the future,
[manually drop chunks](https://docs.tigerdata.com/use-timescale/latest/data-retention/manually-drop-chunks).
## Remove a data retention policy
Remove an existing data retention policy by using the
[`remove_retention_policy`][remove_retention_policy] function. Pass it the name
of the hypertable to remove the policy from.
## See scheduled data retention jobs
To see your scheduled data retention jobs and their job statistics, query the
[`timescaledb_information.jobs`][timescaledb_information.jobs] and
[`timescaledb_information.job_stats`][timescaledb_information.job_stats] tables.
For example:
The results look like this:
===== PAGE: https://docs.tigerdata.com/use-timescale/data-retention/manually-drop-chunks/ =====
**Examples:**
Example 1 (sql):
```sql
SELECT add_retention_policy('conditions', INTERVAL '24 hours');
```
Example 2 (sql):
```sql
SELECT remove_retention_policy('conditions');
```
Example 3 (sql):
```sql
SELECT j.hypertable_name,
j.job_id,
config,
schedule_interval,
job_status,
last_run_status,
last_run_started_at,
js.next_start,
total_runs,
total_successes,
total_failures
FROM timescaledb_information.jobs j
JOIN timescaledb_information.job_stats js
ON j.job_id = js.job_id
WHERE j.proc_name = 'policy_retention';
```
Example 4 (sql):
```sql
-[ RECORD 1 ]-------+-----------------------------------------------
hypertable_name | conditions
job_id | 1000
config | {"drop_after": "5 years", "hypertable_id": 14}
schedule_interval | 1 day
job_status | Scheduled
last_run_status | Success
last_run_started_at | 2022-05-19 16:15:11.200109+00
next_start | 2022-05-20 16:15:11.243531+00
total_runs | 1
total_successes | 1
total_failures | 0
```
---
## chunk_columnstore_stats()
**URL:** llms-txt#chunk_columnstore_stats()
**Contents:**
- Samples
- Arguments
- Returns
Retrieve statistics about the chunks in the columnstore
`chunk_columnstore_stats` returns the size of chunks in the columnstore, these values are computed when you call either:
- [add_columnstore_policy][add_columnstore_policy]: create a [job][job] that automatically moves chunks in a hypertable to the columnstore at a
specific time interval.
- [convert_to_columnstore][convert_to_columnstore]: manually add a specific chunk in a hypertable to the columnstore.
Inserting into a chunk in the columnstore does not change the chunk size. For more information about how to compute
chunk sizes, see [chunks_detailed_size][chunks_detailed_size].
Since [TimescaleDB v2.18.0](https://github.com/timescale/timescaledb/releases/tag/2.18.0)
To retrieve statistics about chunks:
- **Show the status of the first two chunks in the `conditions` hypertable**:
Returns:
- **Use `pg_size_pretty` to return a more human friendly format**:
| Name | Type | Default | Required | Description |
|--|--|--|--|--|
|`hypertable`|`REGCLASS`|-|✖| The name of a hypertable |
|Column|Type| Description |
|-|-|------------------------------------------------------------------------------------------------------------------------------------------------------------------------------------------------------------------|
|`chunk_schema`|TEXT| Schema name of the chunk. |
|`chunk_name`|TEXT| Name of the chunk. |
|`compression_status`|TEXT| Current compression status of the chunk. |
|`before_compression_table_bytes`|BIGINT| Size of the heap before compression. Returns `NULL` if `compression_status` == `Uncompressed`. |
|`before_compression_index_bytes`|BIGINT| Size of all the indexes before compression. Returns `NULL` if `compression_status` == `Uncompressed`. |
|`before_compression_toast_bytes`|BIGINT| Size the TOAST table before compression. Returns `NULL` if `compression_status` == `Uncompressed`. |
|`before_compression_total_bytes`|BIGINT| Size of the entire chunk table (`before_compression_table_bytes` + `before_compression_index_bytes` + `before_compression_toast_bytes`) before compression. Returns `NULL` if `compression_status` == `Uncompressed`.|
|`after_compression_table_bytes`|BIGINT| Size of the heap after compression. Returns `NULL` if `compression_status` == `Uncompressed`. |
|`after_compression_index_bytes`|BIGINT| Size of all the indexes after compression. Returns `NULL` if `compression_status` == `Uncompressed`. |
|`after_compression_toast_bytes`|BIGINT| Size the TOAST table after compression. Returns `NULL` if `compression_status` == `Uncompressed`. |
|`after_compression_total_bytes`|BIGINT| Size of the entire chunk table (`after_compression_table_bytes` + `after_compression_index_bytes `+ `after_compression_toast_bytes`) after compression. Returns `NULL` if `compression_status` == `Uncompressed`. |
|`node_name`|TEXT| **DEPRECATED**: nodes the chunk is located on, applicable only to distributed hypertables. |
===== PAGE: https://docs.tigerdata.com/api/hypercore/convert_to_rowstore/ =====
**Examples:**
Example 1 (sql):
```sql
SELECT * FROM chunk_columnstore_stats('conditions')
ORDER BY chunk_name LIMIT 2;
```
Example 2 (sql):
```sql
-[ RECORD 1 ]------------------+----------------------
chunk_schema | _timescaledb_internal
chunk_name | _hyper_1_1_chunk
compression_status | Uncompressed
before_compression_table_bytes |
before_compression_index_bytes |
before_compression_toast_bytes |
before_compression_total_bytes |
after_compression_table_bytes |
after_compression_index_bytes |
after_compression_toast_bytes |
after_compression_total_bytes |
node_name |
-[ RECORD 2 ]------------------+----------------------
chunk_schema | _timescaledb_internal
chunk_name | _hyper_1_2_chunk
compression_status | Compressed
before_compression_table_bytes | 8192
before_compression_index_bytes | 32768
before_compression_toast_bytes | 0
before_compression_total_bytes | 40960
after_compression_table_bytes | 8192
after_compression_index_bytes | 32768
after_compression_toast_bytes | 8192
after_compression_total_bytes | 49152
node_name |
```
Example 3 (sql):
```sql
SELECT pg_size_pretty(after_compression_total_bytes) AS total
FROM chunk_columnstore_stats('conditions')
WHERE compression_status = 'Compressed';
```
Example 4 (sql):
```sql
-[ RECORD 1 ]--+------
total | 48 kB
```
---
## timescaledb_information.dimensions
**URL:** llms-txt#timescaledb_information.dimensions
**Contents:**
- Samples
- Available columns
Returns information about the dimensions of a hypertable. Hypertables can be
partitioned on a range of different dimensions. By default, all hypertables are
partitioned on time, but it is also possible to partition on other dimensions in
addition to time.
For hypertables that are partitioned solely on time,
`timescaledb_information.dimensions` returns a single row of metadata. For
hypertables that are partitioned on more than one dimension, the call returns a
row for each dimension.
For time-based dimensions, the metadata returned indicates the integer datatype,
such as BIGINT, INTEGER, or SMALLINT, and the time-related datatype, such as
TIMESTAMPTZ, TIMESTAMP, or DATE. For space-based dimension, the metadata
returned specifies the number of `num_partitions`.
If the hypertable uses time data types, the `time_interval` column is defined.
Alternatively, if the hypertable uses integer data types, the `integer_interval`
and `integer_now_func` columns are defined.
Get information about the dimensions of hypertables.
The `by_range` and `by_hash` dimension builders are an addition to TimescaleDB 2.13.
Get information about dimensions of a hypertable that has two time-based dimensions.
|Name|Type|Description|
|-|-|-|
|`hypertable_schema`|TEXT|Schema name of the hypertable|
|`hypertable_name`|TEXT|Table name of the hypertable|
|`dimension_number`|BIGINT|Dimension number of the hypertable, starting from 1|
|`column_name`|TEXT|Name of the column used to create this dimension|
|`column_type`|REGTYPE|Type of the column used to create this dimension|
|`dimension_type`|TEXT|Is this a time based or space based dimension|
|`time_interval`|INTERVAL|Time interval for primary dimension if the column type is a time datatype|
|`integer_interval`|BIGINT|Integer interval for primary dimension if the column type is an integer datatype|
|`integer_now_func`|TEXT|`integer_now`` function for primary dimension if the column type is an integer datatype|
|`num_partitions`|SMALLINT|Number of partitions for the dimension|
The `time_interval` and `integer_interval` columns are not applicable for space
based dimensions.
===== PAGE: https://docs.tigerdata.com/api/informational-views/job_errors/ =====
**Examples:**
Example 1 (sql):
```sql
-- Create a range and hash partitioned hypertable
CREATE TABLE dist_table(time timestamptz, device int, temp float);
SELECT create_hypertable('dist_table', by_range('time', INTERVAL '7 days'));
SELECT add_dimension('dist_table', by_hash('device', 3));
SELECT * from timescaledb_information.dimensions
ORDER BY hypertable_name, dimension_number;
-[ RECORD 1 ]-----+-------------------------
hypertable_schema | public
hypertable_name | dist_table
dimension_number | 1
column_name | time
column_type | timestamp with time zone
dimension_type | Time
time_interval | 7 days
integer_interval |
integer_now_func |
num_partitions |
-[ RECORD 2 ]-----+-------------------------
hypertable_schema | public
hypertable_name | dist_table
dimension_number | 2
column_name | device
column_type | integer
dimension_type | Space
time_interval |
integer_interval |
integer_now_func |
num_partitions | 2
```
---
## About Tiger Cloud storage tiers
**URL:** llms-txt#about-tiger-cloud-storage-tiers
**Contents:**
- High-performance storage
- Low-cost storage
The tiered storage architecture in Tiger Cloud includes a high-performance storage tier and a low-cost object storage tier. You use the high-performance tier for data that requires quick access, and the object tier for rarely used historical data. Tiering policies move older data asynchronously and periodically from high-performance to low-cost storage, sparing you the need to do it manually. Chunks from a single hypertable, including compressed chunks, can stretch across these two storage tiers.

## High-performance storage
High-performance storage is where your data is stored by default, until you [enable tiered storage][manage-tiering] and [move older data to the low-cost tier][move-data]. In the high-performance storage, your data is stored in the block format and optimized for frequent querying. The [hypercore row-columnar storage engine][hypercore] available in this tier is designed specifically for real-time analytics. It enables you to compress the data in the high-performance storage by up to 90%, while improving performance. Coupled with other optimizations, Tiger Cloud high-performance storage makes sure your data is always accessible and your queries run at lightning speed.
Tiger Cloud high-performance storage comes in the following types:
- **Standard** (default): based on [AWS EBS gp3][aws-gp3] and designed for general workloads. Provides up to 16 TB of storage and 16,000 IOPS.
- **Enhanced**: based on [EBS io2][ebs-io2] and designed for high-scale, high-throughput workloads. Provides up to 64 TB of storage and 32,000 IOPS.
[See the differences][aws-storage-types] in the underlying AWS storage. You [enable enhanced storage][enable-enhanced] as needed in Tiger Cloud Console.
Once you [enable tiered storage][manage-tiering], you can start moving rarely used data to the object tier. The object tier is based on AWS S3 and stores your data in the [Apache Parquet][parquet] format. Within a Parquet file, a set of rows is grouped together to form a row group. Within a row group, values for a single column across multiple rows are stored together. The original size of the data in your service, compressed or uncompressed, does not correspond directly to its size in S3. A compressed hypertable may even take more space in S3 than it does in Tiger Cloud.
Apache Parquet allows for more efficient scans across longer time periods, and Tiger Cloud uses other metadata and query optimizations to reduce the amount of data that needs to be fetched to satisfy a query, such as:
- **Chunk skipping**: exclude the chunks that fall outside the query time window.
- **Row group skipping**: identify the row groups within the Parquet object that satisfy the query.
- **Column skipping**: fetch only columns that are requested by the query.
The following query is against a tiered dataset and illustrates the optimizations:
`EXPLAIN` illustrates which chunks are being pulled in from the object storage tier:
1. Fetch data from chunks 42, 43, and 44 from the object storage tier.
1. Skip row groups and limit the fetch to a subset of the offsets in the
Parquet object that potentially match the query filter. Only fetch the data
for `device_uuid`, `sensor_id`, and `observed_at` as the query needs only these 3 columns.
The object storage tier is more than an archiving solution. It is also:
- **Cost-effective:** store high volumes of data at a lower cost. You pay only for what you store, with no extra cost for queries.
- **Scalable:** scale past the restrictions of even the enhanced high-performance storage tier.
- **Online:** your data is always there and can be [queried when needed][querying-tiered-data].
By default, tiered data is not included when you query from a Tiger Cloud service. To access tiered data, you [enable tiered reads][querying-tiered-data] for a query, a session, or even for all sessions. After you enable tiered reads, when you run regular SQL queries, a behind-the-scenes process transparently pulls data from wherever it's located: the standard high-performance storage tier, the object storage tier, or both. You can `JOIN` against tiered data, build views, and even define continuous aggregates on it. In fact, because the implementation of continuous aggregates also uses hypertables, they can be tiered to low-cost storage as well.
For low-cost storage, Tiger Data charges only for the size of your data in S3 in the Apache Parquet format, regardless of whether it was compressed in Tiger Cloud before tiering. There are no additional expenses, such as data transfer or compute.
The low-cost storage tier comes with the following limitations:
- **Limited schema modifications**: some schema modifications are not allowed
on hypertables with tiered chunks.
_Allowed_ modifications include: renaming the hypertable, adding columns
with `NULL` defaults, adding indexes, changing or renaming the hypertable
schema, and adding `CHECK` constraints. For `CHECK` constraints, only
untiered data is verified.
Columns can also be deleted, but you cannot subsequently add a new column
to a tiered hypertable with the same name as the now-deleted column.
_Disallowed_ modifications include: adding a column with non-`NULL`
defaults, renaming a column, changing the data type of a
column, and adding a `NOT NULL` constraint to the column.
- **Limited data changes**: you cannot insert data into, update, or delete a
tiered chunk. These limitations take effect as soon as the chunk is
scheduled for tiering.
- **Inefficient query planner filtering for non-native data types**: the query
planner speeds up reads from our object storage tier by using metadata
to filter out columns and row groups that don't satisfy the query. This works for all
native data types, but not for non-native types, such as `JSON`, `JSONB`,
and `GIS`.
* **Latency**: S3 has higher access latency than local storage. This can affect the
execution time of queries in latency-sensitive environments, especially
lighter queries.
* **Number of dimensions**: you cannot use tiered storage with hypertables
partitioned on more than one dimension. Make sure your hypertables are
partitioned on time only, before you enable tiered storage.
===== PAGE: https://docs.tigerdata.com/use-timescale/security/overview/ =====
**Examples:**
Example 1 (sql):
```sql
EXPLAIN ANALYZE
SELECT count(*) FROM
( SELECT device_uuid, sensor_id FROM public.device_readings
WHERE observed_at > '2023-08-28 00:00+00' and observed_at < '2023-08-29 00:00+00'
GROUP BY device_uuid, sensor_id ) q;
QUERY PLAN
-------------------------------------------------------------------------------------------------
Aggregate (cost=7277226.78..7277226.79 rows=1 width=8) (actual time=234993.749..234993.750 rows=1 loops=1)
-> HashAggregate (cost=4929031.23..7177226.78 rows=8000000 width=68) (actual time=184256.546..234913.067 rows=1651523 loops=1)
Group Key: osm_chunk_1.device_uuid, osm_chunk_1.sensor_id
Planned Partitions: 128 Batches: 129 Memory Usage: 20497kB Disk Usage: 4429832kB
-> Foreign Scan on osm_chunk_1 (cost=0.00..0.00 rows=92509677 width=68) (actual time=345.890..128688.459 rows=92505457 loops=1)
Filter: ((observed_at > '2023-08-28 00:00:00+00'::timestamp with time zone) AND (observed_at < '2023-08-29 00:00:00+00'::timestamp with t
ime zone))
Rows Removed by Filter: 4220
Match tiered objects: 3
Row Groups:
_timescaledb_internal._hyper_1_42_chunk: 0-74
_timescaledb_internal._hyper_1_43_chunk: 0-29
_timescaledb_internal._hyper_1_44_chunk: 0-71
S3 requests: 177
S3 data: 224423195 bytes
Planning Time: 6.216 ms
Execution Time: 235372.223 ms
(16 rows)
```
---
## Create a continuous aggregate
**URL:** llms-txt#create-a-continuous-aggregate
**Contents:**
- Create a continuous aggregate
- Creating a continuous aggregate
- Choosing an appropriate bucket interval
- Using the WITH NO DATA option
- Creating a continuous aggregate with the WITH NO DATA option
- Create a continuous aggregate with a JOIN
- Query continuous aggregates
- Querying a continuous aggregate
- Use continuous aggregates with mutable functions: experimental
- Use continuous aggregates with window functions: experimental
Creating a continuous aggregate is a two-step process. You need to create the
view first, then enable a policy to keep the view refreshed. You can create the
view on a hypertable, or on top of another continuous aggregate. You can have
more than one continuous aggregate on each source table or view.
Continuous aggregates require a `time_bucket` on the time partitioning column of
the hypertable.
By default, views are automatically refreshed. You can adjust this by setting
the [WITH NO DATA](#using-the-with-no-data-option) option. Additionally, the
view can not be a [security barrier view][postgres-security-barrier].
Continuous aggregates use hypertables in the background, which means that they
also use chunk time intervals. By default, the continuous aggregate's chunk time
interval is 10 times what the original hypertable's chunk time interval is. For
example, if the original hypertable's chunk time interval is 7 days, the
continuous aggregates that are on top of it have a 70 day chunk time
interval.
## Create a continuous aggregate
In this example, we are using a hypertable called `conditions`, and creating a
continuous aggregate view for daily weather data. The `GROUP BY` clause must
include a `time_bucket` expression which uses time dimension column of the
hypertable. Additionally, all functions and their arguments included in
`SELECT`, `GROUP BY`, and `HAVING` clauses must be
[immutable][postgres-immutable].
### Creating a continuous aggregate
1. At the `psql`prompt, create the materialized view:
To create a continuous aggregate within a transaction block, use the [WITH NO DATA option][with-no-data].
To improve continuous aggregate performance, [set `timescaledb.invalidate_using = 'wal'`][create_materialized_view] Since [TimescaleDB v2.22.0](https://github.com/timescale/timescaledb/releases/tag/2.22.0).
1. Create a policy to refresh the view every hour:
You can use most Postgres aggregate functions in continuous aggregations. To
see what Postgres features are supported, check the
[function support table][cagg-function-support].
## Choosing an appropriate bucket interval
Continuous aggregates require a `time_bucket` on the time partitioning column of
the hypertable. The time bucket allows you to define a time interval, instead of
having to use specific timestamps. For example, you can define a time bucket as
five minutes, or one day.
You can't use [time_bucket_gapfill][api-time-bucket-gapfill] directly in a
continuous aggregate. This is because you need access to previous data to
determine the gapfill content, which isn't yet available when you create the
continuous aggregate. You can work around this by creating the continuous
aggregate using [`time_bucket`][api-time-bucket], then querying the continuous
aggregate using `time_bucket_gapfill`.
## Using the WITH NO DATA option
By default, when you create a view for the first time, it is populated with
data. This is so that the aggregates can be computed across the entire
hypertable. If you don't want this to happen, for example if the table is very
large, or if new data is being continuously added, you can control the order in
which the data is refreshed. You can do this by adding a manual refresh with
your continuous aggregate policy using the `WITH NO DATA` option.
The `WITH NO DATA` option allows the continuous aggregate to be created
instantly, so you don't have to wait for the data to be aggregated. Data begins
to populate only when the policy begins to run. This means that only data newer
than the `start_offset` time begins to populate the continuous aggregate. If you
have historical data that is older than the `start_offset` interval, you need to
manually refresh the history up to the current `start_offset` to allow real-time
queries to run efficiently.
### Creating a continuous aggregate with the WITH NO DATA option
1. At the `psql` prompt, create the view:
1. Manually refresh the view:
## Create a continuous aggregate with a JOIN
In TimescaleDB V2.10 and later, with Postgres v12 or later, you can
create a continuous aggregate with a query that also includes a `JOIN`. For
example:
For more information about creating a continuous aggregate with a `JOIN`,
including some additional restrictions, see the
[about continuous aggregates section](https://docs.tigerdata.com/use-timescale/latest/continuous-aggregates/about-continuous-aggregates/#continuous-aggregates-with-a-join-clause).
## Query continuous aggregates
When you have created a continuous aggregate and set a refresh policy, you can
query the view with a `SELECT` query. You can only specify a single hypertable
in the `FROM` clause. Including more hypertables, tables, views, or subqueries
in your `SELECT` query is not supported. Additionally, make sure that the
hypertable you are querying does not have
[row-level-security policies][postgres-rls]
enabled.
### Querying a continuous aggregate
1. At the `psql` prompt, query the continuous aggregate view called
`conditions_summary_hourly` for the average, minimum, and maximum
temperatures for the first quarter of 2021 recorded by device 5:
1. Alternatively, query the continuous aggregate view called
`conditions_summary_hourly` for the top 20 largest metric spreads in that
quarter:
## Use continuous aggregates with mutable functions: experimental
Mutable functions have experimental supported in the continuous aggregate query definition. Mutable functions are enabled
by default. However, if you use them in a materialized query a warning is returned.
When using non-immutable functions you have to ensure these functions produce consistent results across
continuous aggregate refresh runs. For example, if a function depends on the current time zone you have
to ensure all your continuous aggregate refreshes run with a consistent setting for this.
## Use continuous aggregates with window functions: experimental
Window functions have experimental supported in the continuous aggregate query definition. Window functions are disabled
by default. To enable them, set `timescaledb.enable_cagg_window_functions` to `true`.
Support is experimental, there is a risk of data inconsistency. For example, in backfill scenarios, buckets could be missed.
### Create a window function
To use a window function in a continuous aggregate:
1. Create a simple table with to store a value at a specific time:
1. Enable window functions.
As window functions are experimental, in order to create continuous aggregates with window functions.
you have to `enable_cagg_window_functions`.
1. Bucket your data by `time` and calculate the delta between time buckets using the `lag` window function:
Window functions must stay within the time bucket. Any query that tries to look beyond the current
time bucket will produce incorrect results around the refresh boundaries.
Window functions that partition by time_bucket should be safe even with LAG()/LEAD()
### Window function workaround for older versions of TimescaleDB
For TimescaleDB v2.19.3 and below, continuous aggregates do not support window functions. To work around this:
1. Create a simple table with to store a value at a specific time:
1. Create a continuous aggregate that does not use a window function:
1. Use the `lag` window function on your continuous aggregate at query time:
This speeds up your query by calculating the aggregation ahead of time. The
delta is calculated at query time.
===== PAGE: https://docs.tigerdata.com/use-timescale/continuous-aggregates/hierarchical-continuous-aggregates/ =====
**Examples:**
Example 1 (sql):
```sql
CREATE MATERIALIZED VIEW conditions_summary_daily
WITH (timescaledb.continuous) AS
SELECT device,
time_bucket(INTERVAL '1 day', time) AS bucket,
AVG(temperature),
MAX(temperature),
MIN(temperature)
FROM conditions
GROUP BY device, bucket;
```
Example 2 (sql):
```sql
SELECT add_continuous_aggregate_policy('conditions_summary_daily',
start_offset => INTERVAL '1 month',
end_offset => INTERVAL '1 day',
schedule_interval => INTERVAL '1 hour');
```
Example 3 (sql):
```sql
CREATE MATERIALIZED VIEW cagg_rides_view
WITH (timescaledb.continuous) AS
SELECT vendor_id,
time_bucket('1h', pickup_datetime) AS hour,
count(*) total_rides,
avg(fare_amount) avg_fare,
max(trip_distance) as max_trip_distance,
min(trip_distance) as min_trip_distance
FROM rides
GROUP BY vendor_id, time_bucket('1h', pickup_datetime)
WITH NO DATA;
```
Example 4 (sql):
```sql
CALL refresh_continuous_aggregate('cagg_rides_view', NULL, localtimestamp - INTERVAL '1 week');
```
---
## ALTER TABLE (hypercore)
**URL:** llms-txt#alter-table-(hypercore)
**Contents:**
- Samples
- Arguments
Enable the columnstore or change the columnstore settings for a hypertable. The settings are applied on a per-chunk basis. You do not need to convert the entire hypertable back to the rowstore before changing the settings. The new settings apply only to the chunks that have not yet been converted to columnstore, the existing chunks in the columnstore do not change. This means that chunks with different columnstore settings can co-exist in the same hypertable.
TimescaleDB calculates default columnstore settings for each chunk when it is created. These settings apply to each chunk, and not the entire hypertable. To explicitly disable the defaults, set a setting to an empty string. To remove the current configuration and re-enable the defaults, call `ALTER TABLE RESET ();`.
After you have enabled the columnstore, either:
- [add_columnstore_policy][add_columnstore_policy]: create a [job][job] that automatically moves chunks in a hypertable to the columnstore at a
specific time interval.
- [convert_to_columnstore][convert_to_columnstore]: manually add a specific chunk in a hypertable to the columnstore.
Since [TimescaleDB v2.18.0](https://github.com/timescale/timescaledb/releases/tag/2.18.0)
To enable the columnstore:
- **Configure a hypertable that ingests device data to use the columnstore**:
In this example, the `metrics` hypertable is often queried about a specific device or set of devices.
Segment the hypertable by `device_id` to improve query performance.
- **Specify the chunk interval without changing other columnstore settings**:
- Set the time interval when chunks are added to the columnstore:
- To disable the option you set previously, set the interval to 0:
| Name | Type | Default | Required | Description |
|-------|---------|-----------------------------------------------------------------------------------------------------------------------------------------------------------------------------------------------------------------------------------|----------|--------------|
| `table_name` | TEXT | - | ✖ | The hypertable to enable columstore for. |
| `timescaledb.enable_columnstore` | BOOLEAN | `true` | ✖ | Set to `false` to disable columnstore. |
| `timescaledb.compress_orderby` | TEXT | Descending order on the time column in `table_name`. | ✖ | The order in which items are used in the columnstore. Specified in the same way as an `ORDER BY` clause in a `SELECT` query. Setting `timescaledb.compress_orderby` automatically creates an implicit min/max sparse index on the `orderby` column. |
| `timescaledb.compress_segmentby` | TEXT | TimescaleDB looks at [`pg_stats`](https://www.postgresql.org/docs/current/view-pg-stats.html) and determines an appropriate column based on the data cardinality and distribution. If `pg_stats` is not available, TimescaleDB looks for an appropriate column from the existing indexes. | ✖ | Set the list of columns used to segment data in the columnstore for `table`. An identifier representing the source of the data such as `device_id` or `tags_id` is usually a good candidate. |
| `column_name` | TEXT | - | ✖ | The name of the column to `orderby` or `segmentby`. |
|`timescaledb.sparse_index`| TEXT | TimescaleDB evaluates the columns you already have indexed, checks which data types are a good fit for sparse indexing, then creates a sparse index as an optimization. | ✖ | Configure the sparse indexes for compressed chunks. Requires setting `timescaledb.compress_orderby`. Supported index types include:
`bloom()`: a probabilistic index, effective for `=` filters. Cannot be applied to `timescaledb.compress_orderby` columns.
`minmax()`: stores min/max values for each compressed chunk. Setting `timescaledb.compress_orderby` automatically creates an implicit min/max sparse index on the `orderby` column.
Define multiple indexes using a comma-separated list. You can set only one index per column. Set to an empty string to avoid using sparse indexes and explicitly disable the default behavior. To remove the current sparse index configuration and re-enable default sparse index selection, call `ALTER TABLE your_table_name RESET (timescaledb.sparse_index);`. |
| `timescaledb.compress_chunk_time_interval` | TEXT | - | ✖ | EXPERIMENTAL: reduce the total number of chunks in the columnstore for `table`. If you set `compress_chunk_time_interval`, chunks added to the columnstore are merged with the previous adjacent chunk within `chunk_time_interval` whenever possible. These chunks are irreversibly merged. If you call [convert_to_rowstore][convert_to_rowstore], merged chunks are not split up. You can call `compress_chunk_time_interval` independently of other compression settings; `timescaledb.enable_columnstore` is not required. |
| `interval` | TEXT | - | ✖ | Set to a multiple of the [chunk_time_interval][chunk_time_interval] for `table`. |
| `ALTER` | TEXT | | ✖ | Set a specific column in the columnstore to be `NOT NULL`. |
| `ADD CONSTRAINT` | TEXT | | ✖ | Add `UNIQUE` constraints to data in the columnstore. |
===== PAGE: https://docs.tigerdata.com/api/hypercore/chunk_columnstore_stats/ =====
**Examples:**
Example 1 (sql):
```sql
ALTER TABLE metrics SET(
timescaledb.enable_columnstore,
timescaledb.orderby = 'time DESC',
timescaledb.segmentby = 'device_id');
```
Example 2 (sql):
```sql
ALTER TABLE metrics SET (timescaledb.compress_chunk_time_interval = '24 hours');
```
Example 3 (sql):
```sql
ALTER TABLE metrics SET (timescaledb.compress_chunk_time_interval = '0');
```
---
## chunk_compression_stats()
**URL:** llms-txt#chunk_compression_stats()
**Contents:**
- Samples
- Required arguments
- Returns
Old API since [TimescaleDB v2.18.0](https://github.com/timescale/timescaledb/releases/tag/2.18.0) Replaced by chunk_columnstore_stats().
Get chunk-specific statistics related to hypertable compression.
All sizes are in bytes.
This function shows the compressed size of chunks, computed when the
`compress_chunk` is manually executed, or when a compression policy processes
the chunk. An insert into a compressed chunk does not update the compressed
sizes. For more information about how to compute chunk sizes, see the
`chunks_detailed_size` section.
Use `pg_size_pretty` get the output in a more human friendly format.
## Required arguments
|Name|Type|Description|
|-|-|-|
|`hypertable`|REGCLASS|Name of the hypertable|
|Column|Type|Description|
|-|-|-|
|`chunk_schema`|TEXT|Schema name of the chunk|
|`chunk_name`|TEXT|Name of the chunk|
|`compression_status`|TEXT|the current compression status of the chunk|
|`before_compression_table_bytes`|BIGINT|Size of the heap before compression (NULL if currently uncompressed)|
|`before_compression_index_bytes`|BIGINT|Size of all the indexes before compression (NULL if currently uncompressed)|
|`before_compression_toast_bytes`|BIGINT|Size the TOAST table before compression (NULL if currently uncompressed)|
|`before_compression_total_bytes`|BIGINT|Size of the entire chunk table (table+indexes+toast) before compression (NULL if currently uncompressed)|
|`after_compression_table_bytes`|BIGINT|Size of the heap after compression (NULL if currently uncompressed)|
|`after_compression_index_bytes`|BIGINT|Size of all the indexes after compression (NULL if currently uncompressed)|
|`after_compression_toast_bytes`|BIGINT|Size the TOAST table after compression (NULL if currently uncompressed)|
|`after_compression_total_bytes`|BIGINT|Size of the entire chunk table (table+indexes+toast) after compression (NULL if currently uncompressed)|
|`node_name`|TEXT|nodes on which the chunk is located, applicable only to distributed hypertables|
===== PAGE: https://docs.tigerdata.com/api/compression/add_compression_policy/ =====
**Examples:**
Example 1 (sql):
```sql
SELECT * FROM chunk_compression_stats('conditions')
ORDER BY chunk_name LIMIT 2;
-[ RECORD 1 ]------------------+----------------------
chunk_schema | _timescaledb_internal
chunk_name | _hyper_1_1_chunk
compression_status | Uncompressed
before_compression_table_bytes |
before_compression_index_bytes |
before_compression_toast_bytes |
before_compression_total_bytes |
after_compression_table_bytes |
after_compression_index_bytes |
after_compression_toast_bytes |
after_compression_total_bytes |
node_name |
-[ RECORD 2 ]------------------+----------------------
chunk_schema | _timescaledb_internal
chunk_name | _hyper_1_2_chunk
compression_status | Compressed
before_compression_table_bytes | 8192
before_compression_index_bytes | 32768
before_compression_toast_bytes | 0
before_compression_total_bytes | 40960
after_compression_table_bytes | 8192
after_compression_index_bytes | 32768
after_compression_toast_bytes | 8192
after_compression_total_bytes | 49152
node_name |
```
Example 2 (sql):
```sql
SELECT pg_size_pretty(after_compression_total_bytes) AS total
FROM chunk_compression_stats('conditions')
WHERE compression_status = 'Compressed';
-[ RECORD 1 ]--+------
total | 48 kB
```
---
## Inefficient `compress_chunk_time_interval` configuration
**URL:** llms-txt#inefficient-`compress_chunk_time_interval`-configuration
When you configure `compress_chunk_time_interval` but do not set the primary dimension as the first column in `compress_orderby`, TimescaleDB decompresses chunks before merging. This makes merging less efficient. Set the primary dimension of the chunk as the first column in `compress_orderby` to improve efficiency.
===== PAGE: https://docs.tigerdata.com/_troubleshooting/cloud-jdbc-authentication-support/ =====
---
## convert_to_rowstore()
**URL:** llms-txt#convert_to_rowstore()
**Contents:**
- Samples
- Arguments
Manually convert a specific chunk in the hypertable columnstore to the rowstore.
If you need to modify or add a lot of data to a chunk in the columnstore, best practice is to stop
any [jobs][job] moving chunks to the columnstore, convert the chunk back to the rowstore, then modify the
data. After the update, [convert the chunk to the columnstore][convert_to_columnstore] and restart the jobs.
This workflow is especially useful if you need to backfill old data.
Since [TimescaleDB v2.18.0](https://github.com/timescale/timescaledb/releases/tag/2.18.0)
To modify or add a lot of data to a chunk:
1. **Stop the jobs that are automatically adding chunks to the columnstore**
Retrieve the list of jobs from the [timescaledb_information.jobs][informational-views] view
to find the job you need to [alter_job][alter_job].
1. **Convert a chunk to update back to the rowstore**
1. **Update the data in the chunk you added to the rowstore**
Best practice is to structure your [INSERT][insert] statement to include appropriate
partition key values, such as the timestamp. TimescaleDB adds the data to the correct chunk:
1. **Convert the updated chunks back to the columnstore**
1. **Restart the jobs that are automatically converting chunks to the columnstore**
| Name | Type | Default | Required | Description|
|--|----------|---------|----------|-|
|`chunk`| REGCLASS | - | ✖ | Name of the chunk to be moved to the rowstore. |
|`if_compressed`| BOOLEAN | `true` | ✔ | Set to `false` so this job fails with an error rather than an warning if `chunk` is not in the columnstore |
===== PAGE: https://docs.tigerdata.com/api/hypercore/hypertable_columnstore_stats/ =====
**Examples:**
Example 1 (unknown):
```unknown
1. **Convert a chunk to update back to the rowstore**
```
Example 2 (unknown):
```unknown
1. **Update the data in the chunk you added to the rowstore**
Best practice is to structure your [INSERT][insert] statement to include appropriate
partition key values, such as the timestamp. TimescaleDB adds the data to the correct chunk:
```
Example 3 (unknown):
```unknown
1. **Convert the updated chunks back to the columnstore**
```
Example 4 (unknown):
```unknown
1. **Restart the jobs that are automatically converting chunks to the columnstore**
```
---
## About compression
**URL:** llms-txt#about-compression
**Contents:**
- Key aspects of compression
- Ordering and segmenting.
Old API since [TimescaleDB v2.18.0](https://github.com/timescale/timescaledb/releases/tag/2.18.0) Replaced by hypercore.
Compressing your time-series data allows you to reduce your chunk size by more
than 90%. This saves on storage costs, and keeps your queries operating at
lightning speed.
When you enable compression, the data in your hypertable is compressed chunk by
chunk. When the chunk is compressed, multiple records are grouped into a single
row. The columns of this row hold an array-like structure that stores all the
data. This means that instead of using lots of rows to store the data, it stores
the same data in a single row. Because a single row takes up less disk space
than many rows, it decreases the amount of disk space required, and can also
speed up your queries.
For example, if you had a table with data that looked a bit like this:
|Timestamp|Device ID|Device Type|CPU|Disk IO|
|-|-|-|-|-|
|12:00:01|A|SSD|70.11|13.4|
|12:00:01|B|HDD|69.70|20.5|
|12:00:02|A|SSD|70.12|13.2|
|12:00:02|B|HDD|69.69|23.4|
|12:00:03|A|SSD|70.14|13.0|
|12:00:03|B|HDD|69.70|25.2|
You can convert this to a single row in array form, like this:
|Timestamp|Device ID|Device Type|CPU|Disk IO|
|-|-|-|-|-|
|[12:00:01, 12:00:01, 12:00:02, 12:00:02, 12:00:03, 12:00:03]|[A, B, A, B, A, B]|[SSD, HDD, SSD, HDD, SSD, HDD]|[70.11, 69.70, 70.12, 69.69, 70.14, 69.70]|[13.4, 20.5, 13.2, 23.4, 13.0, 25.2]|
This section explains how to enable native compression, and then goes into
detail on the most important settings for compression, to help you get the
best possible compression ratio.
## Key aspects of compression
Every table has a different schema but they do share some commonalities that you need to think about.
Consider the table `metrics` with the following attributes:
|Column|Type|Collation|Nullable|Default|
|-|-|-|-|-|
time|timestamp with time zone|| not null|
device_id| integer|| not null|
device_type| integer|| not null|
cpu| double precision|||
disk_io| double precision|||
All hypertables have a primary dimension which is used to partition the table into chunks. The primary dimension is given when [the hypertable is created][hypertable-create-table]. In the example below, you can see a classic time-series use case with a `time` column as the primary dimension. In addition, there are two columns `cpu` and `disk_io` containing the values that are captured over time, and a column `device_id` for the device that captured the values.
Columns can be used in a few different ways:
- You can use values in a column as a lookup key, in the example above `device_id` is a typical example of such a column.
- You can use a column for partitioning a table. This is typically a time column like `time` in the example above, but it is possible to partition the table using other types as well.
- You can use a column as a filter to narrow down on what data you select. The column `device_type` is an example of where you can decide to look at, for example, only solid state drives (SSDs).
The remaining columns are typically the values or metrics you are collecting. These are typically aggregated or presented in other ways. The columns `cpu` and `disk_io` are typical examples of such columns.
= now() - ‘1 day’::interval;
`} />
When chunks are compressed in a hypertable, data stored in them is reorganized and stored in column-order rather than row-order. As a result, it is not possible to use the same uncompressed schema version of the chunk and a different schema must be created. This is automatically handled by TimescaleDB, but it has a few implications:
The compression ratio and query performance is very dependent on the order and structure of the compressed data, so some considerations are needed when setting up compression.
Indexes on the hypertable cannot always be used in the same manner for the compressed data.
Indexes set on the hypertable are used only on chunks containing uncompressed
data. TimescaleDB creates and uses custom indexes to incorporate the `segmentby`
and `orderby` parameters during compression which are used when reading compressed data.
More on this in the next section.
Based on the previous schema, filtering of data should happen over a certain time period and analytics are done on device granularity. This pattern of data access lends itself to organizing the data layout suitable for compression.
### Ordering and segmenting.
Ordering the data will have a great impact on the compression ratio and performance of your queries. Rows that change over a dimension should be close to each other. Since we are mostly dealing with time-series data, time dimension is a great candidate. Most of the time data changes in a predictable fashion, following a certain trend. We can exploit this fact to encode the data so it takes less space to store. For example, if you order the records over time, they will get compressed in that order and subsequently also accessed in the same order.
Using the following configuration setup on our example table:
would produce the following data layout.
|Timestamp|Device ID|Device Type|CPU|Disk IO|
|-|-|-|-|
|[12:00:01, 12:00:01, 12:00:02, 12:00:02, 12:00:03, 12:00:03]|[A, B, A, B, A, B]|[SSD, HDD, SSD, HDD, SSD, HDD]|[70.11, 69.70, 70.12, 69.69, 70.14, 69.70]|[13.4, 20.5, 13.2, 23.4, 13.0, 25.2]|
`time` column is used for ordering data, which makes filtering it using `time` column much more efficient.
= '2024-03-01 00:00:00+01' and time < '2024-03-02 00:00:00+01';
avg
--------------------
0.4996848437842719
(1 row)
Time: 87,218 ms
postgres=# ALTER TABLE metrics
SET (
timescaledb.compress,
timescaledb.compress_segmentby = 'device_id',
timescaledb.compress_orderby='time'
);
ALTER TABLE
Time: 6,607 ms
postgres=# SELECT compress_chunk(c) FROM show_chunks('metrics') c;
compress_chunk
----------------------------------------
_timescaledb_internal._hyper_2_4_chunk
_timescaledb_internal._hyper_2_5_chunk
_timescaledb_internal._hyper_2_6_chunk
(3 rows)
Time: 3070,626 ms (00:03,071)
postgres=# select avg(cpu) from metrics where time >= '2024-03-01 00:00:00+01' and time < '2024-03-02 00:00:00+01';
avg
------------------
0.49968484378427
(1 row)
Time: 45,384 ms
`} />
This makes the time column a perfect candidate for ordering your data since the measurements evolve as time goes on. If you were to use that as your only compression setting, you would most likely get a good enough compression ratio to save a lot of storage. However, accessing the data effectively depends on your use case and your queries. With this setup, you would always have to access the data by using the time dimension and subsequently filter all the rows based on any other criteria.
Segmenting the compressed data should be based on the way you access the data. Basically, you want to segment your data in such a way that you can make it easier for your queries to fetch the right data at the right time. That is to say, your queries should dictate how you segment the data so they can be optimized and yield even better query performance.
For example, If you want to access a single device using a specific `device_id` value (either all records or maybe for a specific time range), you would need to filter all those records one by one during row access time. To get around this, you can use device_id column for segmenting. This would allow you to run analytical queries on compressed data much faster if you are looking for specific device IDs.
Consider the following query:
As you can see, the query does a lot of work based on the `device_id` identifier by grouping all its values together. We can use this fact to speed up these types of queries by setting
up compression to segment the data around the values in this column.
Using the following configuration setup on our example table:
would produce the following data layout.
|time|device_id|device_type|cpu|disk_io|energy_consumption|
|---|---|---|---|---|---|
|[12:00:02, 12:00:01]|1|[SSD,SSD]|[88.2, 88.6]|[20, 25]|[0.8, 0.85]|
|[12:00:02, 12:00:01]|2|[HDD,HDD]|[300.5, 299.1]|[30, 40]|[0.9, 0.95]|
|...|...|...|...|...|...|
Segmenting column `device_id` is used for grouping data points together based on the value of that column. This makes accessing a specific device much more efficient.
Number of rows that are compressed together in a single batch (like the ones we see above) is 1000.
If your chunk does not contain enough data to create big enough batches, your compression ratio will be reduced.
This needs to be taken into account when defining your compression settings.
===== PAGE: https://docs.tigerdata.com/use-timescale/compression/compression-design/ =====
---
## Temporary file size limit exceeded when converting chunks to the columnstore
**URL:** llms-txt#temporary-file-size-limit-exceeded-when-converting-chunks-to-the-columnstore
When you try to convert a chunk to the columnstore, especially if the chunk is very large, you
could get this error. Compression operations write files to a new compressed
chunk table, which is written in temporary memory. The maximum amount of
temporary memory available is determined by the `temp_file_limit` parameter. You
can work around this problem by adjusting the `temp_file_limit` and
`maintenance_work_mem` parameters.
===== PAGE: https://docs.tigerdata.com/_troubleshooting/slow-tiering-chunks/ =====
---
## hypertable_index_size()
**URL:** llms-txt#hypertable_index_size()
**Contents:**
- Samples
- Required arguments
- Returns
Get the disk space used by an index on a hypertable, including the
disk space needed to provide the index on all chunks. The size is
reported in bytes.
For more information about using hypertables, including chunk size partitioning,
see the [hypertable section][hypertable-docs].
Get size of a specific index on a hypertable.
## Required arguments
|Name|Type|Description|
|-|-|-|
|`index_name`|REGCLASS|Name of the index on a hypertable|
|Column|Type|Description|
|-|-|-|
|hypertable_index_size|BIGINT|Returns the disk space used by the index|
NULL is returned if the function is executed on a non-hypertable relation.
===== PAGE: https://docs.tigerdata.com/api/hypertable/enable_chunk_skipping/ =====
**Examples:**
Example 1 (sql):
```sql
\d conditions_table
Table "public.conditions_table"
Column | Type | Collation | Nullable | Default
--------+--------------------------+-----------+----------+---------
time | timestamp with time zone | | not null |
device | integer | | |
volume | integer | | |
Indexes:
"second_index" btree ("time")
"test_table_time_idx" btree ("time" DESC)
"third_index" btree ("time")
SELECT hypertable_index_size('second_index');
hypertable_index_size
-----------------------
163840
SELECT pg_size_pretty(hypertable_index_size('second_index'));
pg_size_pretty
----------------
160 kB
```
---
## approximate_row_count()
**URL:** llms-txt#approximate_row_count()
**Contents:**
- Samples
- Required arguments
Get approximate row count for hypertable, distributed hypertable, or regular Postgres table based on catalog estimates.
This function supports tables with nested inheritance and declarative partitioning.
The accuracy of `approximate_row_count` depends on the database having up-to-date statistics about the table or hypertable, which are updated by `VACUUM`, `ANALYZE`, and a few DDL commands. If you have auto-vacuum configured on your table or hypertable, or changes to the table are relatively infrequent, you might not need to explicitly `ANALYZE` your table as shown below. Otherwise, if your table statistics are too out-of-date, running this command updates your statistics and yields more accurate approximation results.
Get the approximate row count for a single hypertable.
### Required arguments
|Name|Type|Description|
|---|---|---|
| `relation` | REGCLASS | Hypertable or regular Postgres table to get row count for. |
===== PAGE: https://docs.tigerdata.com/api/first/ =====
**Examples:**
Example 1 (sql):
```sql
ANALYZE conditions;
SELECT * FROM approximate_row_count('conditions');
```
Example 2 (unknown):
```unknown
approximate_row_count
----------------------
240000
```
---
## Improve hypertable and query performance
**URL:** llms-txt#improve-hypertable-and-query-performance
**Contents:**
- Optimize hypertable chunk intervals
- Enable chunk skipping
- How chunk skipping works
- When to enable chunk skipping
- Enable chunk skipping
- Analyze your hypertables
Hypertables are Postgres tables that help you improve insert and query performance by automatically partitioning
your data by time. Each hypertable is made up of child tables called chunks. Each chunk is assigned a range of time,
and only contains data from that range. When you run a query, TimescaleDB identifies the correct chunk and runs
the query on it, instead of going through the entire table. This page shows you how to tune hypertables to increase
performance even more.
* [Optimize hypertable chunk intervals][chunk-intervals]: choose the optimum chunk size for your data
* [Enable chunk skipping][chunk-skipping]: skip chunks on non-partitioning columns in hypertables when you query your data
* [Analyze your hypertables][analyze-hypertables]: use Postgres `ANALYZE` to create the best query plan
## Optimize hypertable chunk intervals
Adjusting your hypertable chunk interval can improve performance in your database.
1. **Choose an optimum chunk interval**
Postgres builds the index on the fly during ingestion. That means that to build a new entry on the index,
a significant portion of the index needs to be traversed during every row insertion. When the index does not fit
into memory, it is constantly flushed to disk and read back. This wastes IO resources which would otherwise
be used for writing the heap/WAL data to disk.
The default chunk interval is 7 days. However, best practice is to set `chunk_interval` so that prior to processing,
the indexes for chunks currently being ingested into fit within 25% of main memory. For example, on a system with 64
GB of memory, if index growth is approximately 2 GB per day, a 1-week chunk interval is appropriate. If index growth is
around 10 GB per day, use a 1-day interval.
You set `chunk_interval` when you [create a hypertable][hypertable-create-table], or by calling
[`set_chunk_time_interval`][chunk_interval] on an existing hypertable.
In the following example you create a table called `conditions` that stores time values in the
`time` column and has chunks that store data for a `chunk_interval` of one day:
If you are self-hosting TimescaleDB v2.19.3 and below, create a [Postgres relational table][pg-create-table],
then convert it using [create_hypertable][create_hypertable]. You then enable hypercore with a call
to [ALTER TABLE][alter_table_hypercore].
1. **Check current setting for chunk intervals**
Query the TimescaleDB catalog for a hypertable. For example:
The result looks like:
Time-based interval lengths are reported in microseconds.
1. **Change the chunk interval length on an existing hypertable**
To change the chunk interval on an already existing hypertable, call `set_chunk_time_interval`.
The updated chunk interval only applies to new chunks. This means setting an overly long
interval might take a long time to correct. For example, if you set
`chunk_interval` to 1 year and start inserting data, you can no longer
shorten the chunk for that year. If you need to correct this situation, create a
new hypertable and migrate your data.
While chunk turnover does not degrade performance, chunk creation
does take longer lock time than a normal `INSERT` operation into a chunk that has
already been created. This means that if multiple chunks are being created at
the same time, the transactions block each other until the first transaction is
completed.
If you use expensive index types, such as some PostGIS geospatial indexes, take
care to check the total size of the chunk and its index using
[`chunks_detailed_size`][chunks_detailed_size].
## Enable chunk skipping
Early access: TimescaleDB v2.17.1
One of the key purposes of hypertables is to make your analytical queries run with the lowest latency possible.
When you execute a query on a hypertable, you do not parse the whole table; you only access the chunks necessary
to satisfy the query. This works well when the `WHERE` clause of a query uses the column by which a hypertable is
partitioned. For example, in a hypertable where every day of the year is a separate chunk, a query for September 1
accesses only the chunk for that day.
However, many queries use columns other than the partitioning one. For example, a satellite company might have a
table with two columns: one for when data was gathered by a satellite and one for when it was added to the database.
If you partition by the date of gathering, a query by the date of adding accesses all chunks in the hypertable and
slows the performance.
To improve query performance, TimescaleDB enables you to skip chunks on non-partitioning columns in hypertables.
Chunk skipping only works on chunks converted to the columnstore **after** you `enable_chunk_skipping`.
### How chunk skipping works
You enable chunk skipping on a column in a hypertable. TimescaleDB tracks the minimum and maximum values for that
column in each chunk. These ranges are stored in the start (inclusive) and end (exclusive) format in the `chunk_column_stats`
catalog table. TimescaleDB uses these ranges for dynamic chunk exclusion when the `WHERE` clause of an SQL query
specifies ranges on the column.
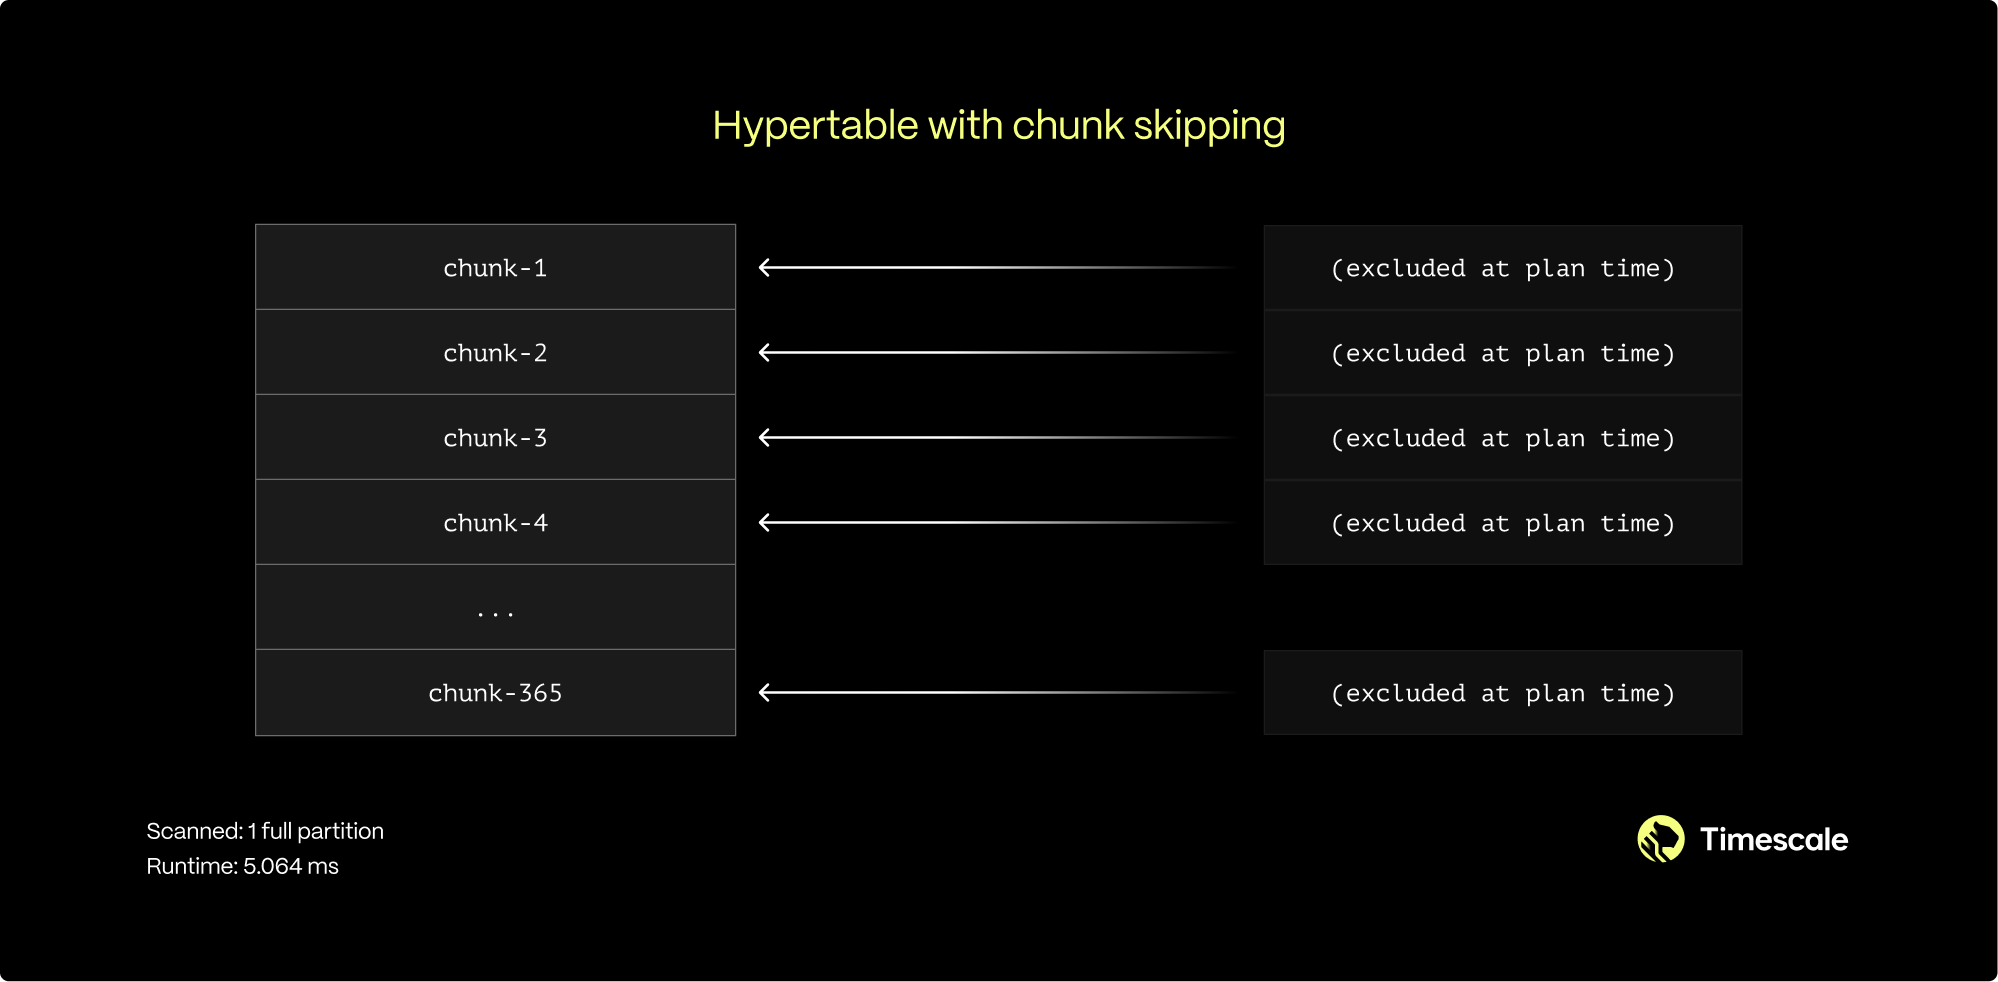
You can enable chunk skipping on hypertables compressed into the columnstore for `smallint`, `int`, `bigint`, `serial`,
`bigserial`, `date`, `timestamp`, or `timestamptz` type columns.
### When to enable chunk skipping
You can enable chunk skipping on as many columns as you need. However, best practice is to enable it on columns that
are both:
- Correlated, that is, related to the partitioning column in some way.
- Referenced in the `WHERE` clauses of the queries.
In the satellite example, the time of adding data to a database inevitably follows the time of gathering.
Sequential IDs and the creation timestamp for both entities also increase synchronously. This means those two
columns are correlated.
For a more in-depth look on chunk skipping, see [our blog post](https://www.timescale.com/blog/boost-postgres-performance-by-7x-with-chunk-skipping-indexes).
### Enable chunk skipping
To enable chunk skipping on a column, call `enable_chunk_skipping` on a `hypertable` for a `column_name`. For example,
the following query enables chunk skipping on the `order_id` column in the `orders` table:
For more details on how to implement chunk skipping, see the [API Reference][api-reference].
## Analyze your hypertables
You can use the Postgres `ANALYZE` command to query all chunks in your
hypertable. The statistics collected by the `ANALYZE` command are used by the
Postgres planner to create the best query plan. For more information about the
`ANALYZE` command, see the [Postgres documentation][pg-analyze].
===== PAGE: https://docs.tigerdata.com/use-timescale/extensions/pgvector/ =====
**Examples:**
Example 1 (sql):
```sql
CREATE TABLE conditions (
time TIMESTAMPTZ NOT NULL,
location TEXT NOT NULL,
device TEXT NOT NULL,
temperature DOUBLE PRECISION NULL,
humidity DOUBLE PRECISION NULL
) WITH (
tsdb.hypertable,
tsdb.partition_column='time',
tsdb.chunk_interval='1 day'
);
```
Example 2 (sql):
```sql
SELECT *
FROM timescaledb_information.dimensions
WHERE hypertable_name = 'conditions';
```
Example 3 (sql):
```sql
hypertable_schema | hypertable_name | dimension_number | column_name | column_type | dimension_type | time_interval | integer_interval | integer_now_func | num_partitions
-------------------+-----------------+------------------+-------------+--------------------------+----------------+---------------+------------------+------------------+----------------
public | metrics | 1 | recorded | timestamp with time zone | Time | 1 day | | |
```
Example 4 (sql):
```sql
SELECT set_chunk_time_interval('conditions', INTERVAL '24 hours');
```
---
## recompress_chunk()
**URL:** llms-txt#recompress_chunk()
**Contents:**
- Samples
- Required arguments
- Optional arguments
- Troubleshooting
Old API since [TimescaleDB v2.18.0](https://github.com/timescale/timescaledb/releases/tag/2.18.0) Replaced by convert_to_columnstore().
Recompresses a compressed chunk that had more data inserted after compression.
You can also recompress chunks by
[running the job associated with your compression policy][run-job].
`recompress_chunk` gives you more fine-grained control by
allowing you to target a specific chunk.
`recompress_chunk` is deprecated since TimescaleDB v2.14 and will be removed in the future.
The procedure is now a wrapper which calls [`compress_chunk`](https://docs.tigerdata.com/api/latest/compression/compress_chunk/)
instead of it.
`recompress_chunk` is implemented as an SQL procedure and not a function. Call
the procedure with `CALL`. Don't use a `SELECT` statement.
`recompress_chunk` only works on chunks that have previously been compressed. To compress a
chunk for the first time, use [`compress_chunk`](https://docs.tigerdata.com/api/latest/compression/compress_chunk/).
Recompress the chunk `timescaledb_internal._hyper_1_2_chunk`:
## Required arguments
|Name|Type|Description|
|-|-|-|
|`chunk`|`REGCLASS`|The chunk to be recompressed. Must include the schema, for example `_timescaledb_internal`, if it is not in the search path.|
## Optional arguments
|Name|Type|Description|
|-|-|-|
|`if_not_compressed`|`BOOLEAN`|If `true`, prints a notice instead of erroring if the chunk is already compressed. Defaults to `false`.|
In TimescaleDB 2.6.0 and above, `recompress_chunk` is implemented as a procedure.
Previously, it was implemented as a function. If you are upgrading to
TimescaleDB 2.6.0 or above, the`recompress_chunk`
function could cause an error. For example, trying to run `SELECT
recompress_chunk(i.show_chunks, true) FROM...` gives the following error:
To fix the error, use `CALL` instead of `SELECT`. You might also need to write a
procedure to replace the full functionality in your `SELECT` statement. For
example:
===== PAGE: https://docs.tigerdata.com/api/_hyperfunctions/saturating_add_pos/ =====
**Examples:**
Example 1 (sql):
```sql
recompress_chunk(
chunk REGCLASS,
if_not_compressed BOOLEAN = false
)
```
Example 2 (sql):
```sql
CALL recompress_chunk('_timescaledb_internal._hyper_1_2_chunk');
```
Example 3 (sql):
```sql
ERROR: recompress_chunk(regclass, boolean) is a procedure
```
Example 4 (sql):
```sql
DO $$
DECLARE chunk regclass;
BEGIN
FOR chunk IN SELECT format('%I.%I', chunk_schema, chunk_name)::regclass
FROM timescaledb_information.chunks
WHERE is_compressed = true
LOOP
RAISE NOTICE 'Recompressing %', chunk::text;
CALL recompress_chunk(chunk, true);
END LOOP;
END
$$;
```
---
## add_dimension()
**URL:** llms-txt#add_dimension()
**Contents:**
- Samples
- Parallelizing queries across multiple data nodes
- Parallelizing disk I/O on a single node
- Required arguments
- Optional arguments
- Returns
This interface is deprecated since [TimescaleDB v2.13.0][rn-2130].
For information about the supported hypertable interface, see [add_dimension()][add-dimension].
Add an additional partitioning dimension to a TimescaleDB hypertable.
The column selected as the dimension can either use interval
partitioning (for example, for a second time partition) or hash partitioning.
The `add_dimension` command can only be executed after a table has been
converted to a hypertable (via `create_hypertable`), but must similarly
be run only on an empty hypertable.
**Space partitions**: Using space partitions is highly recommended
for [distributed hypertables][distributed-hypertables] to achieve
efficient scale-out performance. For [regular hypertables][regular-hypertables]
that exist only on a single node, additional partitioning can be used
for specialized use cases and not recommended for most users.
Space partitions use hashing: Every distinct item is hashed to one of
*N* buckets. Remember that we are already using (flexible) time
intervals to manage chunk sizes; the main purpose of space
partitioning is to enable parallelization across multiple
data nodes (in the case of distributed hypertables) or
across multiple disks within the same time interval
(in the case of single-node deployments).
First convert table `conditions` to hypertable with just time
partitioning on column `time`, then add an additional partition key on `location` with four partitions:
Convert table `conditions` to hypertable with time partitioning on `time` and
space partitioning (2 partitions) on `location`, then add two additional dimensions.
Now in a multi-node example for distributed hypertables with a cluster
of one access node and two data nodes, configure the access node for
access to the two data nodes. Then, convert table `conditions` to
a distributed hypertable with just time partitioning on column `time`,
and finally add a space partitioning dimension on `location`
with two partitions (as the number of the attached data nodes).
### Parallelizing queries across multiple data nodes
In a distributed hypertable, space partitioning enables inserts to be
parallelized across data nodes, even while the inserted rows share
timestamps from the same time interval, and thus increases the ingest rate.
Query performance also benefits by being able to parallelize queries
across nodes, particularly when full or partial aggregations can be
"pushed down" to data nodes (for example, as in the query
`avg(temperature) FROM conditions GROUP BY hour, location`
when using `location` as a space partition). Please see our
[best practices about partitioning in distributed hypertables][distributed-hypertable-partitioning-best-practices]
for more information.
### Parallelizing disk I/O on a single node
Parallel I/O can benefit in two scenarios: (a) two or more concurrent
queries should be able to read from different disks in parallel, or
(b) a single query should be able to use query parallelization to read
from multiple disks in parallel.
Thus, users looking for parallel I/O have two options:
1. Use a RAID setup across multiple physical disks, and expose a
single logical disk to the hypertable (that is, via a single tablespace).
1. For each physical disk, add a separate tablespace to the
database. TimescaleDB allows you to actually add multiple tablespaces
to a *single* hypertable (although under the covers, a hypertable's
chunks are spread across the tablespaces associated with that hypertable).
We recommend a RAID setup when possible, as it supports both forms of
parallelization described above (that is, separate queries to separate
disks, single query to multiple disks in parallel). The multiple
tablespace approach only supports the former. With a RAID setup,
*no spatial partitioning is required*.
That said, when using space partitions, we recommend using 1
space partition per disk.
TimescaleDB does *not* benefit from a very large number of space
partitions (such as the number of unique items you expect in partition
field). A very large number of such partitions leads both to poorer
per-partition load balancing (the mapping of items to partitions using
hashing), as well as much increased planning latency for some types of
queries.
## Required arguments
|Name|Type|Description|
|-|-|-|
|`hypertable`|REGCLASS|Hypertable to add the dimension to|
|`column_name`|TEXT|Column to partition by|
## Optional arguments
|Name|Type|Description|
|-|-|-|
|`number_partitions`|INTEGER|Number of hash partitions to use on `column_name`. Must be > 0|
|`chunk_time_interval`|INTERVAL|Interval that each chunk covers. Must be > 0|
|`partitioning_func`|REGCLASS|The function to use for calculating a value's partition (see `create_hypertable` [instructions][create_hypertable])|
|`if_not_exists`|BOOLEAN|Set to true to avoid throwing an error if a dimension for the column already exists. A notice is issued instead. Defaults to false|
|Column|Type|Description|
|-|-|-|
|`dimension_id`|INTEGER|ID of the dimension in the TimescaleDB internal catalog|
|`schema_name`|TEXT|Schema name of the hypertable|
|`table_name`|TEXT|Table name of the hypertable|
|`column_name`|TEXT|Column name of the column to partition by|
|`created`|BOOLEAN|True if the dimension was added, false when `if_not_exists` is true and no dimension was added|
When executing this function, either `number_partitions` or
`chunk_time_interval` must be supplied, which dictates if the
dimension uses hash or interval partitioning.
The `chunk_time_interval` should be specified as follows:
* If the column to be partitioned is a TIMESTAMP, TIMESTAMPTZ, or
DATE, this length should be specified either as an INTERVAL type or
an integer value in *microseconds*.
* If the column is some other integer type, this length
should be an integer that reflects
the column's underlying semantics (for example, the
`chunk_time_interval` should be given in milliseconds if this column
is the number of milliseconds since the UNIX epoch).
Supporting more than **one** additional dimension is currently
experimental. For any production environments, users are recommended
to use at most one "space" dimension.
===== PAGE: https://docs.tigerdata.com/api/hypertable/hypertable_approximate_detailed_size/ =====
**Examples:**
Example 1 (sql):
```sql
SELECT create_hypertable('conditions', 'time');
SELECT add_dimension('conditions', 'location', number_partitions => 4);
```
Example 2 (sql):
```sql
SELECT create_hypertable('conditions', 'time', 'location', 2);
SELECT add_dimension('conditions', 'time_received', chunk_time_interval => INTERVAL '1 day');
SELECT add_dimension('conditions', 'device_id', number_partitions => 2);
SELECT add_dimension('conditions', 'device_id', number_partitions => 2, if_not_exists => true);
```
Example 3 (sql):
```sql
SELECT add_data_node('dn1', host => 'dn1.example.com');
SELECT add_data_node('dn2', host => 'dn2.example.com');
SELECT create_distributed_hypertable('conditions', 'time');
SELECT add_dimension('conditions', 'location', number_partitions => 2);
```
---
## Hypertable retention policy isn't applying to continuous aggregates
**URL:** llms-txt#hypertable-retention-policy-isn't-applying-to-continuous-aggregates
A retention policy set on a hypertable does not apply to any continuous
aggregates made from the hypertable. This allows you to set different retention
periods for raw and summarized data. To apply a retention policy to a continuous
aggregate, set the policy on the continuous aggregate itself.
===== PAGE: https://docs.tigerdata.com/_troubleshooting/columnstore-backlog-ooms/ =====
---
## hypertable_columnstore_stats()
**URL:** llms-txt#hypertable_columnstore_stats()
**Contents:**
- Samples
- Arguments
- Returns
Retrieve compression statistics for the columnstore.
For more information about using hypertables, including chunk size partitioning,
see [hypertables][hypertable-docs].
Since [TimescaleDB v2.18.0](https://github.com/timescale/timescaledb/releases/tag/2.18.0)
To retrieve compression statistics:
- **Show the compression status of the `conditions` hypertable**:
- **Use `pg_size_pretty` get the output in a more human friendly format**:
|Name|Type|Description|
|-|-|-|
|`hypertable`|REGCLASS|Hypertable to show statistics for|
|Column|Type|Description|
|-|-|-|
|`total_chunks`|BIGINT|The number of chunks used by the hypertable. Returns `NULL` if `compression_status` == `Uncompressed`. |
|`number_compressed_chunks`|INTEGER|The number of chunks used by the hypertable that are currently compressed. Returns `NULL` if `compression_status` == `Uncompressed`. |
|`before_compression_table_bytes`|BIGINT|Size of the heap before compression. Returns `NULL` if `compression_status` == `Uncompressed`. |
|`before_compression_index_bytes`|BIGINT|Size of all the indexes before compression. Returns `NULL` if `compression_status` == `Uncompressed`. |
|`before_compression_toast_bytes`|BIGINT|Size the TOAST table before compression. Returns `NULL` if `compression_status` == `Uncompressed`. |
|`before_compression_total_bytes`|BIGINT|Size of the entire table (`before_compression_table_bytes` + `before_compression_index_bytes` + `before_compression_toast_bytes`) before compression. Returns `NULL` if `compression_status` == `Uncompressed`.|
|`after_compression_table_bytes`|BIGINT|Size of the heap after compression. Returns `NULL` if `compression_status` == `Uncompressed`. |
|`after_compression_index_bytes`|BIGINT|Size of all the indexes after compression. Returns `NULL` if `compression_status` == `Uncompressed`. |
|`after_compression_toast_bytes`|BIGINT|Size the TOAST table after compression. Returns `NULL` if `compression_status` == `Uncompressed`. |
|`after_compression_total_bytes`|BIGINT|Size of the entire table (`after_compression_table_bytes` + `after_compression_index_bytes `+ `after_compression_toast_bytes`) after compression. Returns `NULL` if `compression_status` == `Uncompressed`. |
|`node_name`|TEXT|nodes on which the hypertable is located, applicable only to distributed hypertables. Returns `NULL` if `compression_status` == `Uncompressed`. |
===== PAGE: https://docs.tigerdata.com/api/hypercore/remove_columnstore_policy/ =====
**Examples:**
Example 1 (sql):
```sql
SELECT * FROM hypertable_columnstore_stats('conditions');
```
Example 2 (sql):
```sql
-[ RECORD 1 ]------------------+------
total_chunks | 4
number_compressed_chunks | 1
before_compression_table_bytes | 8192
before_compression_index_bytes | 32768
before_compression_toast_bytes | 0
before_compression_total_bytes | 40960
after_compression_table_bytes | 8192
after_compression_index_bytes | 32768
after_compression_toast_bytes | 8192
after_compression_total_bytes | 49152
node_name |
```
Example 3 (sql):
```sql
SELECT pg_size_pretty(after_compression_total_bytes) as total
FROM hypertable_columnstore_stats('conditions');
```
Example 4 (sql):
```sql
-[ RECORD 1 ]--+------
total | 48 kB
```
---
## Aggregate time-series data with time bucket
**URL:** llms-txt#aggregate-time-series-data-with-time-bucket
**Contents:**
- Group data by time buckets and calculate a summary value
- Group data by time buckets and show the end time of the bucket
- Group data by time buckets and change the time range of the bucket
- Calculate the time bucket of a single value
The `time_bucket` function helps you group in a [hypertable][create-hypertable] so you can
perform aggregate calculations over arbitrary time intervals. It is usually used
in combination with `GROUP BY` for this purpose.
This section shows examples of `time_bucket` use. To learn how time buckets
work, see the [about time buckets section][time-buckets].
## Group data by time buckets and calculate a summary value
Group data into time buckets and calculate a summary value for a column. For
example, calculate the average daily temperature in a table named
`weather_conditions`. The table has a time column named `time` and a
`temperature` column:
The `time_bucket` function returns the start time of the bucket. In this
example, the first bucket starts at midnight on November 15, 2016, and
aggregates all the data from that day:
## Group data by time buckets and show the end time of the bucket
By default, the `time_bucket` column shows the start time of the bucket. If you
prefer to show the end time, you can shift the displayed time using a
mathematical operation on `time`.
For example, you can calculate the minimum and maximum CPU usage for 5-minute
intervals, and show the end of time of the interval. The example table is named
`metrics`. It has a time column named `time` and a CPU usage column named `cpu`:
The addition of `+ '5 min'` changes the displayed timestamp to the end of the
bucket. It doesn't change the range of times spanned by the bucket.
## Group data by time buckets and change the time range of the bucket
To change the time range spanned by the buckets, use the `offset` parameter,
which takes an `INTERVAL` argument. A positive offset shifts the start and end
time of the buckets later. A negative offset shifts the start and end time of
the buckets earlier.
For example, you can calculate the average CPU usage for 5-hour intervals, and
shift the start and end times of all buckets 1 hour later:
## Calculate the time bucket of a single value
Time buckets are usually used together with `GROUP BY` to aggregate data. But
you can also run `time_bucket` on a single time value. This is useful for
testing and learning, because you can see what bucket a value falls into.
For example, to see the 1-week time bucket into which January 5, 2021 would
fall, run:
The function returns `2021-01-04 00:00:00`. The start time of the time bucket is
the Monday of that week, at midnight.
===== PAGE: https://docs.tigerdata.com/use-timescale/time-buckets/about-time-buckets/ =====
**Examples:**
Example 1 (sql):
```sql
SELECT time_bucket('1 day', time) AS bucket,
avg(temperature) AS avg_temp
FROM weather_conditions
GROUP BY bucket
ORDER BY bucket ASC;
```
Example 2 (sql):
```sql
bucket | avg_temp
-----------------------+---------------------
2016-11-15 00:00:00+00 | 68.3704391666665821
2016-11-16 00:00:00+00 | 67.0816684374999347
```
Example 3 (sql):
```sql
SELECT time_bucket('5 min', time) + '5 min' AS bucket,
min(cpu),
max(cpu)
FROM metrics
GROUP BY bucket
ORDER BY bucket DESC;
```
Example 4 (sql):
```sql
SELECT time_bucket('5 hours', time, '1 hour'::INTERVAL) AS bucket,
avg(cpu)
FROM metrics
GROUP BY bucket
ORDER BY bucket DESC;
```
---
## Integrate Debezium with Tiger Cloud
**URL:** llms-txt#integrate-debezium-with-tiger-cloud
**Contents:**
- Prerequisites
- Configure your database to work with Debezium
- Configure Debezium to work with your database
[Debezium][debezium] is an open-source distributed platform for change data capture (CDC).
It enables you to capture changes in a self-hosted TimescaleDB instance and stream them to other systems in real time.
Debezium can capture events about:
- [Hypertables][hypertables]: captured events are rerouted from their chunk-specific topics to a single logical topic
named according to the following pattern: `..`
- [Continuous aggregates][caggs]: captured events are rerouted from their chunk-specific topics to a single logical topic
named according to the following pattern: `..`
- [Hypercore][hypercore]: If you enable hypercore, the Debezium TimescaleDB connector does not apply any special
processing to data in the columnstore. Compressed chunks are forwarded unchanged to the next downstream job in the
pipeline for further processing as needed. Typically, messages with compressed chunks are dropped, and are not
processed by subsequent jobs in the pipeline.
This limitation only affects changes to chunks in the columnstore. Changes to data in the rowstore work correctly.
This page explains how to capture changes in your database and stream them using Debezium on Apache Kafka.
To follow the steps on this page:
* Create a target [self-hosted TimescaleDB][enable-timescaledb] instance.
- [Install Docker][install-docker] on your development machine.
## Configure your database to work with Debezium
To set up self-hosted TimescaleDB to communicate with Debezium:
1. **Configure your self-hosted Postgres deployment**
1. Open `postgresql.conf`.
The Postgres configuration files are usually located in:
- Docker: `/home/postgres/pgdata/data/`
- Linux: `/etc/postgresql//main/` or `/var/lib/pgsql//data/`
- MacOS: `/opt/homebrew/var/postgresql@/`
- Windows: `C:\Program Files\PostgreSQL\\data\`
1. Enable logical replication.
Modify the following settings in `postgresql.conf`:
1. Open `pg_hba.conf` and enable host replication.
To allow replication connections, add the following:
This permission is for the `debezium` Postgres user running on a local or Docker deployment. For more about replication
permissions, see [Configuring Postgres to allow replication with the Debezium connector host][debezium-replication-permissions].
1. **Connect to your self-hosted TimescaleDB instance**
Use [`psql`][psql-connect].
1. **Create a Debezium user in Postgres**
Create a user with the `LOGIN` and `REPLICATION` permissions:
1. **Enable a replication spot for Debezium**
1. Create a table for Debezium to listen to:
1. Turn the table into a hypertable:
Debezium also works with [continuous aggregates][caggs].
1. Create a publication and enable a replication slot:
## Configure Debezium to work with your database
Set up Kafka Connect server, plugins, drivers, and connectors:
1. **Run Zookeeper in Docker**
In another Terminal window, run the following command:
Check the output log to see that zookeeper is running.
1. **Run Kafka in Docker**
In another Terminal window, run the following command:
Check the output log to see that Kafka is running.
1. **Run Kafka Connect in Docker**
In another Terminal window, run the following command:
Check the output log to see that Kafka Connect is running.
1. **Register the Debezium Postgres source connector**
Update the `` for the `` you created in your self-hosted TimescaleDB instance in the following command.
Then run the command in another Terminal window:
1. **Verify `timescaledb-source-connector` is included in the connector list**
1. Check the tasks associated with `timescaledb-connector`:
You see something like:
1. **Verify `timescaledb-connector` is running**
1. Open the Terminal window running Kafka Connect. When the connector is active, you see something like the following:
1. Watch the events in the accounts topic on your self-hosted TimescaleDB instance.
In another Terminal instance, run the following command:
You see the topics being streamed. For example:
Debezium requires logical replication to be enabled. Currently, this is not enabled by default on Tiger Cloud services.
We are working on enabling this feature as you read. As soon as it is live, these docs will be updated.
And that is it, you have configured Debezium to interact with Tiger Data products.
===== PAGE: https://docs.tigerdata.com/integrations/fivetran/ =====
**Examples:**
Example 1 (ini):
```ini
wal_level = logical
max_replication_slots = 10
max_wal_senders = 10
```
Example 2 (unknown):
```unknown
local replication debezium trust
```
Example 3 (sql):
```sql
CREATE ROLE debezium WITH LOGIN REPLICATION PASSWORD '';
```
Example 4 (sql):
```sql
CREATE TABLE accounts (created_at TIMESTAMPTZ DEFAULT NOW(),
name TEXT,
city TEXT);
```
---
## add_retention_policy()
**URL:** llms-txt#add_retention_policy()
**Contents:**
- Samples
- Arguments
- Returns
Create a policy to drop chunks older than a given interval of a particular
hypertable or continuous aggregate on a schedule in the background. For more
information, see the [drop_chunks][drop_chunks] section. This implements a data
retention policy and removes data on a schedule. Only one retention policy may
exist per hypertable.
When you create a retention policy on a hypertable with an integer based time column, you must set the
[integer_now_func][set_integer_now_func] to match your data. If you are seeing `invalid value` issues when you
call `add_retention_policy`, set `VERBOSITY verbose` to see the full context.
- **Create a data retention policy to discard chunks greater than 6 months old**:
When you call `drop_after`, the time data range present in the partitioning time column is used to select the target
chunks.
- **Create a data retention policy with an integer-based time column**:
- **Create a data retention policy to discard chunks created before 6 months**:
When you call `drop_created_before`, chunks created 3 months ago are selected.
| Name | Type | Default | Required | Description |
|-|-|-|-|-------------------------------------------------------------------------------------------------------------------------------------------------------------------------------------------------------------------------------------------------------------------------------------------------------------------------------------------------------------------------------------------------------------------------------------------------|
|`relation`|REGCLASS|-|✔| Name of the hypertable or continuous aggregate to create the policy for |
|`drop_after`|INTERVAL or INTEGER|-|✔| Chunks fully older than this interval when the policy is run are dropped. You specify `drop_after` differently depending on the hypertable time column type:
TIMESTAMP, TIMESTAMPTZ, and DATE: use INTERVAL type
Integer-based timestamps: use INTEGER type. You must set integer_now_func to match your data
|
|`schedule_interval`|INTERVAL|`NULL`|✖| The interval between the finish time of the last execution and the next start. |
|`initial_start`|TIMESTAMPTZ|`NULL`|✖| Time the policy is first run. If omitted, then the schedule interval is the interval between the finish time of the last execution and the next start. If provided, it serves as the origin with respect to which the next_start is calculated. |
|`timezone`|TEXT|`NULL`|✖| A valid time zone. If `initial_start` is also specified, subsequent executions of the retention policy are aligned on its initial start. However, daylight savings time (DST) changes may shift this alignment. Set to a valid time zone if this is an issue you want to mitigate. If omitted, UTC bucketing is performed. |
|`if_not_exists`|BOOLEAN|`false`|✖| Set to `true` to avoid an error if the `drop_chunks_policy` already exists. A notice is issued instead. |
|`drop_created_before`|INTERVAL|`NULL`|✖| Chunks with creation time older than this cut-off point are dropped. The cut-off point is computed as `now() - drop_created_before`. Not supported for continuous aggregates yet. |
You specify `drop_after` differently depending on the hypertable time column type:
* TIMESTAMP, TIMESTAMPTZ, and DATE time columns: the time interval should be an INTERVAL type.
* Integer-based timestamps: the time interval should be an integer type. You must set the [integer_now_func][set_integer_now_func].
|Column|Type|Description|
|-|-|-|
|`job_id`|INTEGER|TimescaleDB background job ID created to implement this policy|
===== PAGE: https://docs.tigerdata.com/api/data-retention/remove_retention_policy/ =====
**Examples:**
Example 1 (sql):
```sql
SELECT add_retention_policy('conditions', drop_after => INTERVAL '6 months');
```
Example 2 (sql):
```sql
SELECT add_retention_policy('conditions', drop_after => BIGINT '600000');
```
Example 3 (sql):
```sql
SELECT add_retention_policy('conditions', drop_created_before => INTERVAL '6 months');
```
---
## Permission denied when changing ownership of tables and hypertables
**URL:** llms-txt#permission-denied-when-changing-ownership-of-tables-and-hypertables
You might see this error when using the `ALTER TABLE` command to change the
ownership of tables or hypertables.
This use of `ALTER TABLE` is blocked because the `tsdbadmin` user is not a
superuser.
To change table ownership, use the [`REASSIGN`][sql-reassign] command instead:
===== PAGE: https://docs.tigerdata.com/_troubleshooting/mst/transaction-wraparound/ =====
**Examples:**
Example 1 (sql):
```sql
REASSIGN OWNED BY TO
```
---
## timescaledb_information.chunk_compression_settings
**URL:** llms-txt#timescaledb_information.chunk_compression_settings
**Contents:**
- Samples
- Arguments
Shows information about compression settings for each chunk that has compression enabled on it.
Show compression settings for all chunks:
Find all chunk compression settings for a specific hypertable:
|Name|Type|Description|
|-|-|-|
|`hypertable`|`REGCLASS`|Hypertable which has compression enabled|
|`chunk`|`REGCLASS`|Chunk which has compression enabled|
|`segmentby`|`TEXT`|List of columns used for segmenting the compressed data|
|`orderby`|`TEXT`| List of columns used for ordering compressed data along with ordering and NULL ordering information|
===== PAGE: https://docs.tigerdata.com/api/informational-views/jobs/ =====
**Examples:**
Example 1 (sql):
```sql
SELECT * FROM timescaledb_information.chunk_compression_settings'
hypertable | measurements
chunk | _timescaledb_internal._hyper_1_1_chunk
segmentby |
orderby | "time" DESC
```
Example 2 (sql):
```sql
SELECT * FROM timescaledb_information.chunk_compression_settings WHERE hypertable::TEXT LIKE 'metrics';
hypertable | metrics
chunk | _timescaledb_internal._hyper_2_3_chunk
segmentby | metric_id
orderby | "time"
```
---
## set_integer_now_fun()
**URL:** llms-txt#set_integer_now_fun()
**Contents:**
- Samples
- Required arguments
- Optional arguments
Override the [`now()`](https://www.postgresql.org/docs/16/functions-datetime.html) date/time function used to
set the current time in the integer `time` column in a hypertable. Many policies only apply to
[chunks][chunks] of a certain age. `integer_now_func` determines the age of each chunk.
The function you set as `integer_now_func` has no arguments. It must be either:
- `IMMUTABLE`: Use when you execute the query each time rather than prepare it prior to execution. The value
for `integer_now_func` is computed before the plan is generated. This generates a significantly smaller
plan, especially if you have a lot of chunks.
- `STABLE`: `integer_now_func` is evaluated just before query execution starts.
[chunk pruning](https://www.timescale.com/blog/optimizing-queries-timescaledb-hypertables-with-partitions-postgresql-6366873a995d) is executed at runtime. This generates a correct result, but may increase
planning time.
`set_integer_now_func` does not work on tables where the `time` column type is `TIMESTAMP`, `TIMESTAMPTZ`, or
`DATE`.
Set the integer `now` function for a hypertable with a time column in [unix time](https://en.wikipedia.org/wiki/Unix_time).
- `IMMUTABLE`: when you execute the query each time:
- `STABLE`: for prepared statements:
## Required arguments
|Name|Type| Description |
|-|-|-|
|`main_table`|REGCLASS| The hypertable `integer_now_func` is used in. |
|`integer_now_func`|REGPROC| A function that returns the current time set in each row in the `time` column in `main_table`.|
## Optional arguments
|Name|Type| Description|
|-|-|-|
|`replace_if_exists`|BOOLEAN| Set to `true` to override `integer_now_func` when you have previously set a custom function. Default is `false`. |
===== PAGE: https://docs.tigerdata.com/api/hypertable/create_index/ =====
**Examples:**
Example 1 (sql):
```sql
CREATE OR REPLACE FUNCTION unix_now_immutable() returns BIGINT LANGUAGE SQL IMMUTABLE as $$ SELECT extract (epoch from now())::BIGINT $$;
SELECT set_integer_now_func('hypertable_name', 'unix_now_immutable');
```
Example 2 (sql):
```sql
CREATE OR REPLACE FUNCTION unix_now_stable() returns BIGINT LANGUAGE SQL STABLE AS $$ SELECT extract(epoch from now())::BIGINT $$;
SELECT set_integer_now_func('hypertable_name', 'unix_now_stable');
```
---
## hypertable_approximate_detailed_size()
**URL:** llms-txt#hypertable_approximate_detailed_size()
**Contents:**
- Samples
- Required arguments
- Returns
Get detailed information about approximate disk space used by a hypertable or
continuous aggregate, returning size information for the table
itself, any indexes on the table, any toast tables, and the total
size of all. All sizes are reported in bytes.
When a continuous aggregate name is provided, the function
transparently looks up the backing hypertable and returns its approximate
size statistics instead.
This function relies on the per backend caching using the in-built
Postgres storage manager layer to compute the approximate size
cheaply. The PG cache invalidation clears off the cached size for a
chunk when DML happens into it. That size cache is thus able to get
the latest size in a matter of minutes. Also, due to the backend
caching, any long running session will only fetch latest data for new
or modified chunks and can use the cached data (which is calculated
afresh the first time around) effectively for older chunks. Thus it
is recommended to use a single connected Postgres backend session to
compute the approximate sizes of hypertables to get faster results.
For more information about using hypertables, including chunk size partitioning,
see the [hypertable section][hypertable-docs].
Get the approximate size information for a hypertable.
## Required arguments
|Name|Type|Description|
|---|---|---|
| `hypertable` | REGCLASS | Hypertable or continuous aggregate to show detailed approximate size of. |
|Column|Type|Description|
|-|-|-|
|table_bytes|BIGINT|Approximate disk space used by main_table (like `pg_relation_size(main_table)`)|
|index_bytes|BIGINT|Approximate disk space used by indexes|
|toast_bytes|BIGINT|Approximate disk space of toast tables|
|total_bytes|BIGINT|Approximate total disk space used by the specified table, including all indexes and TOAST data|
If executed on a relation that is not a hypertable, the function
returns `NULL`.
===== PAGE: https://docs.tigerdata.com/api/hypertable/set_integer_now_func/ =====
**Examples:**
Example 1 (sql):
```sql
SELECT * FROM hypertable_approximate_detailed_size('hyper_table');
table_bytes | index_bytes | toast_bytes | total_bytes
-------------+-------------+-------------+-------------
8192 | 24576 | 32768 | 65536
```
---
## hypertable_compression_stats()
**URL:** llms-txt#hypertable_compression_stats()
**Contents:**
- Samples
- Required arguments
- Returns
Old API since [TimescaleDB v2.18.0](https://github.com/timescale/timescaledb/releases/tag/2.18.0) Replaced by hypertable_columnstore_stats().
Get statistics related to hypertable compression. All sizes are in bytes.
For more information about using hypertables, including chunk size partitioning,
see the [hypertable section][hypertable-docs].
For more information about compression, see the
[compression section][compression-docs].
Use `pg_size_pretty` get the output in a more human friendly format.
## Required arguments
|Name|Type|Description|
|-|-|-|
|`hypertable`|REGCLASS|Hypertable to show statistics for|
|Column|Type|Description|
|-|-|-|
|`total_chunks`|BIGINT|The number of chunks used by the hypertable|
|`number_compressed_chunks`|BIGINT|The number of chunks used by the hypertable that are currently compressed|
|`before_compression_table_bytes`|BIGINT|Size of the heap before compression|
|`before_compression_index_bytes`|BIGINT|Size of all the indexes before compression|
|`before_compression_toast_bytes`|BIGINT|Size the TOAST table before compression|
|`before_compression_total_bytes`|BIGINT|Size of the entire table (table+indexes+toast) before compression|
|`after_compression_table_bytes`|BIGINT|Size of the heap after compression|
|`after_compression_index_bytes`|BIGINT|Size of all the indexes after compression|
|`after_compression_toast_bytes`|BIGINT|Size the TOAST table after compression|
|`after_compression_total_bytes`|BIGINT|Size of the entire table (table+indexes+toast) after compression|
|`node_name`|TEXT|nodes on which the hypertable is located, applicable only to distributed hypertables|
Returns show `NULL` if the data is currently uncompressed.
===== PAGE: https://docs.tigerdata.com/api/compression/compress_chunk/ =====
**Examples:**
Example 1 (sql):
```sql
SELECT * FROM hypertable_compression_stats('conditions');
-[ RECORD 1 ]------------------+------
total_chunks | 4
number_compressed_chunks | 1
before_compression_table_bytes | 8192
before_compression_index_bytes | 32768
before_compression_toast_bytes | 0
before_compression_total_bytes | 40960
after_compression_table_bytes | 8192
after_compression_index_bytes | 32768
after_compression_toast_bytes | 8192
after_compression_total_bytes | 49152
node_name |
```
Example 2 (sql):
```sql
SELECT pg_size_pretty(after_compression_total_bytes) as total
FROM hypertable_compression_stats('conditions');
-[ RECORD 1 ]--+------
total | 48 kB
```
---
## Grow and shrink multi-node
**URL:** llms-txt#grow-and-shrink-multi-node
**Contents:**
- See which data nodes are in use
- Choose how many nodes to use for a distributed hypertable
- Attach a new data node
- Attaching a new data node to a distributed hypertable
- Move data between chunks Experimental
- Remove a data node
[Multi-node support is sunsetted][multi-node-deprecation].
TimescaleDB v2.13 is the last release that includes multi-node support for Postgres
versions 13, 14, and 15.
When you are working within a multi-node environment, you might discover that
you need more or fewer data nodes in your cluster over time. You can choose how
many of the available nodes to use when creating a distributed hypertable. You
can also add and remove data nodes from your cluster, and move data between
chunks on data nodes as required to free up storage.
## See which data nodes are in use
You can check which data nodes are in use by a distributed hypertable, using
this query. In this example, our distributed hypertable is called
`conditions`:
The result of this query looks like this:
## Choose how many nodes to use for a distributed hypertable
By default, when you create a distributed hypertable, it uses all available
data nodes. To restrict it to specific nodes, pass the `data_nodes` argument to
[`create_distributed_hypertable`][create_distributed_hypertable].
## Attach a new data node
When you add additional data nodes to a database, you need to add them to the
distributed hypertable so that your database can use them.
### Attaching a new data node to a distributed hypertable
1. On the access node, at the `psql` prompt, add the data node:
1. Attach the new data node to the distributed hypertable:
When you attach a new data node, the partitioning configuration of the
distributed hypertable is updated to account for the additional data node, and
the number of hash partitions are automatically increased to match. You can
prevent this happening by setting the function parameter `repartition` to
`FALSE`.
## Move data between chunks Experimental
When you attach a new data node to a distributed hypertable, you can move
existing data in your hypertable to the new node to free up storage on the
existing nodes and make better use of the added capacity.
The ability to move chunks between data nodes is an experimental feature that is
under active development. We recommend that you do not use this feature in a
production environment.
Move data using this query:
The move operation uses a number of transactions, which means that you cannot
roll the transaction back automatically if something goes wrong. If a move
operation fails, the failure is logged with an operation ID that you can use to
clean up any state left on the involved nodes.
Clean up after a failed move using this query. In this example, the operation ID
of the failed move is `ts_copy_1_31`:
## Remove a data node
You can also remove data nodes from an existing distributed hypertable.
You cannot remove a data node that still contains data for the distributed
hypertable. Before you remove the data node, check that is has had all of its
data deleted or moved, or that you have replicated the data on to other data
nodes.
Remove a data node using this query. In this example, our distributed hypertable
is called `conditions`:
===== PAGE: https://docs.tigerdata.com/self-hosted/multinode-timescaledb/multinode-administration/ =====
**Examples:**
Example 1 (sql):
```sql
SELECT hypertable_name, data_nodes
FROM timescaledb_information.hypertables
WHERE hypertable_name = 'conditions';
```
Example 2 (sql):
```sql
hypertable_name | data_nodes
-----------------+---------------------------------------
conditions | {data_node_1,data_node_2,data_node_3}
```
Example 3 (sql):
```sql
SELECT add_data_node('node3', host => 'dn3.example.com');
```
Example 4 (sql):
```sql
SELECT attach_data_node('node3', hypertable => 'hypertable_name');
```
---
## Energy time-series data tutorial - set up dataset
**URL:** llms-txt#energy-time-series-data-tutorial---set-up-dataset
**Contents:**
- Prerequisites
- Optimize time-series data in hypertables
- Load energy consumption data
- Create continuous aggregates
- Connect Grafana to Tiger Cloud
This tutorial uses the energy consumption data for over a year in a
hypertable named `metrics`.
To follow the steps on this page:
* Create a target [Tiger Cloud service][create-service] with the Real-time analytics capability.
You need [your connection details][connection-info]. This procedure also
works for [self-hosted TimescaleDB][enable-timescaledb].
## Optimize time-series data in hypertables
Hypertables are Postgres tables in TimescaleDB that automatically partition your time-series data by time. Time-series data represents the way a system, process, or behavior changes over time. Hypertables enable TimescaleDB to work efficiently with time-series data. Each hypertable is made up of child tables called chunks. Each chunk is assigned a range
of time, and only contains data from that range. When you run a query, TimescaleDB identifies the correct chunk and
runs the query on it, instead of going through the entire table.
[Hypercore][hypercore] is the hybrid row-columnar storage engine in TimescaleDB used by hypertables. Traditional
databases force a trade-off between fast inserts (row-based storage) and efficient analytics
(columnar storage). Hypercore eliminates this trade-off, allowing real-time analytics without sacrificing
transactional capabilities.
Hypercore dynamically stores data in the most efficient format for its lifecycle:
* **Row-based storage for recent data**: the most recent chunk (and possibly more) is always stored in the rowstore,
ensuring fast inserts, updates, and low-latency single record queries. Additionally, row-based storage is used as a
writethrough for inserts and updates to columnar storage.
* **Columnar storage for analytical performance**: chunks are automatically compressed into the columnstore, optimizing
storage efficiency and accelerating analytical queries.
Unlike traditional columnar databases, hypercore allows data to be inserted or modified at any stage, making it a
flexible solution for both high-ingest transactional workloads and real-time analytics—within a single database.
Because TimescaleDB is 100% Postgres, you can use all the standard Postgres tables, indexes, stored
procedures, and other objects alongside your hypertables. This makes creating and working with hypertables similar
to standard Postgres.
1. To create a hypertable to store the energy consumption data, call [CREATE TABLE][hypertable-create-table].
If you are self-hosting TimescaleDB v2.19.3 and below, create a [Postgres relational table][pg-create-table],
then convert it using [create_hypertable][create_hypertable]. You then enable hypercore with a call
to [ALTER TABLE][alter_table_hypercore].
## Load energy consumption data
When you have your database set up, you can load the energy consumption data
into the `metrics` hypertable.
This is a large dataset, so it might take a long time, depending on your network
connection.
1. Download the dataset:
[metrics.csv.gz](https://assets.timescale.com/docs/downloads/metrics.csv.gz)
1. Use your file manager to decompress the downloaded dataset, and take a note
of the path to the `metrics.csv` file.
1. At the psql prompt, copy the data from the `metrics.csv` file into
your hypertable. Make sure you point to the correct path, if it is not in
your current working directory:
1. You can check that the data has been copied successfully with this command:
You should get five records that look like this:
## Create continuous aggregates
In modern applications, data usually grows very quickly. This means that aggregating
it into useful summaries can become very slow. If you are collecting data very frequently, you might want to aggregate your
data into minutes or hours instead. For example, if an IoT device takes
temperature readings every second, you might want to find the average temperature
for each hour. Every time you run this query, the database needs to scan the
entire table and recalculate the average. TimescaleDB makes aggregating data lightning fast, accurate, and easy with continuous aggregates.
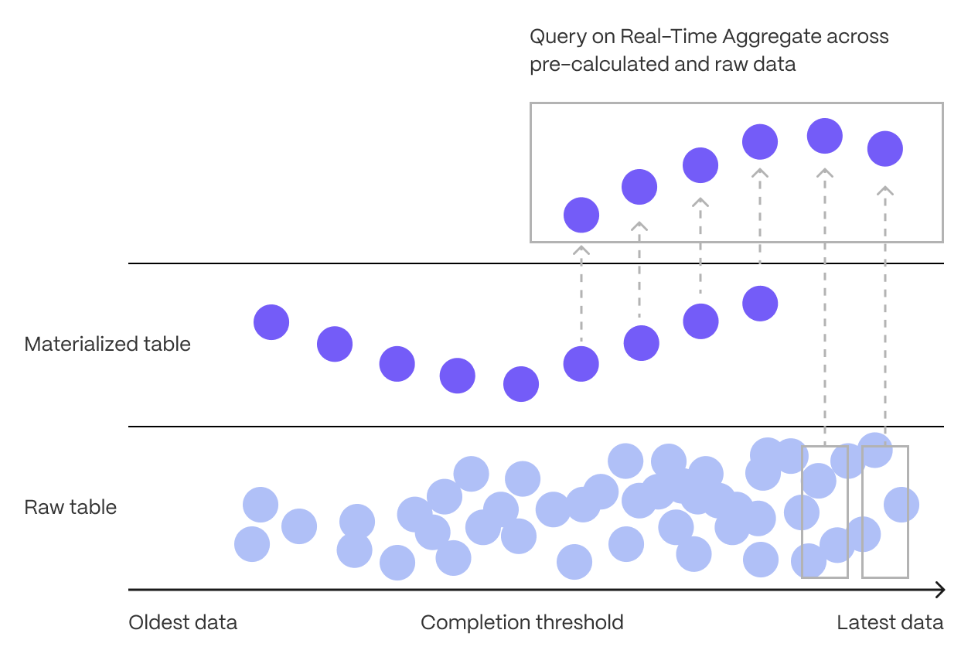
Continuous aggregates in TimescaleDB are a kind of hypertable that is refreshed automatically
in the background as new data is added, or old data is modified. Changes to your
dataset are tracked, and the hypertable behind the continuous aggregate is
automatically updated in the background.
Continuous aggregates have a much lower maintenance burden than regular Postgres materialized
views, because the whole view is not created from scratch on each refresh. This
means that you can get on with working your data instead of maintaining your
database.
Because continuous aggregates are based on hypertables, you can query them in exactly the same way as your other tables. This includes continuous aggregates in the rowstore, compressed into the [columnstore][hypercore],
or [tiered to object storage][data-tiering]. You can even create [continuous aggregates on top of your continuous aggregates][hierarchical-caggs], for an even more fine-tuned aggregation.
[Real-time aggregation][real-time-aggregation] enables you to combine pre-aggregated data from the materialized view with the most recent raw data. This gives you up-to-date results on every query. In TimescaleDB v2.13 and later, real-time aggregates are **DISABLED** by default. In earlier versions, real-time aggregates are **ENABLED** by default; when you create a continuous aggregate, queries to that view include the results from the most recent raw data.
1. **Monitor energy consumption on a day-to-day basis**
1. Create a continuous aggregate `kwh_day_by_day` for energy consumption:
1. Add a refresh policy to keep `kwh_day_by_day` up-to-date:
1. **Monitor energy consumption on an hourly basis**
1. Create a continuous aggregate `kwh_hour_by_hour` for energy consumption:
1. Add a refresh policy to keep the continuous aggregate up-to-date:
1. **Analyze your data**
Now you have made continuous aggregates, it could be a good idea to use them to perform analytics on your data.
For example, to see how average energy consumption changes during weekdays over the last year, run the following query:
You see something like:
| day | ordinal | value |
| --- | ------- | ----- |
| Mon | 2 | 23.08078714975423 |
| Sun | 1 | 19.511430831944395 |
| Tue | 3 | 25.003118897837307 |
| Wed | 4 | 8.09300571759772 |
## Connect Grafana to Tiger Cloud
To visualize the results of your queries, enable Grafana to read the data in your service:
1. **Log in to Grafana**
In your browser, log in to either:
- Self-hosted Grafana: at `http://localhost:3000/`. The default credentials are `admin`, `admin`.
- Grafana Cloud: use the URL and credentials you set when you created your account.
1. **Add your service as a data source**
1. Open `Connections` > `Data sources`, then click `Add new data source`.
1. Select `PostgreSQL` from the list.
1. Configure the connection:
- `Host URL`, `Database name`, `Username`, and `Password`
Configure using your [connection details][connection-info]. `Host URL` is in the format `:`.
- `TLS/SSL Mode`: select `require`.
- `PostgreSQL options`: enable `TimescaleDB`.
- Leave the default setting for all other fields.
1. Click `Save & test`.
Grafana checks that your details are set correctly.
===== PAGE: https://docs.tigerdata.com/tutorials/energy-data/query-energy/ =====
**Examples:**
Example 1 (sql):
```sql
CREATE TABLE "metrics"(
created timestamp with time zone default now() not null,
type_id integer not null,
value double precision not null
) WITH (
tsdb.hypertable,
tsdb.partition_column='time'
);
```
Example 2 (sql):
```sql
\COPY metrics FROM metrics.csv CSV;
```
Example 3 (sql):
```sql
SELECT * FROM metrics LIMIT 5;
```
Example 4 (sql):
```sql
created | type_id | value
-------------------------------+---------+-------
2023-05-31 23:59:59.043264+00 | 13 | 1.78
2023-05-31 23:59:59.042673+00 | 2 | 126
2023-05-31 23:59:59.042667+00 | 11 | 1.79
2023-05-31 23:59:59.042623+00 | 23 | 0.408
2023-05-31 23:59:59.042603+00 | 12 | 0.96
```
---
## create_hypertable()
**URL:** llms-txt#create_hypertable()
**Contents:**
- Samples
- Required arguments
- Optional arguments
- Returns
- Units
This page describes the hypertable API supported prior to TimescaleDB v2.13. Best practice is to use the new
[`create_hypertable`][api-create-hypertable] interface.
Creates a TimescaleDB hypertable from a Postgres table (replacing the latter),
partitioned on time and with the option to partition on one or more other
columns. The Postgres table cannot be an already partitioned table
(declarative partitioning or inheritance). In case of a non-empty table, it is
possible to migrate the data during hypertable creation using the `migrate_data`
option, although this might take a long time and has certain limitations when
the table contains foreign key constraints (see below).
After creation, all actions, such as `ALTER TABLE`, `SELECT`, etc., still work
on the resulting hypertable.
For more information about using hypertables, including chunk size partitioning,
see the [hypertable section][hypertable-docs].
Convert table `conditions` to hypertable with just time partitioning on column `time`:
Convert table `conditions` to hypertable, setting `chunk_time_interval` to 24 hours.
Convert table `conditions` to hypertable. Do not raise a warning
if `conditions` is already a hypertable:
Time partition table `measurements` on a composite column type `report` using a
time partitioning function. Requires an immutable function that can convert the
column value into a supported column value:
Time partition table `events`, on a column type `jsonb` (`event`), which has
a top level key (`started`) containing an ISO 8601 formatted timestamp:
## Required arguments
|Name|Type|Description|
|-|-|-|
|`relation`|REGCLASS|Identifier of table to convert to hypertable.|
|`time_column_name`|REGCLASS| Name of the column containing time values as well as the primary column to partition by.|
## Optional arguments
|Name|Type|Description|
|-|-|-|
|`partitioning_column`|REGCLASS|Name of an additional column to partition by. If provided, the `number_partitions` argument must also be provided.|
|`number_partitions`|INTEGER|Number of [hash partitions][hash-partitions] to use for `partitioning_column`. Must be > 0.|
|`chunk_time_interval`|INTERVAL|Event time that each chunk covers. Must be > 0. Default is 7 days.|
|`create_default_indexes`|BOOLEAN|Whether to create default indexes on time/partitioning columns. Default is TRUE.|
|`if_not_exists`|BOOLEAN|Whether to print warning if table already converted to hypertable or raise exception. Default is FALSE.|
|`partitioning_func`|REGCLASS|The function to use for calculating a value's partition.|
|`associated_schema_name`|REGCLASS|Name of the schema for internal hypertable tables. Default is `_timescaledb_internal`.|
|`associated_table_prefix`|TEXT|Prefix for internal hypertable chunk names. Default is `_hyper`.|
|`migrate_data`|BOOLEAN|Set to TRUE to migrate any existing data from the `relation` table to chunks in the new hypertable. A non-empty table generates an error without this option. Large tables may take significant time to migrate. Defaults to FALSE.|
|`time_partitioning_func`|REGCLASS| Function to convert incompatible primary time column values to compatible ones. The function must be `IMMUTABLE`.|
|`replication_factor`|INTEGER|Replication factor to use with distributed hypertable. If not provided, value is determined by the `timescaledb.hypertable_replication_factor_default` GUC. |
|`data_nodes`|ARRAY|This is the set of data nodes that are used for this table if it is distributed. This has no impact on non-distributed hypertables. If no data nodes are specified, a distributed hypertable uses all data nodes known by this instance.|
|`distributed`|BOOLEAN|Set to TRUE to create distributed hypertable. If not provided, value is determined by the `timescaledb.hypertable_distributed_default` GUC. When creating a distributed hypertable, consider using [`create_distributed_hypertable`][create_distributed_hypertable] in place of `create_hypertable`. Default is NULL. |
|Column|Type|Description|
|-|-|-|
|`hypertable_id`|INTEGER|ID of the hypertable in TimescaleDB.|
|`schema_name`|TEXT|Schema name of the table converted to hypertable.|
|`table_name`|TEXT|Table name of the table converted to hypertable.|
|`created`|BOOLEAN|TRUE if the hypertable was created, FALSE when `if_not_exists` is true and no hypertable was created.|
If you use `SELECT * FROM create_hypertable(...)` you get the return value
formatted as a table with column headings.
The use of the `migrate_data` argument to convert a non-empty table can
lock the table for a significant amount of time, depending on how much data is
in the table. It can also run into deadlock if foreign key constraints exist to
other tables.
When converting a normal SQL table to a hypertable, pay attention to how you handle
constraints. A hypertable can contain foreign keys to normal SQL table columns,
but the reverse is not allowed. UNIQUE and PRIMARY constraints must include the
partitioning key.
The deadlock is likely to happen when concurrent transactions simultaneously try
to insert data into tables that are referenced in the foreign key constraints
and into the converting table itself. The deadlock can be prevented by manually
obtaining `SHARE ROW EXCLUSIVE` lock on the referenced tables before calling
`create_hypertable` in the same transaction, see
[Postgres documentation](https://www.postgresql.org/docs/current/sql-lock.html)
for the syntax.
The `time` column supports the following data types:
|Description|Types|
|-|-|
|Timestamp| TIMESTAMP, TIMESTAMPTZ|
|Date|DATE|
|Integer|SMALLINT, INT, BIGINT|
The type flexibility of the 'time' column allows the use of non-time-based
values as the primary chunk partitioning column, as long as those values can
increment.
For incompatible data types (for example, `jsonb`) you can specify a function to
the `time_partitioning_func` argument which can extract a compatible data type.
The units of `chunk_time_interval` should be set as follows:
* For time columns having timestamp or DATE types, the `chunk_time_interval`
should be specified either as an `interval` type or an integral value in
*microseconds*.
* For integer types, the `chunk_time_interval` **must** be set explicitly, as
the database does not otherwise understand the semantics of what each
integer value represents (a second, millisecond, nanosecond, etc.). So if
your time column is the number of milliseconds since the UNIX epoch, and you
wish to have each chunk cover 1 day, you should specify
`chunk_time_interval => 86400000`.
In case of hash partitioning (in other words, if `number_partitions` is greater
than zero), it is possible to optionally specify a custom partitioning function.
If no custom partitioning function is specified, the default partitioning
function is used. The default partitioning function calls Postgres's internal
hash function for the given type, if one exists. Thus, a custom partitioning
function can be used for value types that do not have a native Postgres hash
function. A partitioning function should take a single `anyelement` type
argument and return a positive `integer` hash value. Note that this hash value
is *not* a partition ID, but rather the inserted value's position in the
dimension's key space, which is then divided across the partitions.
The time column in `create_hypertable` must be defined as `NOT NULL`. If this is
not already specified on table creation, `create_hypertable` automatically adds
this constraint on the table when it is executed.
===== PAGE: https://docs.tigerdata.com/api/hypertable/set_chunk_time_interval/ =====
**Examples:**
Example 1 (sql):
```sql
SELECT create_hypertable('conditions', 'time');
```
Example 2 (sql):
```sql
SELECT create_hypertable('conditions', 'time', chunk_time_interval => 86400000000);
SELECT create_hypertable('conditions', 'time', chunk_time_interval => INTERVAL '1 day');
```
Example 3 (sql):
```sql
SELECT create_hypertable('conditions', 'time', if_not_exists => TRUE);
```
Example 4 (sql):
```sql
CREATE TYPE report AS (reported timestamp with time zone, contents jsonb);
CREATE FUNCTION report_reported(report)
RETURNS timestamptz
LANGUAGE SQL
IMMUTABLE AS
'SELECT $1.reported';
SELECT create_hypertable('measurements', 'report', time_partitioning_func => 'report_reported');
```
---
## hypertable_approximate_size()
**URL:** llms-txt#hypertable_approximate_size()
**Contents:**
- Samples
- Required arguments
- Returns
Get the approximate total disk space used by a hypertable or continuous aggregate,
that is, the sum of the size for the table itself including chunks,
any indexes on the table, and any toast tables. The size is reported
in bytes. This is equivalent to computing the sum of `total_bytes`
column from the output of `hypertable_approximate_detailed_size` function.
When a continuous aggregate name is provided, the function
transparently looks up the backing hypertable and returns its statistics
instead.
This function relies on the per backend caching using the in-built
Postgres storage manager layer to compute the approximate size
cheaply. The PG cache invalidation clears off the cached size for a
chunk when DML happens into it. That size cache is thus able to get
the latest size in a matter of minutes. Also, due to the backend
caching, any long running session will only fetch latest data for new
or modified chunks and can use the cached data (which is calculated
afresh the first time around) effectively for older chunks. Thus it
is recommended to use a single connected Postgres backend session to
compute the approximate sizes of hypertables to get faster results.
For more information about using hypertables, including chunk size partitioning,
see the [hypertable section][hypertable-docs].
Get the approximate size information for a hypertable.
Get the approximate size information for all hypertables.
Get the approximate size information for a continuous aggregate.
## Required arguments
|Name|Type|Description|
|-|-|-|
|`hypertable`|REGCLASS|Hypertable or continuous aggregate to show size of.|
|Name|Type|Description|
|-|-|-|
|hypertable_approximate_size|BIGINT|Total approximate disk space used by the specified hypertable, including all indexes and TOAST data|
`NULL` is returned if the function is executed on a non-hypertable relation.
===== PAGE: https://docs.tigerdata.com/api/hypertable/split_chunk/ =====
**Examples:**
Example 1 (sql):
```sql
SELECT * FROM hypertable_approximate_size('devices');
hypertable_approximate_size
-----------------------------
8192
```
Example 2 (sql):
```sql
SELECT hypertable_name, hypertable_approximate_size(format('%I.%I', hypertable_schema, hypertable_name)::regclass)
FROM timescaledb_information.hypertables;
```
Example 3 (sql):
```sql
SELECT hypertable_approximate_size('device_stats_15m');
hypertable_approximate_size
-----------------------------
8192
```
---
## decompress_chunk()
**URL:** llms-txt#decompress_chunk()
**Contents:**
- Samples
- Required arguments
- Optional arguments
- Returns
Old API since [TimescaleDB v2.18.0](https://github.com/timescale/timescaledb/releases/tag/2.18.0) Replaced by convert_to_rowstore().
Before decompressing chunks, stop any compression policy on the hypertable you
are decompressing. You can use `SELECT alter_job(JOB_ID, scheduled => false);`
to prevent scheduled execution.
Decompress a single chunk:
Decompress all compressed chunks in a hypertable named `metrics`:
## Required arguments
|Name|Type|Description|
|---|---|---|
|`chunk_name`|`REGCLASS`|Name of the chunk to be decompressed.|
## Optional arguments
|Name|Type|Description|
|---|---|---|
|`if_compressed`|`BOOLEAN`|Disabling this will make the function error out on chunks that are not compressed. Defaults to true.|
|Column|Type|Description|
|---|---|---|
|`decompress_chunk`|`REGCLASS`|Name of the chunk that was decompressed.|
===== PAGE: https://docs.tigerdata.com/api/compression/remove_compression_policy/ =====
**Examples:**
Example 1 (unknown):
```unknown
Decompress all compressed chunks in a hypertable named `metrics`:
```
---
## detach_chunk()
**URL:** llms-txt#detach_chunk()
**Contents:**
- Samples
- Arguments
- Returns
Separate a chunk from a [hypertable][hypertables-section].
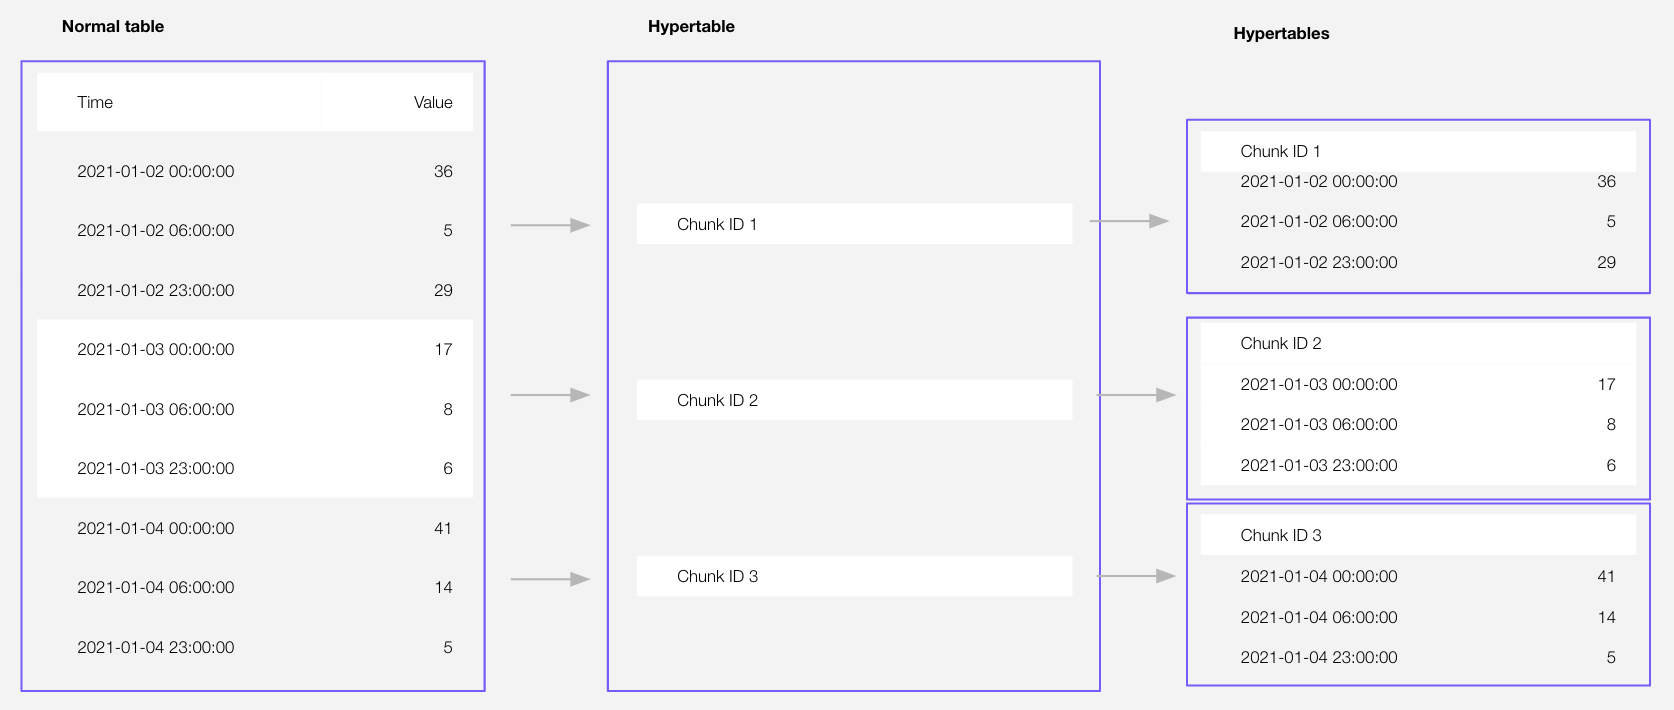
`chunk` becomes a standalone hypertable with the same name and schema. All existing constraints and
indexes on `chunk` are preserved after detaching. Foreign keys are dropped.
In this initial release, you cannot detach a chunk that has been [converted to the columnstore][setup-hypercore].
Since [TimescaleDB v2.21.0](https://github.com/timescale/timescaledb/releases/tag/2.21.0)
Detach a chunk from a hypertable:
|Name|Type| Description |
|---|---|------------------------------|
| `chunk` | REGCLASS | Name of the chunk to detach. |
This function returns void.
===== PAGE: https://docs.tigerdata.com/api/hypertable/attach_tablespace/ =====
**Examples:**
Example 1 (sql):
```sql
CALL detach_chunk('_timescaledb_internal._hyper_1_2_chunk');
```
---
## detach_data_node()
**URL:** llms-txt#detach_data_node()
**Contents:**
- Required arguments
- Optional arguments
- Returns
- Errors
- Sample usage
[Multi-node support is sunsetted][multi-node-deprecation].
TimescaleDB v2.13 is the last release that includes multi-node support for Postgres
versions 13, 14, and 15.
Detach a data node from one hypertable or from all hypertables.
Reasons for detaching a data node include:
* A data node should no longer be used by a hypertable and needs to be
removed from all hypertables that use it
* You want to have fewer data nodes for a distributed hypertable to
partition across
## Required arguments
| Name | Type|Description |
|-------------|----|-------------------------------|
| `node_name` | TEXT | Name of data node to detach from the distributed hypertable |
## Optional arguments
| Name | Type|Description |
|---------------|---|-------------------------------------|
| `hypertable` | REGCLASS | Name of the distributed hypertable where the data node should be detached. If NULL, the data node is detached from all hypertables. |
| `if_attached` | BOOLEAN | Prevent error if the data node is not attached. Defaults to false. |
| `force` | BOOLEAN | Force detach of the data node even if that means that the replication factor is reduced below what was set. Note that it is never allowed to reduce the replication factor below 1 since that would cause data loss. |
| `repartition` | BOOLEAN | Make the number of hash partitions equal to the new number of data nodes (if such partitioning exists). This ensures that the remaining data nodes are used evenly. Defaults to true. |
The number of hypertables the data node was detached from.
Detaching a node is not permitted:
* If it would result in data loss for the hypertable due to the data node
containing chunks that are not replicated on other data nodes
* If it would result in under-replicated chunks for the distributed hypertable
(without the `force` argument)
Replication is currently experimental, and not a supported feature
Detaching a data node is under no circumstances possible if that would
mean data loss for the hypertable. Nor is it possible to detach a data node,
unless forced, if that would mean that the distributed hypertable would end
up with under-replicated chunks.
The only safe way to detach a data node is to first safely delete any
data on it or replicate it to another data node.
Detach data node `dn3` from `conditions`:
===== PAGE: https://docs.tigerdata.com/api/distributed-hypertables/set_replication_factor/ =====
**Examples:**
Example 1 (sql):
```sql
SELECT detach_data_node('dn3', 'conditions');
```
---
## cleanup_copy_chunk_operation()
**URL:** llms-txt#cleanup_copy_chunk_operation()
**Contents:**
- Required arguments
- Sample usage
[Multi-node support is sunsetted][multi-node-deprecation].
TimescaleDB v2.13 is the last release that includes multi-node support for Postgres
versions 13, 14, and 15.
You can [copy][copy_chunk] or [move][move_chunk] a
chunk to a new location within a multi-node environment. The
operation happens over multiple transactions so, if it fails, it
is manually cleaned up using this function. Without cleanup,
the failed operation might hold a replication slot open, which in turn
prevents storage from being reclaimed. The operation ID is logged in
case of a failed copy or move operation and is required as input to
the cleanup function.
Experimental features could have bugs. They might not be backwards compatible,
and could be removed in future releases. Use these features at your own risk, and
do not use any experimental features in production.
## Required arguments
|Name|Type|Description|
|-|-|-|
|`operation_id`|NAME|ID of the failed operation|
Clean up a failed operation:
Get a list of running copy or move operations:
===== PAGE: https://docs.tigerdata.com/api/distributed-hypertables/create_distributed_restore_point/ =====
**Examples:**
Example 1 (sql):
```sql
CALL timescaledb_experimental.cleanup_copy_chunk_operation('ts_copy_1_31');
```
Example 2 (sql):
```sql
SELECT * FROM _timescaledb_catalog.chunk_copy_operation;
```
---
## Enforce constraints with unique indexes
**URL:** llms-txt#enforce-constraints-with-unique-indexes
**Contents:**
- Create a hypertable and add unique indexes
- Create a hypertable from an existing table with unique indexes
You use unique indexes on a hypertable to enforce [constraints][constraints]. If you have a primary key,
you have a unique index. In Postgres, a primary key is a unique index with a `NOT NULL` constraint.
You do not need to have a unique index on your hypertables. When you create a unique index,
it must contain all the partitioning columns of the hypertable.
## Create a hypertable and add unique indexes
To create a unique index on a hypertable:
1. **Determine the partitioning columns**
Before you create a unique index, you need to determine which unique indexes are
allowed on your hypertable. Begin by identifying your partitioning columns.
TimescaleDB traditionally uses the following columns to partition hypertables:
* The `time` column used to create the hypertable. Every TimescaleDB hypertable
is partitioned by time.
* Any space-partitioning columns. Space partitions are optional and not
included in every hypertable.
1. **Create a hypertable**
Create a [hypertable][hypertables-section] for your time-series data using [CREATE TABLE][hypertable-create-table].
For [efficient queries][secondary-indexes] on data in the columnstore, remember to `segmentby` the column you will
use most often to filter your data. For example:
If you are self-hosting TimescaleDB v2.19.3 and below, create a [Postgres relational table][pg-create-table],
then convert it using [create_hypertable][create_hypertable]. You then enable hypercore with a call
to [ALTER TABLE][alter_table_hypercore].
1. **Create a unique index on the hypertable**
When you create a unique index on a hypertable, it must contain all the partitioning columns. It may contain
other columns as well, and they may be arranged in any order. You cannot create a unique index without `time`,
because `time` is a partitioning column.
- Create a unique index on `time` and `device_id` with a call to `CREATE UNIQUE INDEX`:
- Create a unique index on `time`, `user_id`, and `device_id`.
`device_id` is not a partitioning column, but this still works:
This restriction is necessary to guarantee global uniqueness in the index.
## Create a hypertable from an existing table with unique indexes
If you create a unique index on a table before turning it into a hypertable, the
same restrictions apply in reverse. You can only partition the table by columns
in your unique index.
1. **Create a relational table**
1. **Create a unique index on the table**
For example, on `device_id` and `time`:
1. **Turn the table into a partitioned hypertable**
- On `time` and `device_id`:
You get an error if you try to turn the relational table into a hypertable partitioned by `time` and `user_id`.
This is because `user_id` is not part of the `UNIQUE INDEX`. To fix the error, add `user_id` to your unique index.
===== PAGE: https://docs.tigerdata.com/use-timescale/hypertables/hypertable-crud/ =====
**Examples:**
Example 1 (sql):
```sql
CREATE TABLE hypertable_example(
time TIMESTAMPTZ,
user_id BIGINT,
device_id BIGINT,
value FLOAT
) WITH (
tsdb.hypertable,
tsdb.partition_column='time',
tsdb.segmentby = 'device_id',
tsdb.orderby = 'time DESC'
);
```
Example 2 (sql):
```sql
CREATE UNIQUE INDEX idx_deviceid_time
ON hypertable_example(device_id, time);
```
Example 3 (sql):
```sql
CREATE UNIQUE INDEX idx_userid_deviceid_time
ON hypertable_example(user_id, device_id, time);
```
Example 4 (sql):
```sql
CREATE TABLE another_hypertable_example(
time TIMESTAMPTZ,
user_id BIGINT,
device_id BIGINT,
value FLOAT
);
```
---
## timescaledb_information.compression_settings
**URL:** llms-txt#timescaledb_information.compression_settings
**Contents:**
- Samples
- Available columns
This view exists for backwards compatibility. The supported views to retrieve information about compression are:
- [timescaledb_information.hypertable_compression_settings][hypertable_compression_settings]
- [timescaledb_information.chunk_compression_settings][chunk_compression_settings].
This section describes a feature that is deprecated. We strongly
recommend that you do not use this feature in a production environment. If you
need more information, [contact us](https://www.tigerdata.com/contact/).
Get information about compression-related settings for hypertables.
Each row of the view provides information about individual `orderby`
and `segmentby` columns used by compression.
How you use `segmentby` is the single most important thing for compression. It
affects compresion rates, query performance, and what is compressed or
decompressed by mutable compression.
The `by_range` dimension builder is an addition to TimescaleDB 2.13.
|Name|Type|Description|
|---|---|---|
| `hypertable_schema` | TEXT | Schema name of the hypertable |
| `hypertable_name` | TEXT | Table name of the hypertable |
| `attname` | TEXT | Name of the column used in the compression settings |
| `segmentby_column_index` | SMALLINT | Position of attname in the compress_segmentby list |
| `orderby_column_index` | SMALLINT | Position of attname in the compress_orderby list |
| `orderby_asc` | BOOLEAN | True if this is used for order by ASC, False for order by DESC |
| `orderby_nullsfirst` | BOOLEAN | True if nulls are ordered first for this column, False if nulls are ordered last|
===== PAGE: https://docs.tigerdata.com/api/informational-views/dimensions/ =====
**Examples:**
Example 1 (sql):
```sql
CREATE TABLE hypertab (a_col integer, b_col integer, c_col integer, d_col integer, e_col integer);
SELECT table_name FROM create_hypertable('hypertab', by_range('a_col', 864000000));
ALTER TABLE hypertab SET (timescaledb.compress, timescaledb.compress_segmentby = 'a_col,b_col',
timescaledb.compress_orderby = 'c_col desc, d_col asc nulls last');
SELECT * FROM timescaledb_information.compression_settings WHERE hypertable_name = 'hypertab';
-[ RECORD 1 ]----------+---------
hypertable_schema | public
hypertable_name | hypertab
attname | a_col
segmentby_column_index | 1
orderby_column_index |
orderby_asc |
orderby_nullsfirst |
-[ RECORD 2 ]----------+---------
hypertable_schema | public
hypertable_name | hypertab
attname | b_col
segmentby_column_index | 2
orderby_column_index |
orderby_asc |
orderby_nullsfirst |
-[ RECORD 3 ]----------+---------
hypertable_schema | public
hypertable_name | hypertab
attname | c_col
segmentby_column_index |
orderby_column_index | 1
orderby_asc | f
orderby_nullsfirst | t
-[ RECORD 4 ]----------+---------
hypertable_schema | public
hypertable_name | hypertab
attname | d_col
segmentby_column_index |
orderby_column_index | 2
orderby_asc | t
orderby_nullsfirst | f
```
---
## Hypertables
**URL:** llms-txt#hypertables
**Contents:**
- Partition by time
- Time partitioning
- Best practices for scaling and partitioning
- Hypertable indexes
- Partition by dimension
Tiger Cloud supercharges your real-time analytics by letting you run complex queries continuously, with near-zero latency. Under the hood, this is achieved by using hypertables—Postgres tables that automatically partition your time-series data by time and optionally by other dimensions. When you run a query, Tiger Cloud identifies the correct partition, called chunk, and runs the query on it, instead of going through the entire table.

Hypertables offer the following benefits:
- **Efficient data management with [automated partitioning by time][chunk-size]**: Tiger Cloud splits your data into chunks that hold data from a specific time range. For example, one day or one week. You can configure this range to better suit your needs.
- **Better performance with [strategic indexing][hypertable-indexes]**: an index on time in the descending order is automatically created when you create a hypertable. More indexes are created on the chunk level, to optimize performance. You can create additional indexes, including unique indexes, on the columns you need.
- **Faster queries with [chunk skipping][chunk-skipping]**: Tiger Cloud skips the chunks that are irrelevant in the context of your query, dramatically reducing the time and resources needed to fetch results. Even more—you can enable chunk skipping on non-partitioning columns.
- **Advanced data analysis with [hyperfunctions][hyperfunctions]**: Tiger Cloud enables you to efficiently process, aggregate, and analyze significant volumes of data while maintaining high performance.
To top it all, there is no added complexity—you interact with hypertables in the same way as you would with regular Postgres tables. All the optimization magic happens behind the scenes.
Inheritance is not supported for hypertables and may lead to unexpected behavior.
Each hypertable is partitioned into child hypertables called chunks. Each chunk is assigned
a range of time, and only contains data from that range.
### Time partitioning
Typically, you partition hypertables on columns that hold time values.
[Best practice is to use `timestamptz`][timestamps-best-practice] column type. However, you can also partition on
`date`, `integer`, `timestamp` and [UUIDv7][uuidv7_functions] types.
By default, each hypertable chunk holds data for 7 days. You can change this to better suit your
needs. For example, if you set `chunk_interval` to 1 day, each chunk stores data for a single day.
TimescaleDB divides time into potential chunk ranges, based on the `chunk_interval`. Each hypertable chunk holds
data for a specific time range only. When you insert data from a time range that doesn't yet have a chunk, TimescaleDB
automatically creates a chunk to store it.
In practice, this means that the start time of your earliest chunk does not
necessarily equal the earliest timestamp in your hypertable. Instead, there
might be a time gap between the start time and the earliest timestamp. This
doesn't affect your usual interactions with your hypertable, but might affect
the number of chunks you see when inspecting it.
## Best practices for scaling and partitioning
Best practices for maintaining a high performance when scaling include:
- Limit the number of hypertables in your service; having tens of thousands of hypertables is not recommended.
- Choose a strategic chunk size.
Chunk size affects insert and query performance. You want a chunk small enough
to fit into memory so you can insert and query recent data without
reading from disk. However, having too many small and sparsely filled chunks can
affect query planning time and compression. The more chunks in the system, the slower that process becomes, even more so
when all those chunks are part of a single hypertable.
Postgres builds the index on the fly during ingestion. That means that to build a new entry on the index,
a significant portion of the index needs to be traversed during every row insertion. When the index does not fit
into memory, it is constantly flushed to disk and read back. This wastes IO resources which would otherwise
be used for writing the heap/WAL data to disk.
The default chunk interval is 7 days. However, best practice is to set `chunk_interval` so that prior to processing,
the indexes for chunks currently being ingested into fit within 25% of main memory. For example, on a system with 64
GB of memory, if index growth is approximately 2 GB per day, a 1-week chunk interval is appropriate. If index growth is
around 10 GB per day, use a 1-day interval.
You set `chunk_interval` when you [create a hypertable][hypertable-create-table], or by calling
[`set_chunk_time_interval`][chunk_interval] on an existing hypertable.
For a detailed analysis of how to optimize your chunk sizes, see the
[blog post on chunk time intervals][blog-chunk-time]. To learn how
to view and set your chunk time intervals, see
[Optimize hypertable chunk intervals][change-chunk-intervals].
## Hypertable indexes
By default, indexes are automatically created when you create a hypertable. The default index is on time, descending.
You can prevent index creation by setting the `create_default_indexes` option to `false`.
Hypertables have some restrictions on unique constraints and indexes. If you
want a unique index on a hypertable, it must include all the partitioning
columns for the table. To learn more, see
[Enforce constraints with unique indexes on hypertables][hypertables-and-unique-indexes].
You can prevent index creation by setting the `create_default_indexes` option to `false`.
## Partition by dimension
Partitioning on time is the most common use case for hypertable, but it may not be enough for your needs. For example,
you may need to scan for the latest readings that match a certain condition without locking a critical hypertable.
The use case for a partitioning dimension is a multi-tenant setup. You isolate the tenants using the `tenant_id` space
partition. However, you must perform extensive testing to ensure this works as expected, and there is a strong risk of
partition explosion.
You add a partitioning dimension at the same time as you create the hypertable, when the table is empty. The good news
is that although you select the number of partitions at creation time, as your data grows you can change the number of
partitions later and improve query performance. Changing the number of partitions only affects chunks created after the
change, not existing chunks. To set the number of partitions for a partitioning dimension, call `set_number_partitions`.
For example:
1. **Create the hypertable with the 1-day interval chunk interval**
1. **Add a hash partition on a non-time column**
Now use your hypertable as usual, but you can also ingest and query efficiently by the `device_id` column.
1. **Change the number of partitions as you data grows**
===== PAGE: https://docs.tigerdata.com/use-timescale/hypercore/ =====
**Examples:**
Example 1 (sql):
```sql
CREATE TABLE conditions(
"time" timestamptz not null,
device_id integer,
temperature float
)
WITH(
timescaledb.hypertable,
timescaledb.partition_column='time',
timescaledb.chunk_interval='1 day'
);
```
Example 2 (sql):
```sql
select * from add_dimension('conditions', by_hash('device_id', 3));
```
Example 3 (sql):
```sql
select set_number_partitions('conditions', 5, 'device_id');
```
---
## timescaledb_information.hypertable_compression_settings
**URL:** llms-txt#timescaledb_information.hypertable_compression_settings
**Contents:**
- Samples
- Arguments
Shows information about compression settings for each hypertable chunk that has compression enabled on it.
Show compression settings for all hypertables:
Find compression settings for a specific hypertable:
|Name|Type|Description|
|-|-|-|
|`hypertable`|`REGCLASS`|Hypertable which has compression enabled|
|`chunk`|`REGCLASS`|Hypertable chunk which has compression enabled|
|`segmentby`|`TEXT`|List of columns used for segmenting the compressed data|
|`orderby`|`TEXT`| List of columns used for ordering compressed data along with ordering and NULL ordering information|
===== PAGE: https://docs.tigerdata.com/api/informational-views/compression_settings/ =====
**Examples:**
Example 1 (sql):
```sql
SELECT * FROM timescaledb_information.hypertable_compression_settings;
hypertable | measurements
chunk | _timescaledb_internal._hyper_2_97_chunk
segmentby |
orderby | time DESC
```
Example 2 (sql):
```sql
SELECT * FROM timescaledb_information.hypertable_compression_settings WHERE hypertable::TEXT LIKE 'metrics';
hypertable | metrics
chunk | _timescaledb_internal._hyper_1_12_chunk
segmentby | metric_id
orderby | time DESC
```
---
## move_chunk()
**URL:** llms-txt#move_chunk()
**Contents:**
- Samples
- Required arguments
- Optional arguments
TimescaleDB allows you to move data and indexes to different tablespaces. This
allows you to move data to more cost-effective storage as it ages.
The `move_chunk` function acts like a combination of the
[Postgres CLUSTER command][postgres-cluster] and
[Postgres ALTER TABLE...SET TABLESPACE][postgres-altertable] commands. Unlike
these Postgres commands, however, the `move_chunk` function uses lower lock
levels so that the chunk and hypertable are able to be read for most of the
process. This comes at a cost of slightly higher disk usage during the
operation. For a more detailed discussion of this capability, see the
documentation on [managing storage with tablespaces][manage-storage].
You must be logged in as a super user, such as the `postgres` user,
to use the `move_chunk()` call.
## Required arguments
|Name|Type|Description|
|-|-|-|
|`chunk`|REGCLASS|Name of chunk to be moved|
|`destination_tablespace`|NAME|Target tablespace for chunk being moved|
|`index_destination_tablespace`|NAME|Target tablespace for index associated with the chunk you are moving|
## Optional arguments
|Name|Type|Description|
|-|-|-|
|`reorder_index`|REGCLASS|The name of the index (on either the hypertable or chunk) to order by|
|`verbose`|BOOLEAN|Setting to true displays messages about the progress of the move_chunk command. Defaults to false.|
===== PAGE: https://docs.tigerdata.com/api/hypertable/hypertable_index_size/ =====
---
## Logical backup with pg_dump and pg_restore
**URL:** llms-txt#logical-backup-with-pg_dump-and-pg_restore
**Contents:**
- Prerequisites
- Back up and restore an entire database
- Back up and restore individual hypertables
You back up and restore each self-hosted Postgres database with TimescaleDB enabled using the native
Postgres [`pg_dump`][pg_dump] and [`pg_restore`][pg_restore] commands. This also works for compressed hypertables,
you don't have to decompress the chunks before you begin.
If you are using `pg_dump` to backup regularly, make sure you keep
track of the versions of Postgres and TimescaleDB you are running. For more
information, see [Versions are mismatched when dumping and restoring a database][troubleshooting-version-mismatch].
This page shows you how to:
- [Back up and restore an entire database][backup-entire-database]
- [Back up and restore individual hypertables][backup-individual-tables]
You can also [upgrade between different versions of TimescaleDB][timescaledb-upgrade].
- A source database to backup from, and a target database to restore to.
- Install the `psql` and `pg_dump` Postgres client tools on your migration machine.
## Back up and restore an entire database
You backup and restore an entire database using `pg_dump` and `psql`.
1. **Set your connection strings**
These variables hold the connection information for the source database to backup from and
the target database to restore to:
1. **Backup your database**
You may see some errors while `pg_dump` is running. See [Troubleshooting self-hosted TimescaleDB][troubleshooting]
to check if they can be safely ignored.
1. **Restore your database from the backup**
1. Connect to your target database:
1. Create a new database and enable TimescaleDB:
1. Put your database in the right state for restoring:
1. Restore the database:
1. Return your database to normal operations:
Do not use `pg_restore` with the `-j` option. This option does not correctly restore the
TimescaleDB catalogs.
## Back up and restore individual hypertables
`pg_dump` provides flags that allow you to specify tables or schemas
to back up. However, using these flags means that the dump lacks necessary
information that TimescaleDB requires to understand the relationship between
them. Even if you explicitly specify both the hypertable and all of its
constituent chunks, the dump would still not contain all the information it
needs to recreate the hypertable on restore.
To backup individual hypertables, backup the database schema, then backup only the tables
you need. You also use this method to backup individual plain tables.
1. **Set your connection strings**
These variables hold the connection information for the source database to backup from and
the target database to restore to:
1. **Backup the database schema and individual tables**
1. Back up the hypertable schema:
1. Backup hypertable data to a CSV file:
For each hypertable to backup:
1. **Restore the schema to the target database**
1. **Restore hypertables from the backup**
For each hypertable to backup:
1. Recreate the hypertable:
When you [create the new hypertable][create_hypertable], you do not need to use the
same parameters as existed in the source database. This
can provide a good opportunity for you to re-organize your hypertables if
you need to. For example, you can change the partitioning key, the number of
partitions, or the chunk interval sizes.
1. Restore the data:
The standard `COPY` command in Postgres is single threaded. If you have a
lot of data, you can speed up the copy using the [timescaledb-parallel-copy][parallel importer].
Best practice is to backup and restore a database at a time. However, if you have superuser access to
Postgres instance with TimescaleDB installed, you can use `pg_dumpall` to back up all Postgres databases in a
cluster, including global objects that are common to all databases, namely database roles, tablespaces,
and privilege grants. You restore the Postgres instance using `psql`. For more information, see the
[Postgres documentation][postgres-docs].
===== PAGE: https://docs.tigerdata.com/self-hosted/backup-and-restore/physical/ =====
**Examples:**
Example 1 (bash):
```bash
export SOURCE=postgres://:@:/
export TARGET=postgres://:@:
```
Example 2 (bash):
```bash
pg_dump -d "source" \
-Fc -f .bak
```
Example 3 (bash):
```bash
psql -d "target"
```
Example 4 (sql):
```sql
CREATE DATABASE ;
\c
CREATE EXTENSION IF NOT EXISTS timescaledb;
```
---
## CREATE INDEX (Transaction Per Chunk)
**URL:** llms-txt#create-index-(transaction-per-chunk)
**Contents:**
- Samples
This option extends [`CREATE INDEX`][postgres-createindex] with the ability to
use a separate transaction for each chunk it creates an index on, instead of
using a single transaction for the entire hypertable. This allows `INSERT`s, and
other operations to be performed concurrently during most of the duration of the
`CREATE INDEX` command. While the index is being created on an individual chunk,
it functions as if a regular `CREATE INDEX` were called on that chunk, however
other chunks are completely unblocked.
This version of `CREATE INDEX` can be used as an alternative to
`CREATE INDEX CONCURRENTLY`, which is not currently supported on hypertables.
- Not supported for `CREATE UNIQUE INDEX`.
- If the operation fails partway through, indexes might not be created on all
hypertable chunks. If this occurs, the index on the root table of the hypertable
is marked as invalid. You can check this by running `\d+` on the hypertable. The
index still works, and is created on new chunks, but if you want to ensure all
chunks have a copy of the index, drop and recreate it.
You can also use the following query to find all invalid indexes:
Create an anonymous index:
===== PAGE: https://docs.tigerdata.com/api/continuous-aggregates/refresh_continuous_aggregate/ =====
**Examples:**
Example 1 (SQL):
```SQL
CREATE INDEX ... WITH (timescaledb.transaction_per_chunk, ...);
```
Example 2 (SQL):
```SQL
SELECT * FROM pg_index i WHERE i.indisvalid IS FALSE;
```
Example 3 (SQL):
```SQL
CREATE INDEX ON conditions(time, device_id)
WITH (timescaledb.transaction_per_chunk);
```
Example 4 (SQL):
```SQL
CREATE INDEX ON conditions USING brin(time, location)
WITH (timescaledb.transaction_per_chunk);
```
---
## set_replication_factor()
**URL:** llms-txt#set_replication_factor()
**Contents:**
- Required arguments
- Errors
- Sample usage
[Multi-node support is sunsetted][multi-node-deprecation].
TimescaleDB v2.13 is the last release that includes multi-node support for Postgres
versions 13, 14, and 15.
Sets the replication factor of a distributed hypertable to the given value.
Changing the replication factor does not affect the number of replicas for existing chunks.
Chunks created after changing the replication factor are replicated
in accordance with new value of the replication factor. If the replication factor cannot be
satisfied, since the amount of attached data nodes is less than new replication factor,
the command aborts with an error.
If existing chunks have less replicas than new value of the replication factor,
the function prints a warning.
## Required arguments
|Name|Type|Description|
|---|---|---|
| `hypertable` | REGCLASS | Distributed hypertable to update the replication factor for.|
| `replication_factor` | INTEGER | The new value of the replication factor. Must be greater than 0, and smaller than or equal to the number of attached data nodes.|
An error is given if:
* `hypertable` is not a distributed hypertable.
* `replication_factor` is less than `1`, which cannot be set on a distributed hypertable.
* `replication_factor` is bigger than the number of attached data nodes.
If a bigger replication factor is desired, it is necessary to attach more data nodes
by using [attach_data_node][attach_data_node].
Update the replication factor for a distributed hypertable to `2`:
Example of the warning if any existing chunk of the distributed hypertable has less than 2 replicas:
Example of providing too big of a replication factor for a hypertable with 2 attached data nodes:
===== PAGE: https://docs.tigerdata.com/api/distributed-hypertables/delete_data_node/ =====
**Examples:**
Example 1 (sql):
```sql
SELECT set_replication_factor('conditions', 2);
```
Example 2 (unknown):
```unknown
WARNING: hypertable "conditions" is under-replicated
DETAIL: Some chunks have less than 2 replicas.
```
Example 3 (sql):
```sql
SELECT set_replication_factor('conditions', 3);
ERROR: too big replication factor for hypertable "conditions"
DETAIL: The hypertable has 2 data nodes attached, while the replication factor is 3.
HINT: Decrease the replication factor or attach more data nodes to the hypertable.
```
---
## About indexes
**URL:** llms-txt#about-indexes
Because looking up data can take a long time, especially if you have a lot of
data in your hypertable, you can use an index to speed up read operations from
non-compressed chunks in the rowstore (which use their [own columnar indexes][about-compression]).
You can create an index on any combination of columns. To define an index as a `UNIQUE` or `PRIMARY KEY` index, it must include the partitioning column (this is usually the time column).
Which column you choose to create your
index on depends on what kind of data you have stored.
When you create a hypertable, set the datatype for the `time` column as
`timestamptz` and not `timestamp`.
For more information, see [Postgres timestamp][postgresql-timestamp].
While it is possible to add an index that does not include the `time` column,
doing so results in very slow ingest speeds. For time-series data, indexing
on the time column allows one index to be created per chunk.
Consider a simple example with temperatures collected from two locations named
`office` and `garage`:
An index on `(location, time DESC)` is organized like this:
An index on `(time DESC, location)` is organized like this:
A good rule of thumb with indexes is to think in layers. Start by choosing the
columns that you typically want to run equality operators on, such as
`location = garage`. Then finish by choosing columns you want to use range
operators on, such as `time > 0930`.
As a more complex example, imagine you have a number of devices tracking
1,000 different retail stores. You have 100 devices per store, and 5 different
types of devices. All of these devices report metrics as `float` values, and you
decide to store all the metrics in the same table, like this:
When you create this table, an index is automatically generated on the time
column, making it faster to query your data based on time.
If you want to query your data on something other than time, you can create
different indexes. For example, you might want to query data from the last month
for just a given `device_id`. Or you could query all data for a single
`store_id` for the last three months.
You want to keep the index on time so that you can quickly filter for a given
time range, and add another index on `device_id` and `store_id`. This creates a
composite index. A composite index on `(store_id, device_id, time)` orders by
`store_id` first. Each unique `store_id`, will then be sorted by `device_id` in
order. And each entry with the same `store_id` and `device_id` are then ordered
by `time`. To create this index, use this command:
When you have this composite index on your hypertable, you can run a range of
different queries. Here are some examples:
This queries the portion of the list with a specific `store_id`. The index is
effective for this query, but could be a bit bloated; an index on just
`store_id` would probably be more efficient.
This query is not effective, because it would need to scan multiple sections of
the list. This is because the part of the list that contains data for
`time > 10` for one device would be located in a different section than for a
different device. In this case, consider building an index on `(store_id, time)`
instead.
The index in the example is useless for this query, because the data for
`device M` is located in a completely different section of the list for each
`store_id`.
This is an accurate query for this index. It narrows down the list to a very
specific portion.
===== PAGE: https://docs.tigerdata.com/use-timescale/schema-management/json/ =====
**Examples:**
Example 1 (sql):
```sql
garage-0940
garage-0930
garage-0920
garage-0910
office-0930
office-0920
office-0910
```
Example 2 (sql):
```sql
0940-garage
0930-garage
0930-office
0920-garage
0920-office
0910-garage
0910-office
```
Example 3 (sql):
```sql
CREATE TABLE devices (
time timestamptz,
device_id int,
device_type int,
store_id int,
value float
);
```
Example 4 (sql):
```sql
CREATE INDEX ON devices (store_id, device_id, time DESC);
```
---
## User permissions do not allow chunks to be converted to columnstore or rowstore
**URL:** llms-txt#user-permissions-do-not-allow-chunks-to-be-converted-to-columnstore-or-rowstore
You might get this error if you attempt to compress a chunk into the columnstore, or decompress it back into rowstore with a non-privileged user
account. To compress or decompress a chunk, your user account must have permissions that allow it to perform `CREATE INDEX` on the
chunk. You can check the permissions of the current user with this command at
the `psql` command prompt:
To resolve this problem, grant your user account the appropriate privileges with
this command:
For more information about the `GRANT` command, see the
[Postgres documentation][pg-grant].
===== PAGE: https://docs.tigerdata.com/_troubleshooting/compression-inefficient-chunk-interval/ =====
**Examples:**
Example 1 (sql):
```sql
\dn+
```
Example 2 (sql):
```sql
GRANT PRIVILEGES
ON TABLE
TO ;
```
---
## Query data in distributed hypertables
**URL:** llms-txt#query-data-in-distributed-hypertables
[Multi-node support is sunsetted][multi-node-deprecation].
TimescaleDB v2.13 is the last release that includes multi-node support for Postgres
versions 13, 14, and 15.
You can query a distributed hypertable just as you would query a standard
hypertable or Postgres table. For more information, see the section on
[writing data][write].
Queries perform best when the access node can push transactions down to the data
nodes. To ensure that the access node can push down transactions, check that the
[`enable_partitionwise_aggregate`][enable_partitionwise_aggregate] setting is
set to `on` for the access node. By default, it is `off`.
If you want to use continuous aggregates on your distributed hypertable, see the
[continuous aggregates][caggs] section for more information.
===== PAGE: https://docs.tigerdata.com/self-hosted/distributed-hypertables/about-distributed-hypertables/ =====
---
## convert_to_columnstore()
**URL:** llms-txt#convert_to_columnstore()
**Contents:**
- Samples
- Arguments
- Returns
Manually convert a specific chunk in the hypertable rowstore to the columnstore.
Although `convert_to_columnstore` gives you more fine-grained control, best practice is to use
[`add_columnstore_policy`][add_columnstore_policy]. You can also add chunks to the columnstore at a specific time
[running the job associated with your columnstore policy][run-job] manually.
To move a chunk from the columnstore back to the rowstore, use [`convert_to_rowstore`][convert_to_rowstore].
Since [TimescaleDB v2.18.0](https://github.com/timescale/timescaledb/releases/tag/2.18.0)
To convert a single chunk to columnstore:
| Name | Type | Default | Required | Description |
|----------------------|--|---------|--|----------------------------------------------------------------------------------------------------------------------------------------------------|
| `chunk` | REGCLASS | - |✔| Name of the chunk to add to the columnstore. |
| `if_not_columnstore` | BOOLEAN | `true` |✖| Set to `false` so this job fails with an error rather than a warning if `chunk` is already in the columnstore. |
| `recompress` | BOOLEAN | `false` |✖| Set to `true` to add a chunk that had more data inserted after being added to the columnstore. |
Calls to `convert_to_columnstore` return:
| Column | Type | Description |
|-------------------|--------------------|----------------------------------------------------------------------------------------------------|
| `chunk name` or `table` | REGCLASS or String | The name of the chunk added to the columnstore, or a table-like result set with zero or more rows. |
===== PAGE: https://docs.tigerdata.com/api/compression/decompress_chunk/ =====
---
## attach_chunk()
**URL:** llms-txt#attach_chunk()
**Contents:**
- Samples
- Arguments
- Returns
Attach a hypertable as a chunk in another [hypertable][hypertables-section] at a given slice in a dimension.

The schema, name, existing constraints, and indexes of `chunk` do not change, even
if a constraint conflicts with a chunk constraint in `hypertable`.
The `hypertable` you attach `chunk` to does not need to have the same dimension columns as the
hypertable you previously [detached `chunk`][hypertable-detach-chunk] from.
While attaching `chunk` to `hypertable`:
- Dimension columns in `chunk` are set as `NOT NULL`.
- Any foreign keys in `hypertable` are created in `chunk`.
You cannot:
- Attaching a chunk that is still attached to another hypertable. First call [detach_chunk][hypertable-detach-chunk].
- Attaching foreign tables are not supported.
Since [TimescaleDB v2.21.0](https://github.com/timescale/timescaledb/releases/tag/2.21.0)
Attach a hypertable as a chunk in another hypertable for a specific slice in a dimension:
|Name|Type| Description |
|---|---|-----------------------------------------------------------------------------------------------------------------------------------------------|
| `hypertable` | REGCLASS | Name of the hypertable to attach `chunk` to. |
| `chunk` | REGCLASS | Name of the chunk to attach. |
| `slices` | JSONB | The slice `chunk` will occupy in `hypertable`. `slices` cannot clash with the slice already occupied by an existing chunk in `hypertable`. |
This function returns void.
===== PAGE: https://docs.tigerdata.com/api/hypertable/detach_tablespaces/ =====
**Examples:**
Example 1 (sql):
```sql
CALL attach_chunk('ht', '_timescaledb_internal._hyper_1_2_chunk', '{"device_id": [0, 1000]}');
```
---
## compress_chunk()
**URL:** llms-txt#compress_chunk()
**Contents:**
- Samples
- Required arguments
- Optional arguments
- Returns
Old API since [TimescaleDB v2.18.0](https://github.com/timescale/timescaledb/releases/tag/2.18.0) Replaced by convert_to_columnstore().
The `compress_chunk` function is used for synchronous compression (or recompression, if necessary) of
a specific chunk. This is most often used instead of the
[`add_compression_policy`][add_compression_policy] function, when a user
wants more control over the scheduling of compression. For most users, we
suggest using the policy framework instead.
You can also compress chunks by
[running the job associated with your compression policy][run-job].
`compress_chunk` gives you more fine-grained control by
allowing you to target a specific chunk that needs compressing.
You can get a list of chunks belonging to a hypertable using the
[`show_chunks` function](https://docs.tigerdata.com/api/latest/hypertable/show_chunks/).
Compress a single chunk.
## Required arguments
|Name|Type|Description|
|---|---|---|
| `chunk_name` | REGCLASS | Name of the chunk to be compressed|
## Optional arguments
|Name|Type|Description|
|---|---|---|
| `if_not_compressed` | BOOLEAN | Disabling this will make the function error out on chunks that are already compressed. Defaults to true.|
|Column|Type|Description|
|---|---|---|
| `compress_chunk` | REGCLASS | Name of the chunk that was compressed|
===== PAGE: https://docs.tigerdata.com/api/compression/chunk_compression_stats/ =====
---
## About distributed hypertables
**URL:** llms-txt#about-distributed-hypertables
**Contents:**
- Architecture of a distributed hypertable
- Space partitioning
- Closed and open dimensions for space partitioning
- Repartitioning distributed hypertables
- Replicating distributed hypertables
- Performance of distributed hypertables
- Query push down
- Full push down
- Partial push down
- Limitations of query push down
[Multi-node support is sunsetted][multi-node-deprecation].
TimescaleDB v2.13 is the last release that includes multi-node support for Postgres
versions 13, 14, and 15.
Distributed hypertables are hypertables that span multiple nodes. With
distributed hypertables, you can scale your data storage across multiple
machines. The database can also parallelize some inserts and queries.
A distributed hypertable still acts as if it were a single table. You can work
with one in the same way as working with a standard hypertable. To learn more
about hypertables, see the [hypertables section][hypertables].
Certain nuances can affect distributed hypertable performance. This section
explains how distributed hypertables work, and what you need to consider before
adopting one.
## Architecture of a distributed hypertable
Distributed hypertables are used with multi-node clusters. Each cluster has an
access node and multiple data nodes. You connect to your database using the
access node, and the data is stored on the data nodes. For more information
about multi-node, see the [multi-node section][multi-node].
You create a distributed hypertable on your access node. Its chunks are stored
on the data nodes. When you insert data or run a query, the access node
communicates with the relevant data nodes and pushes down any processing if it
can.
## Space partitioning
Distributed hypertables are always partitioned by time, just like standard
hypertables. But unlike standard hypertables, distributed hypertables should
also be partitioned by space. This allows you to balance inserts and queries
between data nodes, similar to traditional sharding. Without space partitioning,
all data in the same time range would write to the same chunk on a single node.
By default, TimescaleDB creates as many space partitions as there are data
nodes. You can change this number, but having too many space partitions degrades
performance. It increases planning time for some queries, and leads to poorer
balancing when mapping items to partitions.
Data is assigned to space partitions by hashing. Each hash bucket in the space
dimension corresponds to a data node. One data node may hold many buckets, but
each bucket may belong to only one node for each time interval.
When space partitioning is on, 2 dimensions are used to divide data into chunks:
the time dimension and the space dimension. You can specify the number of
partitions along the space dimension. Data is assigned to a partition by hashing
its value on that dimension.
For example, say you use `device_id` as a space partitioning column. For each
row, the value of the `device_id` column is hashed. Then the row is inserted
into the correct partition for that hash value.
### Closed and open dimensions for space partitioning
Space partitioning dimensions can be open or closed. A closed dimension has a
fixed number of partitions, and usually uses some hashing to match values to
partitions. An open dimension does not have a fixed number of partitions, and
usually has each chunk cover a certain range. In most cases the time dimension
is open and the space dimension is closed.
If you use the `create_hypertable` command to create your hypertable, then the
space dimension is open, and there is no way to adjust this. To create a
hypertable with a closed space dimension, create the hypertable with only the
time dimension first. Then use the `add_dimension` command to explicitly add an
open device. If you set the range to `1`, each device has its own chunks. This
can help you work around some limitations of regular space dimensions, and is
especially useful if you want to make some chunks readily available for
exclusion.
### Repartitioning distributed hypertables
You can expand distributed hypertables by adding additional data nodes. If you
now have fewer space partitions than data nodes, you need to increase the
number of space partitions to make use of your new nodes. The new partitioning
configuration only affects new chunks. In this diagram, an extra data node
was added during the third time interval. The fourth time interval now includes
four chunks, while the previous time intervals still include three:
This can affect queries that span the two different partitioning configurations.
For more information, see the section on
[limitations of query push down][limitations].
## Replicating distributed hypertables
To replicate distributed hypertables at the chunk level, configure the
hypertables to write each chunk to multiple data nodes. This native replication
ensures that a distributed hypertable is protected against data node failures
and provides an alternative to fully replicating each data node using streaming
replication to provide high availability. Only the data nodes are replicated
using this method. The access node is not replicated.
For more information about replication and high availability, see the
[multi-node HA section][multi-node-ha].
## Performance of distributed hypertables
A distributed hypertable horizontally scales your data storage, so you're not
limited by the storage of any single machine. It also increases performance for
some queries.
Whether, and by how much, your performance increases depends on your query
patterns and data partitioning. Performance increases when the access node can
push down query processing to data nodes. For example, if you query with a
`GROUP BY` clause, and the data is partitioned by the `GROUP BY` column, the
data nodes can perform the processing and send only the final results to the
access node.
If processing can't be done on the data nodes, the access node needs to pull in
raw or partially processed data and do the processing locally. For more
information, see the [limitations of pushing down
queries][limitations-pushing-down].
The access node can use a full or a partial method to push down queries.
Computations that can be pushed down include sorts and groupings. Joins on data
nodes aren't currently supported.
To see how a query is pushed down to a data node, use `EXPLAIN VERBOSE` to
inspect the query plan and the remote SQL statement sent to each data node.
In the full push-down method, the access node offloads all computation to the
data nodes. It receives final results from the data nodes and appends them. To
fully push down an aggregate query, the `GROUP BY` clause must include either:
* All the partitioning columns _or_
* Only the first space-partitioning column
For example, say that you want to calculate the `max` temperature for each
location:
If `location` is your only space partition, each data node can compute the
maximum on its own subset of the data.
### Partial push down
In the partial push-down method, the access node offloads most of the
computation to the data nodes. It receives partial results from the data nodes
and calculates a final aggregate by combining the partials.
For example, say that you want to calculate the `max` temperature across all
locations. Each data node computes a local maximum, and the access node computes
the final result by computing the maximum of all the local maximums:
### Limitations of query push down
Distributed hypertables get improved performance when they can push down queries
to the data nodes. But the query planner might not be able to push down every
query. Or it might only be able to partially push down a query. This can occur
for several reasons:
* You changed the partitioning configuration. For example, you added new data
nodes and increased the number of space partitions to match. This can cause
chunks for the same space value to be stored on different nodes. For
instance, say you partition by `device_id`. You start with 3 partitions, and
data for `device_B` is stored on node 3. You later increase to 4 partitions.
New chunks for `device_B` are now stored on node 4. If you query across the
repartitioning boundary, a final aggregate for `device_B` cannot be
calculated on node 3 or node 4 alone. Partially processed data must be sent
to the access node for final aggregation. The TimescaleDB query planner
dynamically detects such overlapping chunks and reverts to the appropriate
partial aggregation plan. This means that you can add data nodes and
repartition your data to achieve elasticity without worrying about query
results. In some cases, your query could be slightly less performant, but
this is rare and the affected chunks usually move quickly out of your
retention window.
* The query includes [non-immutable functions][volatility] and expressions.
The function cannot be pushed down to the data node, because by definition,
it isn't guaranteed to have a consistent result across each node. An example
non-immutable function is [`random()`][random-func], which depends on the
current seed.
* The query includes a job function. The access node assumes the
function doesn't exist on the data nodes, and doesn't push it down.
TimescaleDB uses several optimizations to avoid these limitations, and push down
as many queries as possible. For example, `now()` is a non-immutable function.
The database converts it to a constant on the access node and pushes down the
constant timestamp to the data nodes.
## Combine distributed hypertables and standard hypertables
You can use distributed hypertables in the same database as standard hypertables
and standard Postgres tables. This mostly works the same way as having
multiple standard tables, with a few differences. For example, if you `JOIN` a
standard table and a distributed hypertable, the access node needs to fetch the
raw data from the data nodes and perform the `JOIN` locally.
All the limitations of regular hypertables also apply to distributed
hypertables. In addition, the following limitations apply specifically
to distributed hypertables:
* Distributed scheduling of background jobs is not supported. Background jobs
created on an access node are scheduled and executed on this access node
without distributing the jobs to data nodes.
* Continuous aggregates can aggregate data distributed across data nodes, but
the continuous aggregate itself must live on the access node. This could
create a limitation on how far you can scale your installation, but because
continuous aggregates are downsamples of the data, this does not usually
create a problem.
* Reordering chunks is not supported.
* Tablespaces cannot be attached to a distributed hypertable on the access
node. It is still possible to attach tablespaces on data nodes.
* Roles and permissions are assumed to be consistent across the nodes of a
distributed database, but consistency is not enforced.
* Joins on data nodes are not supported. Joining a distributed hypertable with
another table requires the other table to reside on the access node. This
also limits the performance of joins on distributed hypertables.
* Tables referenced by foreign key constraints in a distributed hypertable
must be present on the access node and all data nodes. This applies also to
referenced values.
* Parallel-aware scans and appends are not supported.
* Distributed hypertables do not natively provide a consistent restore point
for backup and restore across nodes. Use the
[`create_distributed_restore_point`][create_distributed_restore_point]
command, and make sure you take care when you restore individual backups to
access and data nodes.
* For native replication limitations, see the
[native replication section][native-replication].
* User defined functions have to be manually installed on the data nodes so
that the function definition is available on both access and data nodes.
This is particularly relevant for functions that are registered with
`set_integer_now_func`.
Note that these limitations concern usage from the access node. Some
currently unsupported features might still work on individual data nodes,
but such usage is neither tested nor officially supported. Future versions
of TimescaleDB might remove some of these limitations.
===== PAGE: https://docs.tigerdata.com/self-hosted/backup-and-restore/logical-backup/ =====
**Examples:**
Example 1 (sql):
```sql
SELECT location, max(temperature)
FROM conditions
GROUP BY location;
```
Example 2 (sql):
```sql
SELECT max(temperature) FROM conditions;
```
---
## reorder_chunk()
**URL:** llms-txt#reorder_chunk()
**Contents:**
- Samples
- Required arguments
- Optional arguments
- Returns
Reorder a single chunk's heap to follow the order of an index. This function
acts similarly to the [Postgres CLUSTER command][postgres-cluster] , however
it uses lower lock levels so that, unlike with the CLUSTER command, the chunk
and hypertable are able to be read for most of the process. It does use a bit
more disk space during the operation.
This command can be particularly useful when data is often queried in an order
different from that in which it was originally inserted. For example, data is
commonly inserted into a hypertable in loose time order (for example, many devices
concurrently sending their current state), but one might typically query the
hypertable about a _specific_ device. In such cases, reordering a chunk using an
index on `(device_id, time)` can lead to significant performance improvement for
these types of queries.
One can call this function directly on individual chunks of a hypertable, but
using [add_reorder_policy][add_reorder_policy] is often much more convenient.
Reorder a chunk on an index:
## Required arguments
|Name|Type|Description|
|---|---|---|
| `chunk` | REGCLASS | Name of the chunk to reorder. |
## Optional arguments
|Name|Type|Description|
|---|---|---|
| `index` | REGCLASS | The name of the index (on either the hypertable or chunk) to order by.|
| `verbose` | BOOLEAN | Setting to true displays messages about the progress of the reorder command. Defaults to false.|
This function returns void.
===== PAGE: https://docs.tigerdata.com/api/hypertable/add_reorder_policy/ =====
**Examples:**
Example 1 (sql):
```sql
SELECT reorder_chunk('_timescaledb_internal._hyper_1_10_chunk', '_timescaledb_internal.conditions_device_id_time_idx');
```
---
## create_distributed_hypertable()
**URL:** llms-txt#create_distributed_hypertable()
**Contents:**
- Required arguments
- Optional arguments
- Returns
- Sample usage
- Best practices
[Multi-node support is sunsetted][multi-node-deprecation].
TimescaleDB v2.13 is the last release that includes multi-node support for Postgres
versions 13, 14, and 15.
Create a TimescaleDB hypertable distributed across a multinode environment.
`create_distributed_hypertable()` replaces [`create_hypertable() (old interface)`][create-hypertable-old]. Distributed tables use the old API. The new generalized [`create_hypertable`][create-hypertable-new] API was introduced in TimescaleDB v2.13.
## Required arguments
|Name|Type| Description |
|---|---|----------------------------------------------------------------------------------------------|
| `relation` | REGCLASS | Identifier of the table you want to convert to a hypertable. |
| `time_column_name` | TEXT | Name of the column that contains time values, as well as the primary column to partition by. |
## Optional arguments
|Name|Type|Description|
|---|---|---|
| `partitioning_column` | TEXT | Name of an additional column to partition by. |
| `number_partitions` | INTEGER | Number of hash partitions to use for `partitioning_column`. Must be > 0. Default is the number of `data_nodes`. |
| `associated_schema_name` | TEXT | Name of the schema for internal hypertable tables. Default is `_timescaledb_internal`. |
| `associated_table_prefix` | TEXT | Prefix for internal hypertable chunk names. Default is `_hyper`. |
| `chunk_time_interval` | INTERVAL | Interval in event time that each chunk covers. Must be > 0. Default is 7 days. |
| `create_default_indexes` | BOOLEAN | Boolean whether to create default indexes on time/partitioning columns. Default is TRUE. |
| `if_not_exists` | BOOLEAN | Boolean whether to print warning if table already converted to hypertable or raise exception. Default is FALSE. |
| `partitioning_func` | REGCLASS | The function to use for calculating a value's partition.|
| `migrate_data` | BOOLEAN | Set to TRUE to migrate any existing data from the `relation` table to chunks in the new hypertable. A non-empty table generates an error without this option. Large tables may take significant time to migrate. Default is FALSE. |
| `time_partitioning_func` | REGCLASS | Function to convert incompatible primary time column values to compatible ones. The function must be `IMMUTABLE`. |
| `replication_factor` | INTEGER | The number of data nodes to which the same data is written to. This is done by creating chunk copies on this amount of data nodes. Must be >= 1; If not set, the default value is determined by the `timescaledb.hypertable_replication_factor_default` GUC. Read [the best practices][best-practices] before changing the default. |
| `data_nodes` | ARRAY | The set of data nodes used for the distributed hypertable. If not present, defaults to all data nodes known by the access node (the node on which the distributed hypertable is created). |
|Column|Type|Description|
|---|---|---|
| `hypertable_id` | INTEGER | ID of the hypertable in TimescaleDB. |
| `schema_name` | TEXT | Schema name of the table converted to hypertable. |
| `table_name` | TEXT | Table name of the table converted to hypertable. |
| `created` | BOOLEAN | TRUE if the hypertable was created, FALSE when `if_not_exists` is TRUE and no hypertable was created. |
Create a table `conditions` which is partitioned across data
nodes by the 'location' column. Note that the number of space
partitions is automatically equal to the number of data nodes assigned
to this hypertable (all configured data nodes in this case, as
`data_nodes` is not specified).
Create a table `conditions` using a specific set of data nodes.
* **Hash partitions**: Best practice for distributed hypertables is to enable [hash partitions](https://www.techopedia.com/definition/31996/hash-partitioning).
With hash partitions, incoming data is divided between the data nodes. Without hash partition, all
data for each time slice is written to a single data node.
* **Time intervals**: Follow the guidelines for `chunk_time_interval` defined in [`create_hypertable`]
[create-hypertable-old].
When you enable hash partitioning, the hypertable is evenly distributed across the data nodes. This
means you can set a larger time interval. For example, you ingest 10 GB of data per day shared over
five data nodes, each node has 64 GB of memory. If this is the only table being served by these data nodes, use a time interval of 1 week:
If you do not enable hash partitioning, use the same `chunk_time_interval` settings as a non-distributed
instance. This is because all incoming data is handled by a single node.
* **Replication factor**: `replication_factor` defines the number of data nodes a newly created chunk is
replicated in. For example, when you set `replication_factor` to `3`, each chunk exists on 3 separate
data nodes. Rows written to a chunk are inserted into all data notes in a two-phase commit protocol.
If a data node fails or is removed, no data is lost. Writes succeed on the other data nodes. However, the
chunks on the lost data node are now under-replicated. When the failed data node becomes available, rebalance the chunks with a call to [copy_chunk][copy_chunk].
===== PAGE: https://docs.tigerdata.com/api/distributed-hypertables/attach_data_node/ =====
**Examples:**
Example 1 (sql):
```sql
SELECT create_distributed_hypertable('conditions', 'time', 'location');
```
Example 2 (sql):
```sql
SELECT create_distributed_hypertable('conditions', 'time', 'location',
data_nodes => '{ "data_node_1", "data_node_2", "data_node_4", "data_node_7" }');
```
Example 3 (unknown):
```unknown
7 days * 10 GB 70
-------------------- == --- ~= 22% of main memory used for the most recent chunks
5 data nodes * 64 GB 320
```
---
## Manual compression
**URL:** llms-txt#manual-compression
**Contents:**
- Selecting chunks to compress
- Compressing chunks manually
- Manually compress chunks in a single command
- Roll up uncompressed chunks when compressing
In most cases, an [automated compression policy][add_compression_policy] is sufficient to automatically compress your
chunks. However, if you want more control, you can also use manual synchronous compression of specific chunks.
Before you start, you need a list of chunks to compress. In this example, you
use a hypertable called `example`, and compress chunks older than three days.
### Selecting chunks to compress
1. At the psql prompt, select all chunks in the table `example` that are older
than three days:
1. This returns a list of chunks. Take note of the chunks' names:
||show_chunks|
|---|---|
|1|_timescaledb_internal_hyper_1_2_chunk|
|2|_timescaledb_internal_hyper_1_3_chunk|
When you are happy with the list of chunks, you can use the chunk names to
manually compress each one.
### Compressing chunks manually
1. At the psql prompt, compress the chunk:
1. Check the results of the compression with this command:
The results show the chunks for the given hypertable, their compression
status, and some other statistics:
|chunk_schema|chunk_name|compression_status|before_compression_table_bytes|before_compression_index_bytes|before_compression_toast_bytes|before_compression_total_bytes|after_compression_table_bytes|after_compression_index_bytes|after_compression_toast_bytes|after_compression_total_bytes|node_name|
|---|---|---|---|---|---|---|---|---|---|---|---|
|_timescaledb_internal|_hyper_1_1_chunk|Compressed|8192 bytes|16 kB|8192 bytes|32 kB|8192 bytes|16 kB|8192 bytes|32 kB||
|_timescaledb_internal|_hyper_1_20_chunk|Uncompressed||||||||||
1. Repeat for all chunks you want to compress.
## Manually compress chunks in a single command
Alternatively, you can select the chunks and compress them in a single command
by using the output of the `show_chunks` command to compress each one. For
example, use this command to compress chunks between one and three weeks old
if they are not already compressed:
## Roll up uncompressed chunks when compressing
In TimescaleDB v2.9 and later, you can roll up multiple uncompressed chunks into
a previously compressed chunk as part of your compression procedure. This allows
you to have much smaller uncompressed chunk intervals, which reduces the disk
space used for uncompressed data. For example, if you have multiple smaller
uncompressed chunks in your data, you can roll them up into a single compressed
chunk.
To roll up your uncompressed chunks into a compressed chunk, alter the compression
settings to set the compress chunk time interval and run compression operations
to roll up the chunks while compressing.
The default setting of `compress_orderby` is `'time DESC'` (the descending or DESC command is used to sort the data returned in ascending order), which causes chunks to be re-compressed
many times during the rollup, possibly leading to a steep performance penalty.
Set `timescaledb.compress_orderby = 'time ASC'` to avoid this penalty.
The time interval you choose must be a multiple of the uncompressed chunk
interval. For example, if your uncompressed chunk interval is one week, your
`` of the compressed chunk could be two weeks or six weeks, but
not one month.
===== PAGE: https://docs.tigerdata.com/use-timescale/compression/about-compression/ =====
**Examples:**
Example 1 (sql):
```sql
SELECT show_chunks('example', older_than => INTERVAL '3 days');
```
Example 2 (sql):
```sql
SELECT compress_chunk( '');
```
Example 3 (sql):
```sql
SELECT *
FROM chunk_compression_stats('example');
```
Example 4 (sql):
```sql
SELECT compress_chunk(i, if_not_compressed => true)
FROM show_chunks(
'example',
now()::timestamp - INTERVAL '1 week',
now()::timestamp - INTERVAL '3 weeks'
) i;
```
---
## Materialized hypertables
**URL:** llms-txt#materialized-hypertables
**Contents:**
- Discover the name of a materialized hypertable
- Discovering the name of a materialized hypertable
Continuous aggregates take raw data from the original hypertable, aggregate it,
and store the aggregated data in a materialization hypertable. You can modify
this materialized hypertable in the same way as any other hypertable.
## Discover the name of a materialized hypertable
To change a materialized hypertable, you need to use its fully qualified
name. To find the correct name, use the
[timescaledb_information.continuous_aggregates view][api-continuous-aggregates-info]).
You can then use the name to modify it in the same way as any other hypertable.
### Discovering the name of a materialized hypertable
1. At the `psql`prompt, query `timescaledb_information.continuous_aggregates`:
1. Locate the name of the hypertable you want to adjust in the results of the
query. The results look like this:
===== PAGE: https://docs.tigerdata.com/use-timescale/continuous-aggregates/real-time-aggregates/ =====
**Examples:**
Example 1 (sql):
```sql
SELECT view_name, format('%I.%I', materialization_hypertable_schema,
materialization_hypertable_name) AS materialization_hypertable
FROM timescaledb_information.continuous_aggregates;
```
Example 2 (sql):
```sql
view_name | materialization_hypertable
---------------------------+---------------------------------------------------
conditions_summary_hourly | _timescaledb_internal._materialized_hypertable_30
conditions_summary_daily | _timescaledb_internal._materialized_hypertable_31
(2 rows)
```
---
## timescaledb_information.hypertable_columnstore_settings
**URL:** llms-txt#timescaledb_information.hypertable_columnstore_settings
**Contents:**
- Samples
- Returns
Retrieve information about the settings for all hypertables in the columnstore.
Since [TimescaleDB v2.18.0](https://github.com/timescale/timescaledb/releases/tag/2.18.0)
To retrieve information about settings:
- **Show columnstore settings for all hypertables**:
- **Retrieve columnstore settings for a specific hypertable**:
|Name|Type| Description |
|-|-|-------------------------------------------------------------------------------------------|
|`hypertable`|`REGCLASS`| A hypertable which has the [columnstore enabled][compression_alter-table].|
|`segmentby`|`TEXT`| The list of columns used to segment data. |
|`orderby`|`TEXT`| List of columns used to order the data, along with ordering and NULL ordering information. |
|`compress_interval_length`|`TEXT`| Interval used for [rolling up chunks during compression][rollup-compression]. |
|`index`| `TEXT` | The sparse index details. |
===== PAGE: https://docs.tigerdata.com/api/hypercore/convert_to_columnstore/ =====
**Examples:**
Example 1 (sql):
```sql
SELECT * FROM timescaledb_information.hypertable_columnstore_settings;
```
Example 2 (sql):
```sql
hypertable | measurements
segmentby |
orderby | "time" DESC
compress_interval_length |
```
Example 3 (sql):
```sql
SELECT * FROM timescaledb_information.hypertable_columnstore_settings WHERE hypertable::TEXT LIKE 'metrics';
```
Example 4 (sql):
```sql
hypertable | metrics
segmentby | metric_id
orderby | "time"
compress_interval_length |
```
---
## timescaledb_information.hypertables
**URL:** llms-txt#timescaledb_information.hypertables
**Contents:**
- Samples
- Available columns
Get metadata information about hypertables.
For more information about using hypertables, including chunk size partitioning,
see the [hypertable section][hypertable-docs].
Get information about a hypertable.
|Name|Type| Description |
|-|-|-------------------------------------------------------------------|
|`hypertable_schema`|TEXT| Schema name of the hypertable |
|`hypertable_name`|TEXT| Table name of the hypertable |
|`owner`|TEXT| Owner of the hypertable |
|`num_dimensions`|SMALLINT| Number of dimensions |
|`num_chunks`|BIGINT| Number of chunks |
|`compression_enabled`|BOOLEAN| Is compression enabled on the hypertable? |
|`is_distributed`|BOOLEAN| Sunsetted since TimescaleDB v2.14.0 Is the hypertable distributed? |
|`replication_factor`|SMALLINT| Sunsetted since TimescaleDB v2.14.0 Replication factor for a distributed hypertable |
|`data_nodes`|TEXT| Sunsetted since TimescaleDB v2.14.0 Nodes on which hypertable is distributed |
|`tablespaces`|TEXT| Tablespaces attached to the hypertable |
===== PAGE: https://docs.tigerdata.com/api/informational-views/policies/ =====
**Examples:**
Example 1 (sql):
```sql
CREATE TABLE metrics(time timestamptz, device int, temp float);
SELECT create_hypertable('metrics','time');
SELECT * from timescaledb_information.hypertables WHERE hypertable_name = 'metrics';
-[ RECORD 1 ]-------+--------
hypertable_schema | public
hypertable_name | metrics
owner | sven
num_dimensions | 1
num_chunks | 0
compression_enabled | f
tablespaces | NULL
```
---
## enable_chunk_skipping()
**URL:** llms-txt#enable_chunk_skipping()
**Contents:**
- Samples
- Arguments
- Returns
Early access: TimescaleDB v2.17.1
Enable range statistics for a specific column in a **compressed** hypertable. This tracks a range of values for that column per chunk.
Used for chunk skipping during query optimization and applies only to the chunks created after chunk skipping is enabled.
Best practice is to enable range tracking on columns that are correlated to the
partitioning column. In other words, enable tracking on secondary columns which are
referenced in the `WHERE` clauses in your queries.
TimescaleDB supports min/max range tracking for the `smallint`, `int`,
`bigint`, `serial`, `bigserial`, `date`, `timestamp`, and `timestamptz` data types. The
min/max ranges are calculated when a chunk belonging to
this hypertable is compressed using the [compress_chunk][compress_chunk] function.
The range is stored in start (inclusive) and end (exclusive) form in the
`chunk_column_stats` catalog table.
This way you store the min/max values for such columns in this catalog
table at the per-chunk level. These min/max range values do
not participate in partitioning of the data. These ranges are
used for chunk skipping when the `WHERE` clause of an SQL query specifies
ranges on the column.
A [DROP COLUMN](https://www.postgresql.org/docs/current/sql-altertable.html#SQL-ALTERTABLE-DESC-DROP-COLUMN)
on a column with statistics tracking enabled on it ends up removing all relevant entries
from the catalog table.
A [decompress_chunk][decompress_chunk] invocation on a compressed chunk resets its entries
from the `chunk_column_stats` catalog table since now it's available for DML and the
min/max range values can change on any further data manipulation in the chunk.
By default, this feature is disabled. To enable chunk skipping, set `timescaledb.enable_chunk_skipping = on` in
`postgresql.conf`. When you upgrade from a database instance that uses compression but does not support chunk
skipping, you need to recompress the previously compressed chunks for chunk skipping to work.
In this sample, you create the `conditions` hypertable with partitioning on the `time` column. You then specify and
enable additional columns to track ranges for.
If you are self-hosting TimescaleDB v2.19.3 and below, create a [Postgres relational table][pg-create-table],
then convert it using [create_hypertable][create_hypertable]. You then enable hypercore with a call
to [ALTER TABLE][alter_table_hypercore].
| Name | Type | Default | Required | Description |
|-------------|------------------|---------|-|----------------------------------------|
|`column_name`| `TEXT` | - | ✔ | Column to track range statistics for |
|`hypertable`| `REGCLASS` | - | ✔ | Hypertable that the column belongs to |
|`if_not_exists`| `BOOLEAN` | `false` | ✖ | Set to `true` so that a notice is sent when ranges are not being tracked for a column. By default, an error is thrown |
|Column|Type|Description|
|-|-|-|
|`column_stats_id`|INTEGER|ID of the entry in the TimescaleDB internal catalog|
|`enabled`|BOOLEAN|Returns `true` when tracking is enabled, `if_not_exists` is `true`, and when a new entry is not added|
===== PAGE: https://docs.tigerdata.com/api/hypertable/detach_tablespace/ =====
**Examples:**
Example 1 (sql):
```sql
CREATE TABLE conditions (
time TIMESTAMPTZ NOT NULL,
location TEXT NOT NULL,
device TEXT NOT NULL,
temperature DOUBLE PRECISION NULL,
humidity DOUBLE PRECISION NULL
) WITH (
tsdb.hypertable,
tsdb.partition_column='time'
);
SELECT enable_chunk_skipping('conditions', 'device_id');
```
---
## Time buckets
**URL:** llms-txt#time-buckets
Time buckets enable you to aggregate data in [hypertables][create-hypertable] by time interval. For example, you can
group data into 5-minute, 1-hour, and 3-day buckets to calculate summary values.
* [Learn how time buckets work][about-time-buckets]
* [Use time buckets][use-time-buckets] to aggregate data
===== PAGE: https://docs.tigerdata.com/use-timescale/schema-management/ =====
---
## Reindex hypertables to fix large indexes
**URL:** llms-txt#reindex-hypertables-to-fix-large-indexes
You might see this error if your hypertable indexes have become very large. To
resolve the problem, reindex your hypertables with this command:
For more information, see the [hypertable documentation][hypertables].
===== PAGE: https://docs.tigerdata.com/_troubleshooting/compression-userperms/ =====
**Examples:**
Example 1 (sql):
```sql
reindex table _timescaledb_internal._hyper_2_1523284_chunk
```
---
## Compress continuous aggregates
**URL:** llms-txt#compress-continuous-aggregates
**Contents:**
- Configure columnstore on continuous aggregates
To save on storage costs, you use hypercore to downsample historical data stored in continuous aggregates. After you
[enable columnstore][compression_continuous-aggregate] on a `MATERIALIZED VIEW`, you set a
[columnstore policy][add_columnstore_policy]. This policy defines the intervals when chunks in a continuous aggregate
are compressed as they are converted from the rowstore to the columnstore.
Columnstore works in the same way on [hypertables and continuous aggregates][hypercore]. When you enable
columnstore with no other options, your data is [segmented by][alter_materialized_view_arguments] the `groupby` columns
in the continuous aggregate, and [ordered by][alter_materialized_view_arguments] the time column. [Real-time aggregation][real-time-aggregates]
is disabled by default.
Since [TimescaleDB v2.20.0](https://github.com/timescale/timescaledb/releases/tag/2.20.0) For the old API, see Compress continuous aggregates.
## Configure columnstore on continuous aggregates
For an [existing continuous aggregate][create-cagg]:
1. **Enable columnstore on a continuous aggregate**
To enable the columnstore compression on a continuous aggregate, set `timescaledb.enable_columnstore = true` when you alter the view:
To disable the columnstore compression, set `timescaledb.enable_columnstore = false`:
1. **Set columnstore policies on the continuous aggregate**
Before you set up a columnstore policy on a continuous aggregate, you first set the [refresh policy][refresh-policy]. To
prevent refresh policies from failing, you set the columnstore policy interval so that actively
refreshed regions are not compressed. For example:
1. **Set the refresh policy**
1. **Set the columnstore policy**
For this refresh policy, the `after` parameter must be greater than the value of
`start_offset` in the refresh policy:
===== PAGE: https://docs.tigerdata.com/use-timescale/continuous-aggregates/create-index/ =====
**Examples:**
Example 1 (sql):
```sql
ALTER MATERIALIZED VIEW set (timescaledb.enable_columnstore = true);
```
Example 2 (sql):
```sql
SELECT add_continuous_aggregate_policy('',
start_offset => INTERVAL '30 days',
end_offset => INTERVAL '1 day',
schedule_interval => INTERVAL '1 hour');
```
Example 3 (sql):
```sql
CALL add_columnstore_policy('', after => INTERVAL '45 days');
```
---
## About time buckets
**URL:** llms-txt#about-time-buckets
**Contents:**
- How time bucketing works
- Origin
- Timezones
Time bucketing is essential for real-time analytics. The [`time_bucket`][time_bucket] function enables you to aggregate data in a [hypertable][create-hypertable] into buckets of time. For example, 5 minutes, 1 hour, or 3 days.
It's similar to Postgres's [`date_bin`][date_bin] function, but it gives you more
flexibility in the bucket size and start time.
You can use it to roll up data for analysis or downsampling. For example, you can calculate
5-minute averages for a sensor reading over the last day. You can perform these
rollups as needed, or pre-calculate them in [continuous aggregates][caggs].
This section explains how time bucketing works. For examples of the
`time_bucket` function, see the section on
[Aggregate time-series data with `time_bucket`][use-time-buckets].
## How time bucketing works
Time bucketing groups data into time intervals. With `time_bucket`, the interval
length can be any number of microseconds, milliseconds, seconds, minutes, hours,
days, weeks, months, years, or centuries.
The `time_bucket` function is usually used in combination with `GROUP BY` to
aggregate data. For example, you can calculate the average, maximum, minimum, or
sum of values within a bucket.
The origin determines when time buckets start and end. By default, a time bucket
doesn't start at the earliest timestamp in your data. There is often a more
logical time. For example, you might collect your first data point at `00:37`,
but you probably want your daily buckets to start at midnight. Similarly, you
might collect your first data point on a Wednesday, but you might want your
weekly buckets calculated from Sunday or Monday.
Instead, time is divided into buckets based on intervals from the origin. The
following diagram shows how, using the example of 2-week buckets. The first
possible start date for a bucket is `origin`. The next possible start date for a
bucket is `origin + bucket interval`. If your first timestamp does not fall
exactly on a possible start date, the immediately preceding start date is used
for the beginning of the bucket.
For example, say that your data's earliest timestamp is April 24, 2020. If you
bucket by an interval of two weeks, the first bucket doesn't start on April 24,
which is a Friday. It also doesn't start on April 20, which is the immediately
preceding Monday. It starts on April 13, because you can get to April 13, 2020,
by counting in two-week increments from January 3, 2000, which is the default
origin in this case.
For intervals that don't include months or years, the default origin is January
3, 2000. For month, year, or century intervals, the default origin is January 1,
2000. For integer time values, the default origin is 0.
These choices make the time ranges of time buckets more intuitive. Because
January 3, 2000, is a Monday, weekly time buckets start on Monday. This is
compliant with the ISO standard for calculating calendar weeks. Monthly and
yearly time buckets use January 1, 2000, as an origin. This allows them to start
on the first day of the calendar month or year.
If you prefer another origin, you can set it yourself using the [`origin`
parameter][origin]. For example, to start weeks on Sunday, set the origin to
Sunday, January 2, 2000.
The origin time depends on the data type of your time values.
If you use `TIMESTAMP`, by default, bucket start times are aligned with
`00:00:00`. Daily and weekly buckets start at `00:00:00`. Shorter buckets start
at a time that you can get to by counting in bucket increments from `00:00:00`
on the origin date.
If you use `TIMESTAMPTZ`, by default, bucket start times are aligned with
`00:00:00 UTC`. To align time buckets to another timezone, set the `timezone`
parameter.
===== PAGE: https://docs.tigerdata.com/mst/vpc-peering/vpc-peering-gcp/ =====
---
## About constraints
**URL:** llms-txt#about-constraints
Constraints are rules that apply to your database columns. This prevents you
from entering invalid data into your database. When you create, change, or
delete constraints on your hypertables, the constraints are propagated to the
underlying chunks, and to any indexes.
Hypertables support all standard Postgres constraint types. For foreign keys in particular, the following is supported:
- Foreign key constraints from a hypertable referencing a regular table
- Foreign key constraints from a regular table referencing a hypertable
Foreign keys from a hypertable referencing another hypertable **are not supported**.
For example, you can create a table that only allows positive device IDs, and
non-null temperature readings. You can also check that time values for all
devices are unique. To create this table, with the constraints, use this
command:
If you are self-hosting TimescaleDB v2.19.3 and below, create a [Postgres relational table][pg-create-table],
then convert it using [create_hypertable][create_hypertable]. You then enable hypercore with a call
to [ALTER TABLE][alter_table_hypercore].
This example also references values in another `locations` table using a foreign
key constraint.
Time columns used for partitioning must not allow `NULL` values. A
`NOT NULL` constraint is added by default to these columns if it doesn't already exist.
For more information on how to manage constraints, see the
[Postgres docs][postgres-createconstraint].
===== PAGE: https://docs.tigerdata.com/use-timescale/schema-management/about-indexing/ =====
**Examples:**
Example 1 (sql):
```sql
CREATE TABLE conditions (
time TIMESTAMPTZ
temp FLOAT NOT NULL,
device_id INTEGER CHECK (device_id > 0),
location INTEGER REFERENCES locations (id),
PRIMARY KEY(time, device_id)
) WITH (
tsdb.hypertable,
tsdb.partition_column='time'
);
```
---
## set_chunk_time_interval()
**URL:** llms-txt#set_chunk_time_interval()
**Contents:**
- Samples
- Arguments
Sets the `chunk_time_interval` on a hypertable. The new interval is used
when new chunks are created, and time intervals on existing chunks are
not changed.
For a TIMESTAMP column, set `chunk_time_interval` to 24 hours:
For a time column expressed as the number of milliseconds since the
UNIX epoch, set `chunk_time_interval` to 24 hours:
| Name | Type | Default | Required | Description |
|-------------|------------------|---------|----------------------------------------------------------------------|--------------------------------------------------------------------------------------------------------------------------------------------------|
|`hypertable`|REGCLASS| - | ✔ | Hypertable or continuous aggregate to update interval for. |
|`chunk_time_interval`|See note|- | ✔ | Event time that each new chunk covers. |
|`dimension_name`|REGCLASS|- | ✖ | The name of the time dimension to set the number of partitions for. Only use `dimension_name` when your hypertable has multiple time dimensions. |
If you change chunk time interval you may see a chunk that is smaller than the new interval. For example, if you
have two 7-day chunks that cover 14 days, then change `chunk_time_interval` to 3 days, you may end up with a
transition chunk covering one day. This happens because the start and end of the new chunk is calculated based on
dividing the timeline by the `chunk_time_interval` starting at epoch 0. This leads to the following chunks
[0, 3), [3, 6), [6, 9), [9, 12), [12, 15), [15, 18) and so on. The two 7-day chunks covered data up to day 14:
[0, 7), [8, 14), so the 3-day chunk for [12, 15) is reduced to a one day chunk. The following chunk [15, 18) is
created as a full 3 day chunk.
The valid types for the `chunk_time_interval` depend on the type used for the
hypertable `time` column:
|`time` column type|`chunk_time_interval` type|Time unit|
|-|-|-|
|TIMESTAMP|INTERVAL|days, hours, minutes, etc|
||INTEGER or BIGINT|microseconds|
|TIMESTAMPTZ|INTERVAL|days, hours, minutes, etc|
||INTEGER or BIGINT|microseconds|
|DATE|INTERVAL|days, hours, minutes, etc|
||INTEGER or BIGINT|microseconds|
|SMALLINT|SMALLINT|The same time unit as the `time` column|
|INT|INT|The same time unit as the `time` column|
|BIGINT|BIGINT|The same time unit as the `time` column|
For more information, see [hypertable partitioning][hypertable-partitioning].
===== PAGE: https://docs.tigerdata.com/api/hypertable/show_tablespaces/ =====
**Examples:**
Example 1 (sql):
```sql
SELECT set_chunk_time_interval('conditions', INTERVAL '24 hours');
SELECT set_chunk_time_interval('conditions', 86400000000);
```
Example 2 (sql):
```sql
SELECT set_chunk_time_interval('conditions', 86400000);
```
---
## drop_chunks()
**URL:** llms-txt#drop_chunks()
**Contents:**
- Samples
- Required arguments
- Optional arguments
Removes data chunks whose time range falls completely before (or
after) a specified time. Shows a list of the chunks that were
dropped, in the same style as the `show_chunks` [function][show_chunks].
Chunks are constrained by a start and end time and the start time is
always before the end time. A chunk is dropped if its end time is
older than the `older_than` timestamp or, if `newer_than` is given,
its start time is newer than the `newer_than` timestamp.
Note that, because chunks are removed if and only if their time range
falls fully before (or after) the specified timestamp, the remaining
data may still contain timestamps that are before (or after) the
specified one.
Chunks can only be dropped based on their time intervals. They cannot be dropped
based on a hash partition.
Drop all chunks from hypertable `conditions` older than 3 months:
Drop all chunks from hypertable `conditions` created before 3 months:
Drop all chunks more than 3 months in the future from hypertable
`conditions`. This is useful for correcting data ingested with
incorrect clocks:
Drop all chunks from hypertable `conditions` before 2017:
Drop all chunks from hypertable `conditions` before 2017, where time
column is given in milliseconds from the UNIX epoch:
Drop all chunks older than 3 months ago and newer than 4 months ago from hypertable `conditions`:
Drop all chunks created 3 months ago and created 4 months before from hypertable `conditions`:
Drop all chunks older than 3 months ago across all hypertables:
## Required arguments
|Name|Type|Description|
|-|-|-|
|`relation`|REGCLASS|Hypertable or continuous aggregate from which to drop chunks.|
## Optional arguments
|Name|Type|Description|
|-|-|-|
|`older_than`|ANY|Specification of cut-off point where any chunks older than this timestamp should be removed.|
|`newer_than`|ANY|Specification of cut-off point where any chunks newer than this timestamp should be removed.|
|`verbose`|BOOLEAN|Setting to true displays messages about the progress of the reorder command. Defaults to false.|
|`created_before`|ANY|Specification of cut-off point where any chunks created before this timestamp should be removed.|
|`created_after`|ANY|Specification of cut-off point where any chunks created after this timestamp should be removed.|
The `older_than` and `newer_than` parameters can be specified in two ways:
* **interval type:** The cut-off point is computed as `now() -
older_than` and similarly `now() - newer_than`. An error is
returned if an INTERVAL is supplied and the time column is not one
of a `TIMESTAMP`, `TIMESTAMPTZ`, or `DATE`.
* **timestamp, date, or integer type:** The cut-off point is
explicitly given as a `TIMESTAMP` / `TIMESTAMPTZ` / `DATE` or as a
`SMALLINT` / `INT` / `BIGINT`. The choice of timestamp or integer
must follow the type of the hypertable's time column.
The `created_before` and `created_after` parameters can be specified in two ways:
* **interval type:** The cut-off point is computed as `now() -
created_before` and similarly `now() - created_after`. This uses
the chunk creation time relative to the current time for the filtering.
* **timestamp, date, or integer type:** The cut-off point is
explicitly given as a `TIMESTAMP` / `TIMESTAMPTZ` / `DATE` or as a
`SMALLINT` / `INT` / `BIGINT`. The choice of integer value
must follow the type of the hypertable's partitioning column. Otherwise
the chunk creation time is used for the filtering.
When using just an interval type, the function assumes that
you are removing things _in the past_. If you want to remove data
in the future, for example to delete erroneous entries, use a timestamp.
When both `older_than` and `newer_than` arguments are used, the
function returns the intersection of the resulting two ranges. For
example, specifying `newer_than => 4 months` and `older_than => 3
months` drops all chunks between 3 and 4 months old.
Similarly, specifying `newer_than => '2017-01-01'` and `older_than
=> '2017-02-01'` drops all chunks between '2017-01-01' and
'2017-02-01'. Specifying parameters that do not result in an
overlapping intersection between two ranges results in an error.
When both `created_before` and `created_after` arguments are used, the
function returns the intersection of the resulting two ranges. For
example, specifying `created_after` => 4 months` and `created_before`=> 3
months` drops all chunks created between 3 and 4 months from now.
Similarly, specifying `created_after`=> '2017-01-01'` and `created_before`
=> '2017-02-01'` drops all chunks created between '2017-01-01' and
'2017-02-01'. Specifying parameters that do not result in an
overlapping intersection between two ranges results in an error.
The `created_before`/`created_after` parameters cannot be used together with
`older_than`/`newer_than`.
===== PAGE: https://docs.tigerdata.com/api/hypertable/detach_chunk/ =====
**Examples:**
Example 1 (sql):
```sql
SELECT drop_chunks('conditions', INTERVAL '3 months');
```
Example 2 (sql):
```sql
drop_chunks
----------------------------------------
_timescaledb_internal._hyper_3_5_chunk
_timescaledb_internal._hyper_3_6_chunk
_timescaledb_internal._hyper_3_7_chunk
_timescaledb_internal._hyper_3_8_chunk
_timescaledb_internal._hyper_3_9_chunk
(5 rows)
```
Example 3 (sql):
```sql
SELECT drop_chunks('conditions', created_before => now() - INTERVAL '3 months');
```
Example 4 (sql):
```sql
SELECT drop_chunks('conditions', newer_than => now() + interval '3 months');
```
---
## add_compression_policy()
**URL:** llms-txt#add_compression_policy()
**Contents:**
- Samples
- Required arguments
- Optional arguments
Old API since [TimescaleDB v2.18.0](https://github.com/timescale/timescaledb/releases/tag/2.18.0) Replaced by add_columnstore_policy().
Allows you to set a policy by which the system compresses a chunk
automatically in the background after it reaches a given age.
Compression policies can only be created on hypertables or continuous aggregates
that already have compression enabled. To set `timescaledb.compress` and other
configuration parameters for hypertables, use the
[`ALTER TABLE`][compression_alter-table]
command. To enable compression on continuous aggregates, use the
[`ALTER MATERIALIZED VIEW`][compression_continuous-aggregate]
command. To view the policies that you set or the policies that already exist,
see [informational views][informational-views].
Add a policy to compress chunks older than 60 days on the `cpu` hypertable.
Add a policy to compress chunks created 3 months before on the 'cpu' hypertable.
Note above that when `compress_after` is used then the time data range
present in the partitioning time column is used to select the target
chunks. Whereas, when `compress_created_before` is used then the chunks
which were created 3 months ago are selected.
Add a compress chunks policy to a hypertable with an integer-based time column:
Add a policy to compress chunks of a continuous aggregate called `cpu_weekly`, that are
older than eight weeks:
## Required arguments
|Name|Type|Description|
|-|-|-|
|`hypertable`|REGCLASS|Name of the hypertable or continuous aggregate|
|`compress_after`|INTERVAL or INTEGER|The age after which the policy job compresses chunks. `compress_after` is calculated relative to the current time, so chunks containing data older than `now - {compress_after}::interval` are compressed. This argument is mutually exclusive with `compress_created_before`.|
|`compress_created_before`|INTERVAL|Chunks with creation time older than this cut-off point are compressed. The cut-off point is computed as `now() - compress_created_before`. Defaults to `NULL`. Not supported for continuous aggregates yet. This argument is mutually exclusive with `compress_after`. |
The `compress_after` parameter should be specified differently depending
on the type of the time column of the hypertable or continuous aggregate:
* For hypertables with TIMESTAMP, TIMESTAMPTZ, and DATE time columns: the time
interval should be an INTERVAL type.
* For hypertables with integer-based timestamps: the time interval should be
an integer type (this requires the [integer_now_func][set_integer_now_func]
to be set).
## Optional arguments
|Name|Type|Description|
|-|-|-|
|`schedule_interval`|INTERVAL|The interval between the finish time of the last execution and the next start. Defaults to 12 hours for hyper tables with a `chunk_interval` >= 1 day and `chunk_interval / 2` for all other hypertables.|
|`initial_start`|TIMESTAMPTZ|Time the policy is first run. Defaults to NULL. If omitted, then the schedule interval is the interval from the finish time of the last execution to the next start. If provided, it serves as the origin with respect to which the next_start is calculated |
|`timezone`|TEXT|A valid time zone. If `initial_start` is also specified, subsequent executions of the compression policy are aligned on its initial start. However, daylight savings time (DST) changes may shift this alignment. Set to a valid time zone if this is an issue you want to mitigate. If omitted, UTC bucketing is performed. Defaults to `NULL`.|
|`if_not_exists`|BOOLEAN|Setting to `true` causes the command to fail with a warning instead of an error if a compression policy already exists on the hypertable. Defaults to false.|
===== PAGE: https://docs.tigerdata.com/api/compression/recompress_chunk/ =====
**Examples:**
Example 1 (unknown):
```unknown
Add a policy to compress chunks created 3 months before on the 'cpu' hypertable.
```
Example 2 (unknown):
```unknown
Note above that when `compress_after` is used then the time data range
present in the partitioning time column is used to select the target
chunks. Whereas, when `compress_created_before` is used then the chunks
which were created 3 months ago are selected.
Add a compress chunks policy to a hypertable with an integer-based time column:
```
Example 3 (unknown):
```unknown
Add a policy to compress chunks of a continuous aggregate called `cpu_weekly`, that are
older than eight weeks:
```
---
## Distributed hypertables
**URL:** llms-txt#distributed-hypertables
[Multi-node support is sunsetted][multi-node-deprecation].
TimescaleDB v2.13 is the last release that includes multi-node support for Postgres
versions 13, 14, and 15.
Distributed hypertables are hypertables that span multiple nodes. With
distributed hypertables, you can scale your data storage across multiple
machines and benefit from parallelized processing for some queries.
Many features of distributed hypertables work the same way as standard
hypertables. To learn how hypertables work in general, see the
[hypertables][hypertables] section.
* [Learn about distributed hypertables][about-distributed-hypertables] for
multi-node databases
* [Create a distributed hypertable][create]
* [Insert data][insert] into distributed hypertables
* [Query data][query] in distributed hypertables
* [Alter and drop][alter-drop] distributed hypertables
* [Create foreign keys][foreign-keys] on distributed hypertables
* [Set triggers][triggers] on distributed hypertables
===== PAGE: https://docs.tigerdata.com/mst/about-mst/ =====
---
## Manually drop chunks
**URL:** llms-txt#manually-drop-chunks
**Contents:**
- Drop chunks older than a certain date
- Drop chunks between 2 dates
- Drop chunks in the future
Drop chunks manually by time value. For example, drop chunks containing data
older than 30 days.
Dropping chunks manually is a one-time operation. To automatically drop chunks
as they age, set up a
[data retention policy](https://docs.tigerdata.com/use-timescale/latest/data-retention/create-a-retention-policy/).
## Drop chunks older than a certain date
To drop chunks older than a certain date, use the [`drop_chunks`][drop_chunks]
function. Provide the name of the hypertable to drop chunks from, and a time
interval beyond which to drop chunks.
For example, to drop chunks with data older than 24 hours:
## Drop chunks between 2 dates
You can also drop chunks between 2 dates. For example, drop chunks with data
between 3 and 4 months old.
Supply a second `INTERVAL` argument for the `newer_than` cutoff:
## Drop chunks in the future
You can also drop chunks in the future, for example, to correct data with the
wrong timestamp. To drop all chunks that are more than 3 months in the
future, from a hypertable called `conditions`:
===== PAGE: https://docs.tigerdata.com/use-timescale/data-retention/data-retention-with-continuous-aggregates/ =====
**Examples:**
Example 1 (sql):
```sql
SELECT drop_chunks('conditions', INTERVAL '24 hours');
```
Example 2 (sql):
```sql
SELECT drop_chunks(
'conditions',
older_than => INTERVAL '3 months',
newer_than => INTERVAL '4 months'
)
```
Example 3 (sql):
```sql
SELECT drop_chunks(
'conditions',
newer_than => now() + INTERVAL '3 months'
);
```
---
## timescaledb_information.chunks
**URL:** llms-txt#timescaledb_information.chunks
**Contents:**
- Samples
- Available columns
Get metadata about the chunks of hypertables.
This view shows metadata for the chunk's primary time-based dimension.
For information about a hypertable's secondary dimensions,
the [dimensions view][dimensions] should be used instead.
If the chunk's primary dimension is of a time datatype, `range_start` and
`range_end` are set. Otherwise, if the primary dimension type is integer based,
`range_start_integer` and `range_end_integer` are set.
Get information about the chunks of a hypertable.
Dimension builder `by_range` was introduced in TimescaleDB 2.13.
The `chunk_creation_time` metadata was introduced in TimescaleDB 2.13.
|Name|Type|Description|
|---|---|---|
| `hypertable_schema` | TEXT | Schema name of the hypertable |
| `hypertable_name` | TEXT | Table name of the hypertable |
| `chunk_schema` | TEXT | Schema name of the chunk |
| `chunk_name` | TEXT | Name of the chunk |
| `primary_dimension` | TEXT | Name of the column that is the primary dimension|
| `primary_dimension_type` | REGTYPE | Type of the column that is the primary dimension|
| `range_start` | TIMESTAMP WITH TIME ZONE | Start of the range for the chunk's dimension |
| `range_end` | TIMESTAMP WITH TIME ZONE | End of the range for the chunk's dimension |
| `range_start_integer` | BIGINT | Start of the range for the chunk's dimension, if the dimension type is integer based |
| `range_end_integer` | BIGINT | End of the range for the chunk's dimension, if the dimension type is integer based |
| `is_compressed` | BOOLEAN | Is the data in the chunk compressed?
Note that for distributed hypertables, this is the cached compression status of the chunk on the access node. The cached status on the access node and data node is not in sync in some scenarios. For example, if a user compresses or decompresses the chunk on the data node instead of the access node, or sets up compression policies directly on data nodes.
Use `chunk_compression_stats()` function to get real-time compression status for distributed chunks.|
| `chunk_tablespace` | TEXT | Tablespace used by the chunk|
| `data_nodes` | ARRAY | Nodes on which the chunk is replicated. This is applicable only to chunks for distributed hypertables |
| `chunk_creation_time` | TIMESTAMP WITH TIME ZONE | The time when this chunk was created for data addition |
===== PAGE: https://docs.tigerdata.com/api/informational-views/data_nodes/ =====
**Examples:**
Example 1 (sql):
```sql
CREATE TABLESPACE tablespace1 location '/usr/local/pgsql/data1';
CREATE TABLE hyper_int (a_col integer, b_col integer, c integer);
SELECT table_name from create_hypertable('hyper_int', by_range('a_col', 10));
CREATE OR REPLACE FUNCTION integer_now_hyper_int() returns int LANGUAGE SQL STABLE as $$ SELECT coalesce(max(a_col), 0) FROM hyper_int $$;
SELECT set_integer_now_func('hyper_int', 'integer_now_hyper_int');
INSERT INTO hyper_int SELECT generate_series(1,5,1), 10, 50;
SELECT attach_tablespace('tablespace1', 'hyper_int');
INSERT INTO hyper_int VALUES( 25 , 14 , 20), ( 25, 15, 20), (25, 16, 20);
SELECT * FROM timescaledb_information.chunks WHERE hypertable_name = 'hyper_int';
-[ RECORD 1 ]----------+----------------------
hypertable_schema | public
hypertable_name | hyper_int
chunk_schema | _timescaledb_internal
chunk_name | _hyper_7_10_chunk
primary_dimension | a_col
primary_dimension_type | integer
range_start |
range_end |
range_start_integer | 0
range_end_integer | 10
is_compressed | f
chunk_tablespace |
data_nodes |
-[ RECORD 2 ]----------+----------------------
hypertable_schema | public
hypertable_name | hyper_int
chunk_schema | _timescaledb_internal
chunk_name | _hyper_7_11_chunk
primary_dimension | a_col
primary_dimension_type | integer
range_start |
range_end |
range_start_integer | 20
range_end_integer | 30
is_compressed | f
chunk_tablespace | tablespace1
data_nodes |
```
---
## Delete data
**URL:** llms-txt#delete-data
**Contents:**
- Delete data with DELETE command
- Delete data by dropping chunks
You can delete data from a hypertable using a standard
[`DELETE`][postgres-delete] SQL command. If you want to delete old data once it
reaches a certain age, you can also drop entire chunks or set up a data
retention policy.
## Delete data with DELETE command
To delete data from a table, use the syntax `DELETE FROM ...`. In this example,
data is deleted from the table `conditions`, if the row's `temperature` or
`humidity` is below a certain level:
If you delete a lot of data, run
[`VACUUM`](https://www.postgresql.org/docs/current/sql-vacuum.html) or
`VACUUM FULL` to reclaim storage from the deleted or obsolete rows.
## Delete data by dropping chunks
TimescaleDB allows you to delete data by age, by dropping chunks from a
hypertable. You can do so either manually or by data retention policy.
To learn more, see the [data retention section][data-retention].
===== PAGE: https://docs.tigerdata.com/use-timescale/write-data/update/ =====
**Examples:**
Example 1 (sql):
```sql
DELETE FROM conditions WHERE temperature < 35 OR humidity < 60;
```
---
## attach_tablespace()
**URL:** llms-txt#attach_tablespace()
**Contents:**
- Samples
- Required arguments
- Optional arguments
Attach a tablespace to a hypertable and use it to store chunks. A
[tablespace][postgres-tablespaces] is a directory on the filesystem
that allows control over where individual tables and indexes are
stored on the filesystem. A common use case is to create a tablespace
for a particular storage disk, allowing tables to be stored
there. To learn more, see the [Postgres documentation on
tablespaces][postgres-tablespaces].
TimescaleDB can manage a set of tablespaces for each hypertable,
automatically spreading chunks across the set of tablespaces attached
to a hypertable. If a hypertable is hash partitioned, TimescaleDB
tries to place chunks that belong to the same partition in the same
tablespace. Changing the set of tablespaces attached to a hypertable
may also change the placement behavior. A hypertable with no attached
tablespaces has its chunks placed in the database's default
tablespace.
Attach the tablespace `disk1` to the hypertable `conditions`:
## Required arguments
|Name|Type|Description|
|---|---|---|
| `tablespace` | TEXT | Name of the tablespace to attach.|
| `hypertable` | REGCLASS | Hypertable to attach the tablespace to.|
Tablespaces need to be [created][postgres-createtablespace] before
being attached to a hypertable. Once created, tablespaces can be
attached to multiple hypertables simultaneously to share the
underlying disk storage. Associating a regular table with a tablespace
using the `TABLESPACE` option to `CREATE TABLE`, prior to calling
`create_hypertable`, has the same effect as calling
`attach_tablespace` immediately following `create_hypertable`.
## Optional arguments
|Name|Type|Description|
|---|---|---|
| `if_not_attached` | BOOLEAN |Set to true to avoid throwing an error if the tablespace is already attached to the table. A notice is issued instead. Defaults to false. |
===== PAGE: https://docs.tigerdata.com/api/hypertable/hypertable_size/ =====
**Examples:**
Example 1 (sql):
```sql
SELECT attach_tablespace('disk1', 'conditions');
SELECT attach_tablespace('disk2', 'conditions', if_not_attached => true);
```
---
## Use triggers on distributed hypertables
**URL:** llms-txt#use-triggers-on-distributed-hypertables
**Contents:**
- Create a trigger on a distributed hypertable
- Creating a trigger on a distributed hypertable
- Avoid processing a trigger multiple times
[Multi-node support is sunsetted][multi-node-deprecation].
TimescaleDB v2.13 is the last release that includes multi-node support for Postgres
versions 13, 14, and 15.
Triggers on distributed hypertables work in much the same way as triggers on
standard hypertables, and have the same limitations. But there are some
differences due to the data being distributed across multiple nodes:
* Row-level triggers fire on the data node where the row is inserted. The
triggers must fire where the data is stored, because `BEFORE` and `AFTER`
row triggers need access to the stored data. The chunks on the access node
do not contain any data, so they have no triggers.
* Statement-level triggers fire once on each affected node, including the
access node. For example, if a distributed hypertable includes 3 data nodes,
inserting 2 rows of data executes a statement-level trigger on the access
node and either 1 or 2 data nodes, depending on whether the rows go to the
same or different nodes.
* A replication factor greater than 1 further causes
the trigger to fire on multiple nodes. Each replica node fires the trigger.
## Create a trigger on a distributed hypertable
Create a trigger on a distributed hypertable by using [`CREATE
TRIGGER`][create-trigger] as usual. The trigger, and the function it executes,
is automatically created on each data node. If the trigger function references
any other functions or objects, they need to be present on all nodes before you
create the trigger.
### Creating a trigger on a distributed hypertable
1. If your trigger needs to reference another function or object, use
[`distributed_exec`][distributed_exec] to create the function or object on
all nodes.
1. Create the trigger function on the access node. This example creates a dummy
trigger that raises the notice 'trigger fired':
1. Create the trigger itself on the access node. This example causes the
trigger to fire whenever a row is inserted into the hypertable `hyper`. Note
that you don't need to manually create the trigger on the data nodes. This is
done automatically for you.
## Avoid processing a trigger multiple times
If you have a statement-level trigger, or a replication factor greater than 1,
the trigger fires multiple times. To avoid repetitive firing, you can set the
trigger function to check which data node it is executing on.
For example, write a trigger function that raises a different notice on the
access node compared to a data node:
===== PAGE: https://docs.tigerdata.com/self-hosted/distributed-hypertables/query/ =====
**Examples:**
Example 1 (sql):
```sql
CREATE OR REPLACE FUNCTION my_trigger_func()
RETURNS TRIGGER LANGUAGE PLPGSQL AS
body$
BEGIN
RAISE NOTICE 'trigger fired';
RETURN NEW;
END
body$;
```
Example 2 (sql):
```sql
CREATE TRIGGER my_trigger
AFTER INSERT ON hyper
FOR EACH ROW
EXECUTE FUNCTION my_trigger_func();
```
Example 3 (sql):
```sql
CREATE OR REPLACE FUNCTION my_trigger_func()
RETURNS TRIGGER LANGUAGE PLPGSQL AS
body$
DECLARE
is_access_node boolean;
BEGIN
SELECT is_distributed INTO is_access_node
FROM timescaledb_information.hypertables
WHERE hypertable_name =
AND hypertable_schema = ;
IF is_access_node THEN
RAISE NOTICE 'trigger fired on the access node';
ELSE
RAISE NOTICE 'trigger fired on a data node';
END IF;
RETURN NEW;
END
body$;
```
---
## remove_columnstore_policy()
**URL:** llms-txt#remove_columnstore_policy()
**Contents:**
- Samples
- Arguments
Remove a columnstore policy from a hypertable or continuous aggregate.
To restart automatic chunk migration to the columnstore, you need to call
[add_columnstore_policy][add_columnstore_policy] again.
Since [TimescaleDB v2.18.0](https://github.com/timescale/timescaledb/releases/tag/2.18.0)
You see the columnstore policies in the [informational views][informational-views].
- **Remove the columnstore policy from the `cpu` table**:
- **Remove the columnstore policy from the `cpu_weekly` continuous aggregate**:
| Name | Type | Default | Required | Description |
|--|--|--|--|-|
|`hypertable`|REGCLASS|-|✔| Name of the hypertable or continuous aggregate to remove the policy from|
| `if_exists` | BOOLEAN | `false` |✖| Set to `true` so this job fails with a warning rather than an error if a columnstore policy does not exist on `hypertable` |
===== PAGE: https://docs.tigerdata.com/api/hypercore/chunk_columnstore_settings/ =====
**Examples:**
Example 1 (unknown):
```unknown
- **Remove the columnstore policy from the `cpu_weekly` continuous aggregate**:
```
---
## Slow tiering of chunks
**URL:** llms-txt#slow-tiering-of-chunks
Chunks are tiered asynchronously. Chunks are selected to be tiered to the object storage tier one at a time ordered by their enqueue time.
To see the chunks waiting to be tiered query the `timescaledb_osm.chunks_queued_for_tiering` view
Processing all the chunks in the queue may take considerable time if a large quantity of data is being migrated to the object storage tier.
===== PAGE: https://docs.tigerdata.com/self-hosted/index/ =====
**Examples:**
Example 1 (sql):
```sql
select count(*) from timescaledb_osm.chunks_queued_for_tiering
```
---
## set_number_partitions()
**URL:** llms-txt#set_number_partitions()
**Contents:**
- Required arguments
- Optional arguments
- Sample usage
[Multi-node support is sunsetted][multi-node-deprecation].
TimescaleDB v2.13 is the last release that includes multi-node support for Postgres
versions 13, 14, and 15.
Sets the number of partitions (slices) of a space dimension on a
hypertable. The new partitioning only affects new chunks.
## Required arguments
| Name | Type | Description |
| --- | --- | --- |
| `hypertable`| REGCLASS | Hypertable to update the number of partitions for.|
| `number_partitions` | INTEGER | The new number of partitions for the dimension. Must be greater than 0 and less than 32,768. |
## Optional arguments
| Name | Type | Description |
| --- | --- | --- |
| `dimension_name` | REGCLASS | The name of the space dimension to set the number of partitions for. |
The `dimension_name` needs to be explicitly specified only if the
hypertable has more than one space dimension. An error is thrown
otherwise.
For a table with a single space dimension:
For a table with more than one space dimension:
===== PAGE: https://docs.tigerdata.com/api/distributed-hypertables/add_data_node/ =====
**Examples:**
Example 1 (sql):
```sql
SELECT set_number_partitions('conditions', 2);
```
Example 2 (sql):
```sql
SELECT set_number_partitions('conditions', 2, 'device_id');
```
---
## Information views
**URL:** llms-txt#information-views
TimescaleDB makes complex database features like partitioning and data retention
easy to use with our comprehensive APIs. TimescaleDB works hard to provide
detailed information about the state of your data, hypertables, chunks, and any
jobs or policies you have in place.
These views provide the data and statistics you need to keep track of your
database.
===== PAGE: https://docs.tigerdata.com/api/configuration/ =====
---
## Real-time aggregates
**URL:** llms-txt#real-time-aggregates
**Contents:**
- Use real-time aggregates
- Real-time aggregates and refreshing historical data
Rapidly growing data means you need more control over what to aggregate and how to aggregate it. With this in mind, Tiger Data equips you with tools for more fine-tuned data analysis.
By default, continuous aggregates do not include the most recent data chunk from the
underlying hypertable. Real-time aggregates, however, use the aggregated data **and** add the
most recent raw data to it. This provides accurate and up-to-date results, without
needing to aggregate data as it is being written.
In TimescaleDB v2.13 and later, real-time aggregates are **DISABLED** by default. In earlier versions, real-time aggregates are **ENABLED** by default; when you create a continuous aggregate, queries to that view include the results from the most recent raw data.
For more detail on the comparison between continuous and real-time aggregates,
see our [real-time aggregate blog post][blog-rtaggs].
## Use real-time aggregates
You can enable and disable real-time aggregation by setting the
`materialized_only` parameter when you create or alter the view.
1. Enable real-time aggregation for an existing continuous aggregate:
1. Disable real-time aggregation:
## Real-time aggregates and refreshing historical data
Real-time aggregates automatically add the most recent data when you query your
continuous aggregate. In other words, they include data _more recent than_ your
last materialized bucket.
If you add new _historical_ data to an already-materialized bucket, it won't be
reflected in a real-time aggregate. You should wait for the next scheduled
refresh, or manually refresh by calling `refresh_continuous_aggregate`. You can
think of real-time aggregates as being eventually consistent for historical
data.
For more information, see the [troubleshooting section][troubleshooting].
===== PAGE: https://docs.tigerdata.com/use-timescale/continuous-aggregates/create-a-continuous-aggregate/ =====
**Examples:**
Example 1 (sql):
```sql
ALTER MATERIALIZED VIEW table_name set (timescaledb.materialized_only = false);
```
Example 2 (sql):
```sql
ALTER MATERIALIZED VIEW table_name set (timescaledb.materialized_only = true);
```
---
## detach_tablespace()
**URL:** llms-txt#detach_tablespace()
**Contents:**
- Samples
- Required arguments
- Optional arguments
Detach a tablespace from one or more hypertables. This _only_ means
that _new_ chunks are not placed on the detached tablespace. This
is useful, for instance, when a tablespace is running low on disk
space and one would like to prevent new chunks from being created in
the tablespace. The detached tablespace itself and any existing chunks
with data on it remains unchanged and continue to work as
before, including being available for queries. Note that newly
inserted data rows may still be inserted into an existing chunk on the
detached tablespace since existing data is not cleared from a detached
tablespace. A detached tablespace can be reattached if desired to once
again be considered for chunk placement.
Detach the tablespace `disk1` from the hypertable `conditions`:
Detach the tablespace `disk1` from all hypertables that the current
user has permissions for:
## Required arguments
|Name|Type|Description|
|---|---|---|
| `tablespace` | TEXT | Tablespace to detach.|
When giving only the tablespace name as argument, the given tablespace
is detached from all hypertables that the current role has the
appropriate permissions for. Therefore, without proper permissions,
the tablespace may still receive new chunks after this command
is issued.
## Optional arguments
|Name|Type|Description|
|---|---|---|
| `hypertable` | REGCLASS | Hypertable to detach a the tablespace from.|
| `if_attached` | BOOLEAN | Set to true to avoid throwing an error if the tablespace is not attached to the given table. A notice is issued instead. Defaults to false. |
When specifying a specific hypertable, the tablespace is only
detached from the given hypertable and thus may remain attached to
other hypertables.
===== PAGE: https://docs.tigerdata.com/api/hypertable/chunks_detailed_size/ =====
**Examples:**
Example 1 (sql):
```sql
SELECT detach_tablespace('disk1', 'conditions');
SELECT detach_tablespace('disk2', 'conditions', if_attached => true);
```
Example 2 (sql):
```sql
SELECT detach_tablespace('disk1');
```
---
## About tablespaces
**URL:** llms-txt#about-tablespaces
**Contents:**
- How hypertable chunks are assigned tablespaces
Tablespaces are used to determine the physical location of the tables and
indexes in your database. In most cases, you want to use faster storage to store
data that is accessed frequently, and slower storage for data that is accessed
less often.
Hypertables consist of a number of chunks, and each chunk can be located in a
specific tablespace. This allows you to grow your hypertables across many disks.
When you create a new chunk, a tablespace is automatically selected to store the
chunk's data.
You can attach and detach tablespaces on a hypertable. When a disk runs
out of space, you can [detach][detach_tablespace] the full tablespace from the
hypertable, and than [attach][attach_tablespace] a tablespace associated with a
new disk. To see the tablespaces for you hypertable, use the
[`show_tablespaces`][show_tablespaces]
command.
## How hypertable chunks are assigned tablespaces
A hypertable can be partitioned in multiple dimensions, but only one of the
dimensions is used to determine the tablespace assigned to a particular
hypertable chunk. If a hypertable has one or more hash-partitioned, or space,
dimensions, it uses the first hash-partitioned dimension. Otherwise, it uses the
first time dimension.
This strategy ensures that hash-partitioned hypertables have chunks co-located
according to hash partition, as long as the list of tablespaces attached to the
hypertable remains the same. Modulo calculation is used to pick a tablespace, so
there can be more partitions than tablespaces. For example, if there are two
tablespaces, partition number three uses the first tablespace.
Hypertables that are only time-partitioned add new partitions continuously, and
therefore have chunks assigned to tablespaces in a way similar to round-robin.
It is possible to attach more tablespaces than there are partitions for the
hypertable. In this case, some tablespaces remain unused until others are detached
or additional partitions are added. This is especially true for hash-partitioned
tables.
===== PAGE: https://docs.tigerdata.com/use-timescale/schema-management/about-schemas/ =====
---
## Altering and updating table schemas
**URL:** llms-txt#altering-and-updating-table-schemas
To modify the schema of an existing hypertable, you can use the `ALTER TABLE`
command. When you change the hypertable schema, the changes are also propagated
to each underlying chunk.
While you can change the schema of an existing hypertable, you cannot change
the schema of a continuous aggregate. For continuous aggregates, the only
permissible changes are renaming a view, setting a schema, changing the owner,
and adjusting other parameters.
For example, to add a new column called `address` to a table called `distributors`:
This creates the new column, with all existing entries recording `NULL` for the
new column.
Changing the schema can, in some cases, consume a lot of resources. This is
especially true if it requires underlying data to be rewritten. If you want to
check your schema change before you apply it, you can use a `CHECK` constraint,
like this:
This scans the table to verify that existing rows meet the constraint, but does
not require a table rewrite.
For more information, see the
[Postgres ALTER TABLE documentation][postgres-alter-table].
===== PAGE: https://docs.tigerdata.com/use-timescale/schema-management/about-constraints/ =====
**Examples:**
Example 1 (sql):
```sql
ALTER TABLE distributors
ADD COLUMN address varchar(30);
```
Example 2 (sql):
```sql
ALTER TABLE distributors
ADD CONSTRAINT zipchk
CHECK (char_length(zipcode) = 5);
```
---
## detach_tablespaces()
**URL:** llms-txt#detach_tablespaces()
**Contents:**
- Samples
- Required arguments
Detach all tablespaces from a hypertable. After issuing this command
on a hypertable, it no longer has any tablespaces attached to
it. New chunks are instead placed in the database's default
tablespace.
Detach all tablespaces from the hypertable `conditions`:
## Required arguments
|Name|Type|Description|
|---|---|---|
| `hypertable` | REGCLASS | Hypertable to detach a the tablespace from.|
===== PAGE: https://docs.tigerdata.com/api/hypertable/create_hypertable/ =====
**Examples:**
Example 1 (sql):
```sql
SELECT detach_tablespaces('conditions');
```
---
## hypertable_size()
**URL:** llms-txt#hypertable_size()
**Contents:**
- Samples
- Required arguments
- Returns
Get the total disk space used by a hypertable or continuous aggregate,
that is, the sum of the size for the table itself including chunks,
any indexes on the table, and any toast tables. The size is reported
in bytes. This is equivalent to computing the sum of `total_bytes`
column from the output of `hypertable_detailed_size` function.
When a continuous aggregate name is provided, the function
transparently looks up the backing hypertable and returns its statistics
instead.
For more information about using hypertables, including chunk size partitioning,
see the [hypertable section][hypertable-docs].
Get the size information for a hypertable.
Get the size information for all hypertables.
Get the size information for a continuous aggregate.
## Required arguments
|Name|Type|Description|
|-|-|-|
|`hypertable`|REGCLASS|Hypertable or continuous aggregate to show size of.|
|Name|Type|Description|
|-|-|-|
|hypertable_size|BIGINT|Total disk space used by the specified hypertable, including all indexes and TOAST data|
`NULL` is returned if the function is executed on a non-hypertable relation.
===== PAGE: https://docs.tigerdata.com/api/continuous-aggregates/alter_policies/ =====
**Examples:**
Example 1 (sql):
```sql
SELECT hypertable_size('devices');
hypertable_size
-----------------
73728
```
Example 2 (sql):
```sql
SELECT hypertable_name, hypertable_size(format('%I.%I', hypertable_schema, hypertable_name)::regclass)
FROM timescaledb_information.hypertables;
```
Example 3 (sql):
```sql
SELECT hypertable_size('device_stats_15m');
hypertable_size
-----------------
73728
```
---
 ### Closed and open dimensions for space partitioning
Space partitioning dimensions can be open or closed. A closed dimension has a
fixed number of partitions, and usually uses some hashing to match values to
partitions. An open dimension does not have a fixed number of partitions, and
usually has each chunk cover a certain range. In most cases the time dimension
is open and the space dimension is closed.
If you use the `create_hypertable` command to create your hypertable, then the
space dimension is open, and there is no way to adjust this. To create a
hypertable with a closed space dimension, create the hypertable with only the
time dimension first. Then use the `add_dimension` command to explicitly add an
open device. If you set the range to `1`, each device has its own chunks. This
can help you work around some limitations of regular space dimensions, and is
especially useful if you want to make some chunks readily available for
exclusion.
### Repartitioning distributed hypertables
You can expand distributed hypertables by adding additional data nodes. If you
now have fewer space partitions than data nodes, you need to increase the
number of space partitions to make use of your new nodes. The new partitioning
configuration only affects new chunks. In this diagram, an extra data node
was added during the third time interval. The fourth time interval now includes
four chunks, while the previous time intervals still include three:
### Closed and open dimensions for space partitioning
Space partitioning dimensions can be open or closed. A closed dimension has a
fixed number of partitions, and usually uses some hashing to match values to
partitions. An open dimension does not have a fixed number of partitions, and
usually has each chunk cover a certain range. In most cases the time dimension
is open and the space dimension is closed.
If you use the `create_hypertable` command to create your hypertable, then the
space dimension is open, and there is no way to adjust this. To create a
hypertable with a closed space dimension, create the hypertable with only the
time dimension first. Then use the `add_dimension` command to explicitly add an
open device. If you set the range to `1`, each device has its own chunks. This
can help you work around some limitations of regular space dimensions, and is
especially useful if you want to make some chunks readily available for
exclusion.
### Repartitioning distributed hypertables
You can expand distributed hypertables by adding additional data nodes. If you
now have fewer space partitions than data nodes, you need to increase the
number of space partitions to make use of your new nodes. The new partitioning
configuration only affects new chunks. In this diagram, an extra data node
was added during the third time interval. The fourth time interval now includes
four chunks, while the previous time intervals still include three:
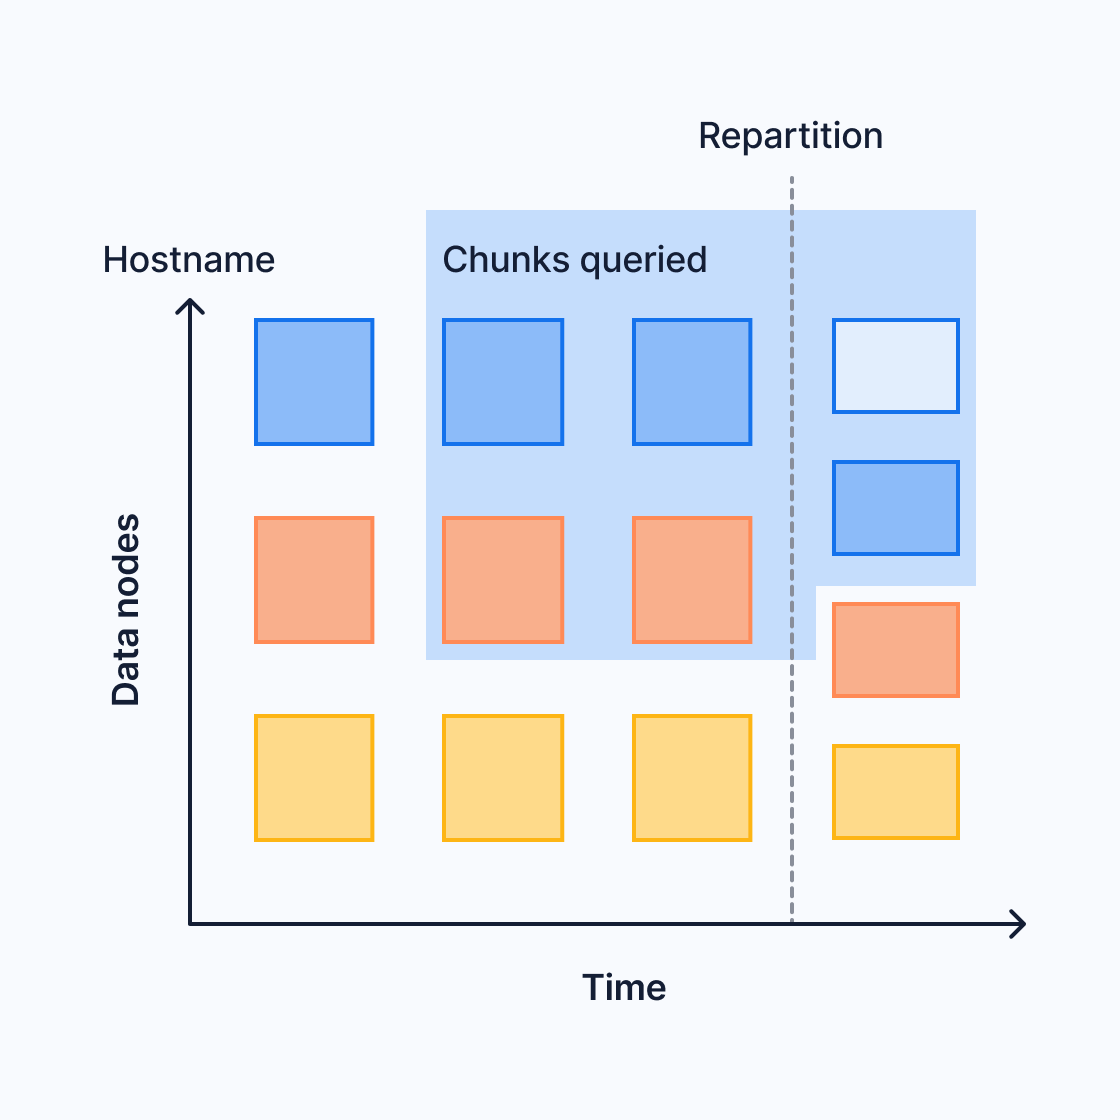 This can affect queries that span the two different partitioning configurations.
For more information, see the section on
[limitations of query push down][limitations].
## Replicating distributed hypertables
To replicate distributed hypertables at the chunk level, configure the
hypertables to write each chunk to multiple data nodes. This native replication
ensures that a distributed hypertable is protected against data node failures
and provides an alternative to fully replicating each data node using streaming
replication to provide high availability. Only the data nodes are replicated
using this method. The access node is not replicated.
For more information about replication and high availability, see the
[multi-node HA section][multi-node-ha].
## Performance of distributed hypertables
A distributed hypertable horizontally scales your data storage, so you're not
limited by the storage of any single machine. It also increases performance for
some queries.
Whether, and by how much, your performance increases depends on your query
patterns and data partitioning. Performance increases when the access node can
push down query processing to data nodes. For example, if you query with a
`GROUP BY` clause, and the data is partitioned by the `GROUP BY` column, the
data nodes can perform the processing and send only the final results to the
access node.
If processing can't be done on the data nodes, the access node needs to pull in
raw or partially processed data and do the processing locally. For more
information, see the [limitations of pushing down
queries][limitations-pushing-down].
The access node can use a full or a partial method to push down queries.
Computations that can be pushed down include sorts and groupings. Joins on data
nodes aren't currently supported.
To see how a query is pushed down to a data node, use `EXPLAIN VERBOSE` to
inspect the query plan and the remote SQL statement sent to each data node.
In the full push-down method, the access node offloads all computation to the
data nodes. It receives final results from the data nodes and appends them. To
fully push down an aggregate query, the `GROUP BY` clause must include either:
* All the partitioning columns _or_
* Only the first space-partitioning column
For example, say that you want to calculate the `max` temperature for each
location:
If `location` is your only space partition, each data node can compute the
maximum on its own subset of the data.
### Partial push down
In the partial push-down method, the access node offloads most of the
computation to the data nodes. It receives partial results from the data nodes
and calculates a final aggregate by combining the partials.
For example, say that you want to calculate the `max` temperature across all
locations. Each data node computes a local maximum, and the access node computes
the final result by computing the maximum of all the local maximums:
### Limitations of query push down
Distributed hypertables get improved performance when they can push down queries
to the data nodes. But the query planner might not be able to push down every
query. Or it might only be able to partially push down a query. This can occur
for several reasons:
* You changed the partitioning configuration. For example, you added new data
nodes and increased the number of space partitions to match. This can cause
chunks for the same space value to be stored on different nodes. For
instance, say you partition by `device_id`. You start with 3 partitions, and
data for `device_B` is stored on node 3. You later increase to 4 partitions.
New chunks for `device_B` are now stored on node 4. If you query across the
repartitioning boundary, a final aggregate for `device_B` cannot be
calculated on node 3 or node 4 alone. Partially processed data must be sent
to the access node for final aggregation. The TimescaleDB query planner
dynamically detects such overlapping chunks and reverts to the appropriate
partial aggregation plan. This means that you can add data nodes and
repartition your data to achieve elasticity without worrying about query
results. In some cases, your query could be slightly less performant, but
this is rare and the affected chunks usually move quickly out of your
retention window.
* The query includes [non-immutable functions][volatility] and expressions.
The function cannot be pushed down to the data node, because by definition,
it isn't guaranteed to have a consistent result across each node. An example
non-immutable function is [`random()`][random-func], which depends on the
current seed.
* The query includes a job function. The access node assumes the
function doesn't exist on the data nodes, and doesn't push it down.
TimescaleDB uses several optimizations to avoid these limitations, and push down
as many queries as possible. For example, `now()` is a non-immutable function.
The database converts it to a constant on the access node and pushes down the
constant timestamp to the data nodes.
## Combine distributed hypertables and standard hypertables
You can use distributed hypertables in the same database as standard hypertables
and standard Postgres tables. This mostly works the same way as having
multiple standard tables, with a few differences. For example, if you `JOIN` a
standard table and a distributed hypertable, the access node needs to fetch the
raw data from the data nodes and perform the `JOIN` locally.
All the limitations of regular hypertables also apply to distributed
hypertables. In addition, the following limitations apply specifically
to distributed hypertables:
* Distributed scheduling of background jobs is not supported. Background jobs
created on an access node are scheduled and executed on this access node
without distributing the jobs to data nodes.
* Continuous aggregates can aggregate data distributed across data nodes, but
the continuous aggregate itself must live on the access node. This could
create a limitation on how far you can scale your installation, but because
continuous aggregates are downsamples of the data, this does not usually
create a problem.
* Reordering chunks is not supported.
* Tablespaces cannot be attached to a distributed hypertable on the access
node. It is still possible to attach tablespaces on data nodes.
* Roles and permissions are assumed to be consistent across the nodes of a
distributed database, but consistency is not enforced.
* Joins on data nodes are not supported. Joining a distributed hypertable with
another table requires the other table to reside on the access node. This
also limits the performance of joins on distributed hypertables.
* Tables referenced by foreign key constraints in a distributed hypertable
must be present on the access node and all data nodes. This applies also to
referenced values.
* Parallel-aware scans and appends are not supported.
* Distributed hypertables do not natively provide a consistent restore point
for backup and restore across nodes. Use the
[`create_distributed_restore_point`][create_distributed_restore_point]
command, and make sure you take care when you restore individual backups to
access and data nodes.
* For native replication limitations, see the
[native replication section][native-replication].
* User defined functions have to be manually installed on the data nodes so
that the function definition is available on both access and data nodes.
This is particularly relevant for functions that are registered with
`set_integer_now_func`.
Note that these limitations concern usage from the access node. Some
currently unsupported features might still work on individual data nodes,
but such usage is neither tested nor officially supported. Future versions
of TimescaleDB might remove some of these limitations.
===== PAGE: https://docs.tigerdata.com/self-hosted/backup-and-restore/logical-backup/ =====
**Examples:**
Example 1 (sql):
```sql
SELECT location, max(temperature)
FROM conditions
GROUP BY location;
```
Example 2 (sql):
```sql
SELECT max(temperature) FROM conditions;
```
---
## reorder_chunk()
**URL:** llms-txt#reorder_chunk()
**Contents:**
- Samples
- Required arguments
- Optional arguments
- Returns
Reorder a single chunk's heap to follow the order of an index. This function
acts similarly to the [Postgres CLUSTER command][postgres-cluster] , however
it uses lower lock levels so that, unlike with the CLUSTER command, the chunk
and hypertable are able to be read for most of the process. It does use a bit
more disk space during the operation.
This command can be particularly useful when data is often queried in an order
different from that in which it was originally inserted. For example, data is
commonly inserted into a hypertable in loose time order (for example, many devices
concurrently sending their current state), but one might typically query the
hypertable about a _specific_ device. In such cases, reordering a chunk using an
index on `(device_id, time)` can lead to significant performance improvement for
these types of queries.
One can call this function directly on individual chunks of a hypertable, but
using [add_reorder_policy][add_reorder_policy] is often much more convenient.
Reorder a chunk on an index:
## Required arguments
|Name|Type|Description|
|---|---|---|
| `chunk` | REGCLASS | Name of the chunk to reorder. |
## Optional arguments
|Name|Type|Description|
|---|---|---|
| `index` | REGCLASS | The name of the index (on either the hypertable or chunk) to order by.|
| `verbose` | BOOLEAN | Setting to true displays messages about the progress of the reorder command. Defaults to false.|
This function returns void.
===== PAGE: https://docs.tigerdata.com/api/hypertable/add_reorder_policy/ =====
**Examples:**
Example 1 (sql):
```sql
SELECT reorder_chunk('_timescaledb_internal._hyper_1_10_chunk', '_timescaledb_internal.conditions_device_id_time_idx');
```
---
## create_distributed_hypertable()
**URL:** llms-txt#create_distributed_hypertable()
**Contents:**
- Required arguments
- Optional arguments
- Returns
- Sample usage
- Best practices
[Multi-node support is sunsetted][multi-node-deprecation].
TimescaleDB v2.13 is the last release that includes multi-node support for Postgres
versions 13, 14, and 15.
Create a TimescaleDB hypertable distributed across a multinode environment.
`create_distributed_hypertable()` replaces [`create_hypertable() (old interface)`][create-hypertable-old]. Distributed tables use the old API. The new generalized [`create_hypertable`][create-hypertable-new] API was introduced in TimescaleDB v2.13.
## Required arguments
|Name|Type| Description |
|---|---|----------------------------------------------------------------------------------------------|
| `relation` | REGCLASS | Identifier of the table you want to convert to a hypertable. |
| `time_column_name` | TEXT | Name of the column that contains time values, as well as the primary column to partition by. |
## Optional arguments
|Name|Type|Description|
|---|---|---|
| `partitioning_column` | TEXT | Name of an additional column to partition by. |
| `number_partitions` | INTEGER | Number of hash partitions to use for `partitioning_column`. Must be > 0. Default is the number of `data_nodes`. |
| `associated_schema_name` | TEXT | Name of the schema for internal hypertable tables. Default is `_timescaledb_internal`. |
| `associated_table_prefix` | TEXT | Prefix for internal hypertable chunk names. Default is `_hyper`. |
| `chunk_time_interval` | INTERVAL | Interval in event time that each chunk covers. Must be > 0. Default is 7 days. |
| `create_default_indexes` | BOOLEAN | Boolean whether to create default indexes on time/partitioning columns. Default is TRUE. |
| `if_not_exists` | BOOLEAN | Boolean whether to print warning if table already converted to hypertable or raise exception. Default is FALSE. |
| `partitioning_func` | REGCLASS | The function to use for calculating a value's partition.|
| `migrate_data` | BOOLEAN | Set to TRUE to migrate any existing data from the `relation` table to chunks in the new hypertable. A non-empty table generates an error without this option. Large tables may take significant time to migrate. Default is FALSE. |
| `time_partitioning_func` | REGCLASS | Function to convert incompatible primary time column values to compatible ones. The function must be `IMMUTABLE`. |
| `replication_factor` | INTEGER | The number of data nodes to which the same data is written to. This is done by creating chunk copies on this amount of data nodes. Must be >= 1; If not set, the default value is determined by the `timescaledb.hypertable_replication_factor_default` GUC. Read [the best practices][best-practices] before changing the default. |
| `data_nodes` | ARRAY | The set of data nodes used for the distributed hypertable. If not present, defaults to all data nodes known by the access node (the node on which the distributed hypertable is created). |
|Column|Type|Description|
|---|---|---|
| `hypertable_id` | INTEGER | ID of the hypertable in TimescaleDB. |
| `schema_name` | TEXT | Schema name of the table converted to hypertable. |
| `table_name` | TEXT | Table name of the table converted to hypertable. |
| `created` | BOOLEAN | TRUE if the hypertable was created, FALSE when `if_not_exists` is TRUE and no hypertable was created. |
Create a table `conditions` which is partitioned across data
nodes by the 'location' column. Note that the number of space
partitions is automatically equal to the number of data nodes assigned
to this hypertable (all configured data nodes in this case, as
`data_nodes` is not specified).
Create a table `conditions` using a specific set of data nodes.
* **Hash partitions**: Best practice for distributed hypertables is to enable [hash partitions](https://www.techopedia.com/definition/31996/hash-partitioning).
With hash partitions, incoming data is divided between the data nodes. Without hash partition, all
data for each time slice is written to a single data node.
* **Time intervals**: Follow the guidelines for `chunk_time_interval` defined in [`create_hypertable`]
[create-hypertable-old].
When you enable hash partitioning, the hypertable is evenly distributed across the data nodes. This
means you can set a larger time interval. For example, you ingest 10 GB of data per day shared over
five data nodes, each node has 64 GB of memory. If this is the only table being served by these data nodes, use a time interval of 1 week:
If you do not enable hash partitioning, use the same `chunk_time_interval` settings as a non-distributed
instance. This is because all incoming data is handled by a single node.
* **Replication factor**: `replication_factor` defines the number of data nodes a newly created chunk is
replicated in. For example, when you set `replication_factor` to `3`, each chunk exists on 3 separate
data nodes. Rows written to a chunk are inserted into all data notes in a two-phase commit protocol.
If a data node fails or is removed, no data is lost. Writes succeed on the other data nodes. However, the
chunks on the lost data node are now under-replicated. When the failed data node becomes available, rebalance the chunks with a call to [copy_chunk][copy_chunk].
===== PAGE: https://docs.tigerdata.com/api/distributed-hypertables/attach_data_node/ =====
**Examples:**
Example 1 (sql):
```sql
SELECT create_distributed_hypertable('conditions', 'time', 'location');
```
Example 2 (sql):
```sql
SELECT create_distributed_hypertable('conditions', 'time', 'location',
data_nodes => '{ "data_node_1", "data_node_2", "data_node_4", "data_node_7" }');
```
Example 3 (unknown):
```unknown
7 days * 10 GB 70
-------------------- == --- ~= 22% of main memory used for the most recent chunks
5 data nodes * 64 GB 320
```
---
## Manual compression
**URL:** llms-txt#manual-compression
**Contents:**
- Selecting chunks to compress
- Compressing chunks manually
- Manually compress chunks in a single command
- Roll up uncompressed chunks when compressing
In most cases, an [automated compression policy][add_compression_policy] is sufficient to automatically compress your
chunks. However, if you want more control, you can also use manual synchronous compression of specific chunks.
Before you start, you need a list of chunks to compress. In this example, you
use a hypertable called `example`, and compress chunks older than three days.
### Selecting chunks to compress
1. At the psql prompt, select all chunks in the table `example` that are older
than three days:
1. This returns a list of chunks. Take note of the chunks' names:
||show_chunks|
|---|---|
|1|_timescaledb_internal_hyper_1_2_chunk|
|2|_timescaledb_internal_hyper_1_3_chunk|
When you are happy with the list of chunks, you can use the chunk names to
manually compress each one.
### Compressing chunks manually
1. At the psql prompt, compress the chunk:
1. Check the results of the compression with this command:
The results show the chunks for the given hypertable, their compression
status, and some other statistics:
|chunk_schema|chunk_name|compression_status|before_compression_table_bytes|before_compression_index_bytes|before_compression_toast_bytes|before_compression_total_bytes|after_compression_table_bytes|after_compression_index_bytes|after_compression_toast_bytes|after_compression_total_bytes|node_name|
|---|---|---|---|---|---|---|---|---|---|---|---|
|_timescaledb_internal|_hyper_1_1_chunk|Compressed|8192 bytes|16 kB|8192 bytes|32 kB|8192 bytes|16 kB|8192 bytes|32 kB||
|_timescaledb_internal|_hyper_1_20_chunk|Uncompressed||||||||||
1. Repeat for all chunks you want to compress.
## Manually compress chunks in a single command
Alternatively, you can select the chunks and compress them in a single command
by using the output of the `show_chunks` command to compress each one. For
example, use this command to compress chunks between one and three weeks old
if they are not already compressed:
## Roll up uncompressed chunks when compressing
In TimescaleDB v2.9 and later, you can roll up multiple uncompressed chunks into
a previously compressed chunk as part of your compression procedure. This allows
you to have much smaller uncompressed chunk intervals, which reduces the disk
space used for uncompressed data. For example, if you have multiple smaller
uncompressed chunks in your data, you can roll them up into a single compressed
chunk.
To roll up your uncompressed chunks into a compressed chunk, alter the compression
settings to set the compress chunk time interval and run compression operations
to roll up the chunks while compressing.
The default setting of `compress_orderby` is `'time DESC'` (the descending or DESC command is used to sort the data returned in ascending order), which causes chunks to be re-compressed
many times during the rollup, possibly leading to a steep performance penalty.
Set `timescaledb.compress_orderby = 'time ASC'` to avoid this penalty.
The time interval you choose must be a multiple of the uncompressed chunk
interval. For example, if your uncompressed chunk interval is one week, your
`
This can affect queries that span the two different partitioning configurations.
For more information, see the section on
[limitations of query push down][limitations].
## Replicating distributed hypertables
To replicate distributed hypertables at the chunk level, configure the
hypertables to write each chunk to multiple data nodes. This native replication
ensures that a distributed hypertable is protected against data node failures
and provides an alternative to fully replicating each data node using streaming
replication to provide high availability. Only the data nodes are replicated
using this method. The access node is not replicated.
For more information about replication and high availability, see the
[multi-node HA section][multi-node-ha].
## Performance of distributed hypertables
A distributed hypertable horizontally scales your data storage, so you're not
limited by the storage of any single machine. It also increases performance for
some queries.
Whether, and by how much, your performance increases depends on your query
patterns and data partitioning. Performance increases when the access node can
push down query processing to data nodes. For example, if you query with a
`GROUP BY` clause, and the data is partitioned by the `GROUP BY` column, the
data nodes can perform the processing and send only the final results to the
access node.
If processing can't be done on the data nodes, the access node needs to pull in
raw or partially processed data and do the processing locally. For more
information, see the [limitations of pushing down
queries][limitations-pushing-down].
The access node can use a full or a partial method to push down queries.
Computations that can be pushed down include sorts and groupings. Joins on data
nodes aren't currently supported.
To see how a query is pushed down to a data node, use `EXPLAIN VERBOSE` to
inspect the query plan and the remote SQL statement sent to each data node.
In the full push-down method, the access node offloads all computation to the
data nodes. It receives final results from the data nodes and appends them. To
fully push down an aggregate query, the `GROUP BY` clause must include either:
* All the partitioning columns _or_
* Only the first space-partitioning column
For example, say that you want to calculate the `max` temperature for each
location:
If `location` is your only space partition, each data node can compute the
maximum on its own subset of the data.
### Partial push down
In the partial push-down method, the access node offloads most of the
computation to the data nodes. It receives partial results from the data nodes
and calculates a final aggregate by combining the partials.
For example, say that you want to calculate the `max` temperature across all
locations. Each data node computes a local maximum, and the access node computes
the final result by computing the maximum of all the local maximums:
### Limitations of query push down
Distributed hypertables get improved performance when they can push down queries
to the data nodes. But the query planner might not be able to push down every
query. Or it might only be able to partially push down a query. This can occur
for several reasons:
* You changed the partitioning configuration. For example, you added new data
nodes and increased the number of space partitions to match. This can cause
chunks for the same space value to be stored on different nodes. For
instance, say you partition by `device_id`. You start with 3 partitions, and
data for `device_B` is stored on node 3. You later increase to 4 partitions.
New chunks for `device_B` are now stored on node 4. If you query across the
repartitioning boundary, a final aggregate for `device_B` cannot be
calculated on node 3 or node 4 alone. Partially processed data must be sent
to the access node for final aggregation. The TimescaleDB query planner
dynamically detects such overlapping chunks and reverts to the appropriate
partial aggregation plan. This means that you can add data nodes and
repartition your data to achieve elasticity without worrying about query
results. In some cases, your query could be slightly less performant, but
this is rare and the affected chunks usually move quickly out of your
retention window.
* The query includes [non-immutable functions][volatility] and expressions.
The function cannot be pushed down to the data node, because by definition,
it isn't guaranteed to have a consistent result across each node. An example
non-immutable function is [`random()`][random-func], which depends on the
current seed.
* The query includes a job function. The access node assumes the
function doesn't exist on the data nodes, and doesn't push it down.
TimescaleDB uses several optimizations to avoid these limitations, and push down
as many queries as possible. For example, `now()` is a non-immutable function.
The database converts it to a constant on the access node and pushes down the
constant timestamp to the data nodes.
## Combine distributed hypertables and standard hypertables
You can use distributed hypertables in the same database as standard hypertables
and standard Postgres tables. This mostly works the same way as having
multiple standard tables, with a few differences. For example, if you `JOIN` a
standard table and a distributed hypertable, the access node needs to fetch the
raw data from the data nodes and perform the `JOIN` locally.
All the limitations of regular hypertables also apply to distributed
hypertables. In addition, the following limitations apply specifically
to distributed hypertables:
* Distributed scheduling of background jobs is not supported. Background jobs
created on an access node are scheduled and executed on this access node
without distributing the jobs to data nodes.
* Continuous aggregates can aggregate data distributed across data nodes, but
the continuous aggregate itself must live on the access node. This could
create a limitation on how far you can scale your installation, but because
continuous aggregates are downsamples of the data, this does not usually
create a problem.
* Reordering chunks is not supported.
* Tablespaces cannot be attached to a distributed hypertable on the access
node. It is still possible to attach tablespaces on data nodes.
* Roles and permissions are assumed to be consistent across the nodes of a
distributed database, but consistency is not enforced.
* Joins on data nodes are not supported. Joining a distributed hypertable with
another table requires the other table to reside on the access node. This
also limits the performance of joins on distributed hypertables.
* Tables referenced by foreign key constraints in a distributed hypertable
must be present on the access node and all data nodes. This applies also to
referenced values.
* Parallel-aware scans and appends are not supported.
* Distributed hypertables do not natively provide a consistent restore point
for backup and restore across nodes. Use the
[`create_distributed_restore_point`][create_distributed_restore_point]
command, and make sure you take care when you restore individual backups to
access and data nodes.
* For native replication limitations, see the
[native replication section][native-replication].
* User defined functions have to be manually installed on the data nodes so
that the function definition is available on both access and data nodes.
This is particularly relevant for functions that are registered with
`set_integer_now_func`.
Note that these limitations concern usage from the access node. Some
currently unsupported features might still work on individual data nodes,
but such usage is neither tested nor officially supported. Future versions
of TimescaleDB might remove some of these limitations.
===== PAGE: https://docs.tigerdata.com/self-hosted/backup-and-restore/logical-backup/ =====
**Examples:**
Example 1 (sql):
```sql
SELECT location, max(temperature)
FROM conditions
GROUP BY location;
```
Example 2 (sql):
```sql
SELECT max(temperature) FROM conditions;
```
---
## reorder_chunk()
**URL:** llms-txt#reorder_chunk()
**Contents:**
- Samples
- Required arguments
- Optional arguments
- Returns
Reorder a single chunk's heap to follow the order of an index. This function
acts similarly to the [Postgres CLUSTER command][postgres-cluster] , however
it uses lower lock levels so that, unlike with the CLUSTER command, the chunk
and hypertable are able to be read for most of the process. It does use a bit
more disk space during the operation.
This command can be particularly useful when data is often queried in an order
different from that in which it was originally inserted. For example, data is
commonly inserted into a hypertable in loose time order (for example, many devices
concurrently sending their current state), but one might typically query the
hypertable about a _specific_ device. In such cases, reordering a chunk using an
index on `(device_id, time)` can lead to significant performance improvement for
these types of queries.
One can call this function directly on individual chunks of a hypertable, but
using [add_reorder_policy][add_reorder_policy] is often much more convenient.
Reorder a chunk on an index:
## Required arguments
|Name|Type|Description|
|---|---|---|
| `chunk` | REGCLASS | Name of the chunk to reorder. |
## Optional arguments
|Name|Type|Description|
|---|---|---|
| `index` | REGCLASS | The name of the index (on either the hypertable or chunk) to order by.|
| `verbose` | BOOLEAN | Setting to true displays messages about the progress of the reorder command. Defaults to false.|
This function returns void.
===== PAGE: https://docs.tigerdata.com/api/hypertable/add_reorder_policy/ =====
**Examples:**
Example 1 (sql):
```sql
SELECT reorder_chunk('_timescaledb_internal._hyper_1_10_chunk', '_timescaledb_internal.conditions_device_id_time_idx');
```
---
## create_distributed_hypertable()
**URL:** llms-txt#create_distributed_hypertable()
**Contents:**
- Required arguments
- Optional arguments
- Returns
- Sample usage
- Best practices
[Multi-node support is sunsetted][multi-node-deprecation].
TimescaleDB v2.13 is the last release that includes multi-node support for Postgres
versions 13, 14, and 15.
Create a TimescaleDB hypertable distributed across a multinode environment.
`create_distributed_hypertable()` replaces [`create_hypertable() (old interface)`][create-hypertable-old]. Distributed tables use the old API. The new generalized [`create_hypertable`][create-hypertable-new] API was introduced in TimescaleDB v2.13.
## Required arguments
|Name|Type| Description |
|---|---|----------------------------------------------------------------------------------------------|
| `relation` | REGCLASS | Identifier of the table you want to convert to a hypertable. |
| `time_column_name` | TEXT | Name of the column that contains time values, as well as the primary column to partition by. |
## Optional arguments
|Name|Type|Description|
|---|---|---|
| `partitioning_column` | TEXT | Name of an additional column to partition by. |
| `number_partitions` | INTEGER | Number of hash partitions to use for `partitioning_column`. Must be > 0. Default is the number of `data_nodes`. |
| `associated_schema_name` | TEXT | Name of the schema for internal hypertable tables. Default is `_timescaledb_internal`. |
| `associated_table_prefix` | TEXT | Prefix for internal hypertable chunk names. Default is `_hyper`. |
| `chunk_time_interval` | INTERVAL | Interval in event time that each chunk covers. Must be > 0. Default is 7 days. |
| `create_default_indexes` | BOOLEAN | Boolean whether to create default indexes on time/partitioning columns. Default is TRUE. |
| `if_not_exists` | BOOLEAN | Boolean whether to print warning if table already converted to hypertable or raise exception. Default is FALSE. |
| `partitioning_func` | REGCLASS | The function to use for calculating a value's partition.|
| `migrate_data` | BOOLEAN | Set to TRUE to migrate any existing data from the `relation` table to chunks in the new hypertable. A non-empty table generates an error without this option. Large tables may take significant time to migrate. Default is FALSE. |
| `time_partitioning_func` | REGCLASS | Function to convert incompatible primary time column values to compatible ones. The function must be `IMMUTABLE`. |
| `replication_factor` | INTEGER | The number of data nodes to which the same data is written to. This is done by creating chunk copies on this amount of data nodes. Must be >= 1; If not set, the default value is determined by the `timescaledb.hypertable_replication_factor_default` GUC. Read [the best practices][best-practices] before changing the default. |
| `data_nodes` | ARRAY | The set of data nodes used for the distributed hypertable. If not present, defaults to all data nodes known by the access node (the node on which the distributed hypertable is created). |
|Column|Type|Description|
|---|---|---|
| `hypertable_id` | INTEGER | ID of the hypertable in TimescaleDB. |
| `schema_name` | TEXT | Schema name of the table converted to hypertable. |
| `table_name` | TEXT | Table name of the table converted to hypertable. |
| `created` | BOOLEAN | TRUE if the hypertable was created, FALSE when `if_not_exists` is TRUE and no hypertable was created. |
Create a table `conditions` which is partitioned across data
nodes by the 'location' column. Note that the number of space
partitions is automatically equal to the number of data nodes assigned
to this hypertable (all configured data nodes in this case, as
`data_nodes` is not specified).
Create a table `conditions` using a specific set of data nodes.
* **Hash partitions**: Best practice for distributed hypertables is to enable [hash partitions](https://www.techopedia.com/definition/31996/hash-partitioning).
With hash partitions, incoming data is divided between the data nodes. Without hash partition, all
data for each time slice is written to a single data node.
* **Time intervals**: Follow the guidelines for `chunk_time_interval` defined in [`create_hypertable`]
[create-hypertable-old].
When you enable hash partitioning, the hypertable is evenly distributed across the data nodes. This
means you can set a larger time interval. For example, you ingest 10 GB of data per day shared over
five data nodes, each node has 64 GB of memory. If this is the only table being served by these data nodes, use a time interval of 1 week:
If you do not enable hash partitioning, use the same `chunk_time_interval` settings as a non-distributed
instance. This is because all incoming data is handled by a single node.
* **Replication factor**: `replication_factor` defines the number of data nodes a newly created chunk is
replicated in. For example, when you set `replication_factor` to `3`, each chunk exists on 3 separate
data nodes. Rows written to a chunk are inserted into all data notes in a two-phase commit protocol.
If a data node fails or is removed, no data is lost. Writes succeed on the other data nodes. However, the
chunks on the lost data node are now under-replicated. When the failed data node becomes available, rebalance the chunks with a call to [copy_chunk][copy_chunk].
===== PAGE: https://docs.tigerdata.com/api/distributed-hypertables/attach_data_node/ =====
**Examples:**
Example 1 (sql):
```sql
SELECT create_distributed_hypertable('conditions', 'time', 'location');
```
Example 2 (sql):
```sql
SELECT create_distributed_hypertable('conditions', 'time', 'location',
data_nodes => '{ "data_node_1", "data_node_2", "data_node_4", "data_node_7" }');
```
Example 3 (unknown):
```unknown
7 days * 10 GB 70
-------------------- == --- ~= 22% of main memory used for the most recent chunks
5 data nodes * 64 GB 320
```
---
## Manual compression
**URL:** llms-txt#manual-compression
**Contents:**
- Selecting chunks to compress
- Compressing chunks manually
- Manually compress chunks in a single command
- Roll up uncompressed chunks when compressing
In most cases, an [automated compression policy][add_compression_policy] is sufficient to automatically compress your
chunks. However, if you want more control, you can also use manual synchronous compression of specific chunks.
Before you start, you need a list of chunks to compress. In this example, you
use a hypertable called `example`, and compress chunks older than three days.
### Selecting chunks to compress
1. At the psql prompt, select all chunks in the table `example` that are older
than three days:
1. This returns a list of chunks. Take note of the chunks' names:
||show_chunks|
|---|---|
|1|_timescaledb_internal_hyper_1_2_chunk|
|2|_timescaledb_internal_hyper_1_3_chunk|
When you are happy with the list of chunks, you can use the chunk names to
manually compress each one.
### Compressing chunks manually
1. At the psql prompt, compress the chunk:
1. Check the results of the compression with this command:
The results show the chunks for the given hypertable, their compression
status, and some other statistics:
|chunk_schema|chunk_name|compression_status|before_compression_table_bytes|before_compression_index_bytes|before_compression_toast_bytes|before_compression_total_bytes|after_compression_table_bytes|after_compression_index_bytes|after_compression_toast_bytes|after_compression_total_bytes|node_name|
|---|---|---|---|---|---|---|---|---|---|---|---|
|_timescaledb_internal|_hyper_1_1_chunk|Compressed|8192 bytes|16 kB|8192 bytes|32 kB|8192 bytes|16 kB|8192 bytes|32 kB||
|_timescaledb_internal|_hyper_1_20_chunk|Uncompressed||||||||||
1. Repeat for all chunks you want to compress.
## Manually compress chunks in a single command
Alternatively, you can select the chunks and compress them in a single command
by using the output of the `show_chunks` command to compress each one. For
example, use this command to compress chunks between one and three weeks old
if they are not already compressed:
## Roll up uncompressed chunks when compressing
In TimescaleDB v2.9 and later, you can roll up multiple uncompressed chunks into
a previously compressed chunk as part of your compression procedure. This allows
you to have much smaller uncompressed chunk intervals, which reduces the disk
space used for uncompressed data. For example, if you have multiple smaller
uncompressed chunks in your data, you can roll them up into a single compressed
chunk.
To roll up your uncompressed chunks into a compressed chunk, alter the compression
settings to set the compress chunk time interval and run compression operations
to roll up the chunks while compressing.
The default setting of `compress_orderby` is `'time DESC'` (the descending or DESC command is used to sort the data returned in ascending order), which causes chunks to be re-compressed
many times during the rollup, possibly leading to a steep performance penalty.
Set `timescaledb.compress_orderby = 'time ASC'` to avoid this penalty.
The time interval you choose must be a multiple of the uncompressed chunk
interval. For example, if your uncompressed chunk interval is one week, your
` The origin determines when time buckets start and end. By default, a time bucket
doesn't start at the earliest timestamp in your data. There is often a more
logical time. For example, you might collect your first data point at `00:37`,
but you probably want your daily buckets to start at midnight. Similarly, you
might collect your first data point on a Wednesday, but you might want your
weekly buckets calculated from Sunday or Monday.
Instead, time is divided into buckets based on intervals from the origin. The
following diagram shows how, using the example of 2-week buckets. The first
possible start date for a bucket is `origin`. The next possible start date for a
bucket is `origin + bucket interval`. If your first timestamp does not fall
exactly on a possible start date, the immediately preceding start date is used
for the beginning of the bucket.
The origin determines when time buckets start and end. By default, a time bucket
doesn't start at the earliest timestamp in your data. There is often a more
logical time. For example, you might collect your first data point at `00:37`,
but you probably want your daily buckets to start at midnight. Similarly, you
might collect your first data point on a Wednesday, but you might want your
weekly buckets calculated from Sunday or Monday.
Instead, time is divided into buckets based on intervals from the origin. The
following diagram shows how, using the example of 2-week buckets. The first
possible start date for a bucket is `origin`. The next possible start date for a
bucket is `origin + bucket interval`. If your first timestamp does not fall
exactly on a possible start date, the immediately preceding start date is used
for the beginning of the bucket.
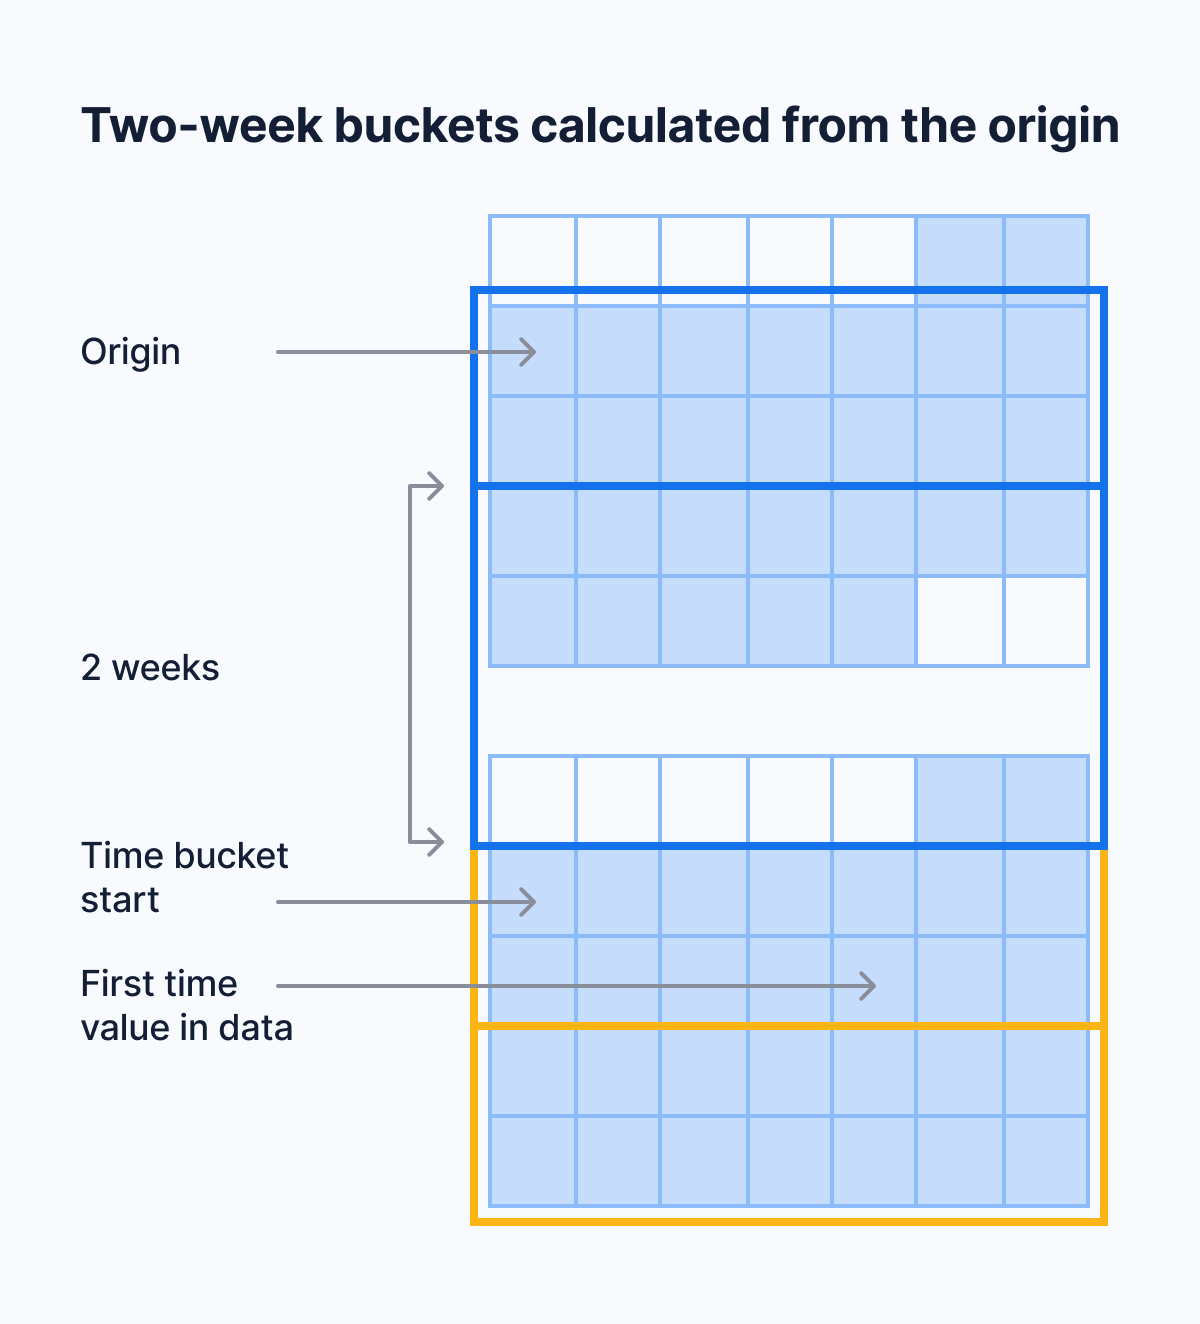 For example, say that your data's earliest timestamp is April 24, 2020. If you
bucket by an interval of two weeks, the first bucket doesn't start on April 24,
which is a Friday. It also doesn't start on April 20, which is the immediately
preceding Monday. It starts on April 13, because you can get to April 13, 2020,
by counting in two-week increments from January 3, 2000, which is the default
origin in this case.
For intervals that don't include months or years, the default origin is January
3, 2000. For month, year, or century intervals, the default origin is January 1,
2000. For integer time values, the default origin is 0.
These choices make the time ranges of time buckets more intuitive. Because
January 3, 2000, is a Monday, weekly time buckets start on Monday. This is
compliant with the ISO standard for calculating calendar weeks. Monthly and
yearly time buckets use January 1, 2000, as an origin. This allows them to start
on the first day of the calendar month or year.
If you prefer another origin, you can set it yourself using the [`origin`
parameter][origin]. For example, to start weeks on Sunday, set the origin to
Sunday, January 2, 2000.
The origin time depends on the data type of your time values.
If you use `TIMESTAMP`, by default, bucket start times are aligned with
`00:00:00`. Daily and weekly buckets start at `00:00:00`. Shorter buckets start
at a time that you can get to by counting in bucket increments from `00:00:00`
on the origin date.
If you use `TIMESTAMPTZ`, by default, bucket start times are aligned with
`00:00:00 UTC`. To align time buckets to another timezone, set the `timezone`
parameter.
===== PAGE: https://docs.tigerdata.com/mst/vpc-peering/vpc-peering-gcp/ =====
---
## About constraints
**URL:** llms-txt#about-constraints
Constraints are rules that apply to your database columns. This prevents you
from entering invalid data into your database. When you create, change, or
delete constraints on your hypertables, the constraints are propagated to the
underlying chunks, and to any indexes.
Hypertables support all standard Postgres constraint types. For foreign keys in particular, the following is supported:
- Foreign key constraints from a hypertable referencing a regular table
- Foreign key constraints from a regular table referencing a hypertable
Foreign keys from a hypertable referencing another hypertable **are not supported**.
For example, you can create a table that only allows positive device IDs, and
non-null temperature readings. You can also check that time values for all
devices are unique. To create this table, with the constraints, use this
command:
If you are self-hosting TimescaleDB v2.19.3 and below, create a [Postgres relational table][pg-create-table],
then convert it using [create_hypertable][create_hypertable]. You then enable hypercore with a call
to [ALTER TABLE][alter_table_hypercore].
This example also references values in another `locations` table using a foreign
key constraint.
Time columns used for partitioning must not allow `NULL` values. A
`NOT NULL` constraint is added by default to these columns if it doesn't already exist.
For more information on how to manage constraints, see the
[Postgres docs][postgres-createconstraint].
===== PAGE: https://docs.tigerdata.com/use-timescale/schema-management/about-indexing/ =====
**Examples:**
Example 1 (sql):
```sql
CREATE TABLE conditions (
time TIMESTAMPTZ
temp FLOAT NOT NULL,
device_id INTEGER CHECK (device_id > 0),
location INTEGER REFERENCES locations (id),
PRIMARY KEY(time, device_id)
) WITH (
tsdb.hypertable,
tsdb.partition_column='time'
);
```
---
## set_chunk_time_interval()
**URL:** llms-txt#set_chunk_time_interval()
**Contents:**
- Samples
- Arguments
Sets the `chunk_time_interval` on a hypertable. The new interval is used
when new chunks are created, and time intervals on existing chunks are
not changed.
For a TIMESTAMP column, set `chunk_time_interval` to 24 hours:
For a time column expressed as the number of milliseconds since the
UNIX epoch, set `chunk_time_interval` to 24 hours:
| Name | Type | Default | Required | Description |
|-------------|------------------|---------|----------------------------------------------------------------------|--------------------------------------------------------------------------------------------------------------------------------------------------|
|`hypertable`|REGCLASS| - | ✔ | Hypertable or continuous aggregate to update interval for. |
|`chunk_time_interval`|See note|- | ✔ | Event time that each new chunk covers. |
|`dimension_name`|REGCLASS|- | ✖ | The name of the time dimension to set the number of partitions for. Only use `dimension_name` when your hypertable has multiple time dimensions. |
If you change chunk time interval you may see a chunk that is smaller than the new interval. For example, if you
have two 7-day chunks that cover 14 days, then change `chunk_time_interval` to 3 days, you may end up with a
transition chunk covering one day. This happens because the start and end of the new chunk is calculated based on
dividing the timeline by the `chunk_time_interval` starting at epoch 0. This leads to the following chunks
[0, 3), [3, 6), [6, 9), [9, 12), [12, 15), [15, 18) and so on. The two 7-day chunks covered data up to day 14:
[0, 7), [8, 14), so the 3-day chunk for [12, 15) is reduced to a one day chunk. The following chunk [15, 18) is
created as a full 3 day chunk.
The valid types for the `chunk_time_interval` depend on the type used for the
hypertable `time` column:
|`time` column type|`chunk_time_interval` type|Time unit|
|-|-|-|
|TIMESTAMP|INTERVAL|days, hours, minutes, etc|
||INTEGER or BIGINT|microseconds|
|TIMESTAMPTZ|INTERVAL|days, hours, minutes, etc|
||INTEGER or BIGINT|microseconds|
|DATE|INTERVAL|days, hours, minutes, etc|
||INTEGER or BIGINT|microseconds|
|SMALLINT|SMALLINT|The same time unit as the `time` column|
|INT|INT|The same time unit as the `time` column|
|BIGINT|BIGINT|The same time unit as the `time` column|
For more information, see [hypertable partitioning][hypertable-partitioning].
===== PAGE: https://docs.tigerdata.com/api/hypertable/show_tablespaces/ =====
**Examples:**
Example 1 (sql):
```sql
SELECT set_chunk_time_interval('conditions', INTERVAL '24 hours');
SELECT set_chunk_time_interval('conditions', 86400000000);
```
Example 2 (sql):
```sql
SELECT set_chunk_time_interval('conditions', 86400000);
```
---
## drop_chunks()
**URL:** llms-txt#drop_chunks()
**Contents:**
- Samples
- Required arguments
- Optional arguments
Removes data chunks whose time range falls completely before (or
after) a specified time. Shows a list of the chunks that were
dropped, in the same style as the `show_chunks` [function][show_chunks].
Chunks are constrained by a start and end time and the start time is
always before the end time. A chunk is dropped if its end time is
older than the `older_than` timestamp or, if `newer_than` is given,
its start time is newer than the `newer_than` timestamp.
Note that, because chunks are removed if and only if their time range
falls fully before (or after) the specified timestamp, the remaining
data may still contain timestamps that are before (or after) the
specified one.
Chunks can only be dropped based on their time intervals. They cannot be dropped
based on a hash partition.
Drop all chunks from hypertable `conditions` older than 3 months:
Drop all chunks from hypertable `conditions` created before 3 months:
Drop all chunks more than 3 months in the future from hypertable
`conditions`. This is useful for correcting data ingested with
incorrect clocks:
Drop all chunks from hypertable `conditions` before 2017:
Drop all chunks from hypertable `conditions` before 2017, where time
column is given in milliseconds from the UNIX epoch:
Drop all chunks older than 3 months ago and newer than 4 months ago from hypertable `conditions`:
Drop all chunks created 3 months ago and created 4 months before from hypertable `conditions`:
Drop all chunks older than 3 months ago across all hypertables:
## Required arguments
|Name|Type|Description|
|-|-|-|
|`relation`|REGCLASS|Hypertable or continuous aggregate from which to drop chunks.|
## Optional arguments
|Name|Type|Description|
|-|-|-|
|`older_than`|ANY|Specification of cut-off point where any chunks older than this timestamp should be removed.|
|`newer_than`|ANY|Specification of cut-off point where any chunks newer than this timestamp should be removed.|
|`verbose`|BOOLEAN|Setting to true displays messages about the progress of the reorder command. Defaults to false.|
|`created_before`|ANY|Specification of cut-off point where any chunks created before this timestamp should be removed.|
|`created_after`|ANY|Specification of cut-off point where any chunks created after this timestamp should be removed.|
The `older_than` and `newer_than` parameters can be specified in two ways:
* **interval type:** The cut-off point is computed as `now() -
older_than` and similarly `now() - newer_than`. An error is
returned if an INTERVAL is supplied and the time column is not one
of a `TIMESTAMP`, `TIMESTAMPTZ`, or `DATE`.
* **timestamp, date, or integer type:** The cut-off point is
explicitly given as a `TIMESTAMP` / `TIMESTAMPTZ` / `DATE` or as a
`SMALLINT` / `INT` / `BIGINT`. The choice of timestamp or integer
must follow the type of the hypertable's time column.
The `created_before` and `created_after` parameters can be specified in two ways:
* **interval type:** The cut-off point is computed as `now() -
created_before` and similarly `now() - created_after`. This uses
the chunk creation time relative to the current time for the filtering.
* **timestamp, date, or integer type:** The cut-off point is
explicitly given as a `TIMESTAMP` / `TIMESTAMPTZ` / `DATE` or as a
`SMALLINT` / `INT` / `BIGINT`. The choice of integer value
must follow the type of the hypertable's partitioning column. Otherwise
the chunk creation time is used for the filtering.
When using just an interval type, the function assumes that
you are removing things _in the past_. If you want to remove data
in the future, for example to delete erroneous entries, use a timestamp.
When both `older_than` and `newer_than` arguments are used, the
function returns the intersection of the resulting two ranges. For
example, specifying `newer_than => 4 months` and `older_than => 3
months` drops all chunks between 3 and 4 months old.
Similarly, specifying `newer_than => '2017-01-01'` and `older_than
=> '2017-02-01'` drops all chunks between '2017-01-01' and
'2017-02-01'. Specifying parameters that do not result in an
overlapping intersection between two ranges results in an error.
When both `created_before` and `created_after` arguments are used, the
function returns the intersection of the resulting two ranges. For
example, specifying `created_after` => 4 months` and `created_before`=> 3
months` drops all chunks created between 3 and 4 months from now.
Similarly, specifying `created_after`=> '2017-01-01'` and `created_before`
=> '2017-02-01'` drops all chunks created between '2017-01-01' and
'2017-02-01'. Specifying parameters that do not result in an
overlapping intersection between two ranges results in an error.
The `created_before`/`created_after` parameters cannot be used together with
`older_than`/`newer_than`.
===== PAGE: https://docs.tigerdata.com/api/hypertable/detach_chunk/ =====
**Examples:**
Example 1 (sql):
```sql
SELECT drop_chunks('conditions', INTERVAL '3 months');
```
Example 2 (sql):
```sql
drop_chunks
----------------------------------------
_timescaledb_internal._hyper_3_5_chunk
_timescaledb_internal._hyper_3_6_chunk
_timescaledb_internal._hyper_3_7_chunk
_timescaledb_internal._hyper_3_8_chunk
_timescaledb_internal._hyper_3_9_chunk
(5 rows)
```
Example 3 (sql):
```sql
SELECT drop_chunks('conditions', created_before => now() - INTERVAL '3 months');
```
Example 4 (sql):
```sql
SELECT drop_chunks('conditions', newer_than => now() + interval '3 months');
```
---
## add_compression_policy()
**URL:** llms-txt#add_compression_policy()
**Contents:**
- Samples
- Required arguments
- Optional arguments
Old API since [TimescaleDB v2.18.0](https://github.com/timescale/timescaledb/releases/tag/2.18.0) Replaced by add_columnstore_policy().
Allows you to set a policy by which the system compresses a chunk
automatically in the background after it reaches a given age.
Compression policies can only be created on hypertables or continuous aggregates
that already have compression enabled. To set `timescaledb.compress` and other
configuration parameters for hypertables, use the
[`ALTER TABLE`][compression_alter-table]
command. To enable compression on continuous aggregates, use the
[`ALTER MATERIALIZED VIEW`][compression_continuous-aggregate]
command. To view the policies that you set or the policies that already exist,
see [informational views][informational-views].
Add a policy to compress chunks older than 60 days on the `cpu` hypertable.
Add a policy to compress chunks created 3 months before on the 'cpu' hypertable.
Note above that when `compress_after` is used then the time data range
present in the partitioning time column is used to select the target
chunks. Whereas, when `compress_created_before` is used then the chunks
which were created 3 months ago are selected.
Add a compress chunks policy to a hypertable with an integer-based time column:
Add a policy to compress chunks of a continuous aggregate called `cpu_weekly`, that are
older than eight weeks:
## Required arguments
|Name|Type|Description|
|-|-|-|
|`hypertable`|REGCLASS|Name of the hypertable or continuous aggregate|
|`compress_after`|INTERVAL or INTEGER|The age after which the policy job compresses chunks. `compress_after` is calculated relative to the current time, so chunks containing data older than `now - {compress_after}::interval` are compressed. This argument is mutually exclusive with `compress_created_before`.|
|`compress_created_before`|INTERVAL|Chunks with creation time older than this cut-off point are compressed. The cut-off point is computed as `now() - compress_created_before`. Defaults to `NULL`. Not supported for continuous aggregates yet. This argument is mutually exclusive with `compress_after`. |
The `compress_after` parameter should be specified differently depending
on the type of the time column of the hypertable or continuous aggregate:
* For hypertables with TIMESTAMP, TIMESTAMPTZ, and DATE time columns: the time
interval should be an INTERVAL type.
* For hypertables with integer-based timestamps: the time interval should be
an integer type (this requires the [integer_now_func][set_integer_now_func]
to be set).
## Optional arguments
|Name|Type|Description|
|-|-|-|
|`schedule_interval`|INTERVAL|The interval between the finish time of the last execution and the next start. Defaults to 12 hours for hyper tables with a `chunk_interval` >= 1 day and `chunk_interval / 2` for all other hypertables.|
|`initial_start`|TIMESTAMPTZ|Time the policy is first run. Defaults to NULL. If omitted, then the schedule interval is the interval from the finish time of the last execution to the next start. If provided, it serves as the origin with respect to which the next_start is calculated |
|`timezone`|TEXT|A valid time zone. If `initial_start` is also specified, subsequent executions of the compression policy are aligned on its initial start. However, daylight savings time (DST) changes may shift this alignment. Set to a valid time zone if this is an issue you want to mitigate. If omitted, UTC bucketing is performed. Defaults to `NULL`.|
|`if_not_exists`|BOOLEAN|Setting to `true` causes the command to fail with a warning instead of an error if a compression policy already exists on the hypertable. Defaults to false.|
===== PAGE: https://docs.tigerdata.com/api/compression/recompress_chunk/ =====
**Examples:**
Example 1 (unknown):
```unknown
Add a policy to compress chunks created 3 months before on the 'cpu' hypertable.
```
Example 2 (unknown):
```unknown
Note above that when `compress_after` is used then the time data range
present in the partitioning time column is used to select the target
chunks. Whereas, when `compress_created_before` is used then the chunks
which were created 3 months ago are selected.
Add a compress chunks policy to a hypertable with an integer-based time column:
```
Example 3 (unknown):
```unknown
Add a policy to compress chunks of a continuous aggregate called `cpu_weekly`, that are
older than eight weeks:
```
---
## Distributed hypertables
**URL:** llms-txt#distributed-hypertables
[Multi-node support is sunsetted][multi-node-deprecation].
TimescaleDB v2.13 is the last release that includes multi-node support for Postgres
versions 13, 14, and 15.
Distributed hypertables are hypertables that span multiple nodes. With
distributed hypertables, you can scale your data storage across multiple
machines and benefit from parallelized processing for some queries.
Many features of distributed hypertables work the same way as standard
hypertables. To learn how hypertables work in general, see the
[hypertables][hypertables] section.
* [Learn about distributed hypertables][about-distributed-hypertables] for
multi-node databases
* [Create a distributed hypertable][create]
* [Insert data][insert] into distributed hypertables
* [Query data][query] in distributed hypertables
* [Alter and drop][alter-drop] distributed hypertables
* [Create foreign keys][foreign-keys] on distributed hypertables
* [Set triggers][triggers] on distributed hypertables
===== PAGE: https://docs.tigerdata.com/mst/about-mst/ =====
---
## Manually drop chunks
**URL:** llms-txt#manually-drop-chunks
**Contents:**
- Drop chunks older than a certain date
- Drop chunks between 2 dates
- Drop chunks in the future
Drop chunks manually by time value. For example, drop chunks containing data
older than 30 days.
Dropping chunks manually is a one-time operation. To automatically drop chunks
as they age, set up a
[data retention policy](https://docs.tigerdata.com/use-timescale/latest/data-retention/create-a-retention-policy/).
## Drop chunks older than a certain date
To drop chunks older than a certain date, use the [`drop_chunks`][drop_chunks]
function. Provide the name of the hypertable to drop chunks from, and a time
interval beyond which to drop chunks.
For example, to drop chunks with data older than 24 hours:
## Drop chunks between 2 dates
You can also drop chunks between 2 dates. For example, drop chunks with data
between 3 and 4 months old.
Supply a second `INTERVAL` argument for the `newer_than` cutoff:
## Drop chunks in the future
You can also drop chunks in the future, for example, to correct data with the
wrong timestamp. To drop all chunks that are more than 3 months in the
future, from a hypertable called `conditions`:
===== PAGE: https://docs.tigerdata.com/use-timescale/data-retention/data-retention-with-continuous-aggregates/ =====
**Examples:**
Example 1 (sql):
```sql
SELECT drop_chunks('conditions', INTERVAL '24 hours');
```
Example 2 (sql):
```sql
SELECT drop_chunks(
'conditions',
older_than => INTERVAL '3 months',
newer_than => INTERVAL '4 months'
)
```
Example 3 (sql):
```sql
SELECT drop_chunks(
'conditions',
newer_than => now() + INTERVAL '3 months'
);
```
---
## timescaledb_information.chunks
**URL:** llms-txt#timescaledb_information.chunks
**Contents:**
- Samples
- Available columns
Get metadata about the chunks of hypertables.
This view shows metadata for the chunk's primary time-based dimension.
For information about a hypertable's secondary dimensions,
the [dimensions view][dimensions] should be used instead.
If the chunk's primary dimension is of a time datatype, `range_start` and
`range_end` are set. Otherwise, if the primary dimension type is integer based,
`range_start_integer` and `range_end_integer` are set.
Get information about the chunks of a hypertable.
Dimension builder `by_range` was introduced in TimescaleDB 2.13.
The `chunk_creation_time` metadata was introduced in TimescaleDB 2.13.
|Name|Type|Description|
|---|---|---|
| `hypertable_schema` | TEXT | Schema name of the hypertable |
| `hypertable_name` | TEXT | Table name of the hypertable |
| `chunk_schema` | TEXT | Schema name of the chunk |
| `chunk_name` | TEXT | Name of the chunk |
| `primary_dimension` | TEXT | Name of the column that is the primary dimension|
| `primary_dimension_type` | REGTYPE | Type of the column that is the primary dimension|
| `range_start` | TIMESTAMP WITH TIME ZONE | Start of the range for the chunk's dimension |
| `range_end` | TIMESTAMP WITH TIME ZONE | End of the range for the chunk's dimension |
| `range_start_integer` | BIGINT | Start of the range for the chunk's dimension, if the dimension type is integer based |
| `range_end_integer` | BIGINT | End of the range for the chunk's dimension, if the dimension type is integer based |
| `is_compressed` | BOOLEAN | Is the data in the chunk compressed?
For example, say that your data's earliest timestamp is April 24, 2020. If you
bucket by an interval of two weeks, the first bucket doesn't start on April 24,
which is a Friday. It also doesn't start on April 20, which is the immediately
preceding Monday. It starts on April 13, because you can get to April 13, 2020,
by counting in two-week increments from January 3, 2000, which is the default
origin in this case.
For intervals that don't include months or years, the default origin is January
3, 2000. For month, year, or century intervals, the default origin is January 1,
2000. For integer time values, the default origin is 0.
These choices make the time ranges of time buckets more intuitive. Because
January 3, 2000, is a Monday, weekly time buckets start on Monday. This is
compliant with the ISO standard for calculating calendar weeks. Monthly and
yearly time buckets use January 1, 2000, as an origin. This allows them to start
on the first day of the calendar month or year.
If you prefer another origin, you can set it yourself using the [`origin`
parameter][origin]. For example, to start weeks on Sunday, set the origin to
Sunday, January 2, 2000.
The origin time depends on the data type of your time values.
If you use `TIMESTAMP`, by default, bucket start times are aligned with
`00:00:00`. Daily and weekly buckets start at `00:00:00`. Shorter buckets start
at a time that you can get to by counting in bucket increments from `00:00:00`
on the origin date.
If you use `TIMESTAMPTZ`, by default, bucket start times are aligned with
`00:00:00 UTC`. To align time buckets to another timezone, set the `timezone`
parameter.
===== PAGE: https://docs.tigerdata.com/mst/vpc-peering/vpc-peering-gcp/ =====
---
## About constraints
**URL:** llms-txt#about-constraints
Constraints are rules that apply to your database columns. This prevents you
from entering invalid data into your database. When you create, change, or
delete constraints on your hypertables, the constraints are propagated to the
underlying chunks, and to any indexes.
Hypertables support all standard Postgres constraint types. For foreign keys in particular, the following is supported:
- Foreign key constraints from a hypertable referencing a regular table
- Foreign key constraints from a regular table referencing a hypertable
Foreign keys from a hypertable referencing another hypertable **are not supported**.
For example, you can create a table that only allows positive device IDs, and
non-null temperature readings. You can also check that time values for all
devices are unique. To create this table, with the constraints, use this
command:
If you are self-hosting TimescaleDB v2.19.3 and below, create a [Postgres relational table][pg-create-table],
then convert it using [create_hypertable][create_hypertable]. You then enable hypercore with a call
to [ALTER TABLE][alter_table_hypercore].
This example also references values in another `locations` table using a foreign
key constraint.
Time columns used for partitioning must not allow `NULL` values. A
`NOT NULL` constraint is added by default to these columns if it doesn't already exist.
For more information on how to manage constraints, see the
[Postgres docs][postgres-createconstraint].
===== PAGE: https://docs.tigerdata.com/use-timescale/schema-management/about-indexing/ =====
**Examples:**
Example 1 (sql):
```sql
CREATE TABLE conditions (
time TIMESTAMPTZ
temp FLOAT NOT NULL,
device_id INTEGER CHECK (device_id > 0),
location INTEGER REFERENCES locations (id),
PRIMARY KEY(time, device_id)
) WITH (
tsdb.hypertable,
tsdb.partition_column='time'
);
```
---
## set_chunk_time_interval()
**URL:** llms-txt#set_chunk_time_interval()
**Contents:**
- Samples
- Arguments
Sets the `chunk_time_interval` on a hypertable. The new interval is used
when new chunks are created, and time intervals on existing chunks are
not changed.
For a TIMESTAMP column, set `chunk_time_interval` to 24 hours:
For a time column expressed as the number of milliseconds since the
UNIX epoch, set `chunk_time_interval` to 24 hours:
| Name | Type | Default | Required | Description |
|-------------|------------------|---------|----------------------------------------------------------------------|--------------------------------------------------------------------------------------------------------------------------------------------------|
|`hypertable`|REGCLASS| - | ✔ | Hypertable or continuous aggregate to update interval for. |
|`chunk_time_interval`|See note|- | ✔ | Event time that each new chunk covers. |
|`dimension_name`|REGCLASS|- | ✖ | The name of the time dimension to set the number of partitions for. Only use `dimension_name` when your hypertable has multiple time dimensions. |
If you change chunk time interval you may see a chunk that is smaller than the new interval. For example, if you
have two 7-day chunks that cover 14 days, then change `chunk_time_interval` to 3 days, you may end up with a
transition chunk covering one day. This happens because the start and end of the new chunk is calculated based on
dividing the timeline by the `chunk_time_interval` starting at epoch 0. This leads to the following chunks
[0, 3), [3, 6), [6, 9), [9, 12), [12, 15), [15, 18) and so on. The two 7-day chunks covered data up to day 14:
[0, 7), [8, 14), so the 3-day chunk for [12, 15) is reduced to a one day chunk. The following chunk [15, 18) is
created as a full 3 day chunk.
The valid types for the `chunk_time_interval` depend on the type used for the
hypertable `time` column:
|`time` column type|`chunk_time_interval` type|Time unit|
|-|-|-|
|TIMESTAMP|INTERVAL|days, hours, minutes, etc|
||INTEGER or BIGINT|microseconds|
|TIMESTAMPTZ|INTERVAL|days, hours, minutes, etc|
||INTEGER or BIGINT|microseconds|
|DATE|INTERVAL|days, hours, minutes, etc|
||INTEGER or BIGINT|microseconds|
|SMALLINT|SMALLINT|The same time unit as the `time` column|
|INT|INT|The same time unit as the `time` column|
|BIGINT|BIGINT|The same time unit as the `time` column|
For more information, see [hypertable partitioning][hypertable-partitioning].
===== PAGE: https://docs.tigerdata.com/api/hypertable/show_tablespaces/ =====
**Examples:**
Example 1 (sql):
```sql
SELECT set_chunk_time_interval('conditions', INTERVAL '24 hours');
SELECT set_chunk_time_interval('conditions', 86400000000);
```
Example 2 (sql):
```sql
SELECT set_chunk_time_interval('conditions', 86400000);
```
---
## drop_chunks()
**URL:** llms-txt#drop_chunks()
**Contents:**
- Samples
- Required arguments
- Optional arguments
Removes data chunks whose time range falls completely before (or
after) a specified time. Shows a list of the chunks that were
dropped, in the same style as the `show_chunks` [function][show_chunks].
Chunks are constrained by a start and end time and the start time is
always before the end time. A chunk is dropped if its end time is
older than the `older_than` timestamp or, if `newer_than` is given,
its start time is newer than the `newer_than` timestamp.
Note that, because chunks are removed if and only if their time range
falls fully before (or after) the specified timestamp, the remaining
data may still contain timestamps that are before (or after) the
specified one.
Chunks can only be dropped based on their time intervals. They cannot be dropped
based on a hash partition.
Drop all chunks from hypertable `conditions` older than 3 months:
Drop all chunks from hypertable `conditions` created before 3 months:
Drop all chunks more than 3 months in the future from hypertable
`conditions`. This is useful for correcting data ingested with
incorrect clocks:
Drop all chunks from hypertable `conditions` before 2017:
Drop all chunks from hypertable `conditions` before 2017, where time
column is given in milliseconds from the UNIX epoch:
Drop all chunks older than 3 months ago and newer than 4 months ago from hypertable `conditions`:
Drop all chunks created 3 months ago and created 4 months before from hypertable `conditions`:
Drop all chunks older than 3 months ago across all hypertables:
## Required arguments
|Name|Type|Description|
|-|-|-|
|`relation`|REGCLASS|Hypertable or continuous aggregate from which to drop chunks.|
## Optional arguments
|Name|Type|Description|
|-|-|-|
|`older_than`|ANY|Specification of cut-off point where any chunks older than this timestamp should be removed.|
|`newer_than`|ANY|Specification of cut-off point where any chunks newer than this timestamp should be removed.|
|`verbose`|BOOLEAN|Setting to true displays messages about the progress of the reorder command. Defaults to false.|
|`created_before`|ANY|Specification of cut-off point where any chunks created before this timestamp should be removed.|
|`created_after`|ANY|Specification of cut-off point where any chunks created after this timestamp should be removed.|
The `older_than` and `newer_than` parameters can be specified in two ways:
* **interval type:** The cut-off point is computed as `now() -
older_than` and similarly `now() - newer_than`. An error is
returned if an INTERVAL is supplied and the time column is not one
of a `TIMESTAMP`, `TIMESTAMPTZ`, or `DATE`.
* **timestamp, date, or integer type:** The cut-off point is
explicitly given as a `TIMESTAMP` / `TIMESTAMPTZ` / `DATE` or as a
`SMALLINT` / `INT` / `BIGINT`. The choice of timestamp or integer
must follow the type of the hypertable's time column.
The `created_before` and `created_after` parameters can be specified in two ways:
* **interval type:** The cut-off point is computed as `now() -
created_before` and similarly `now() - created_after`. This uses
the chunk creation time relative to the current time for the filtering.
* **timestamp, date, or integer type:** The cut-off point is
explicitly given as a `TIMESTAMP` / `TIMESTAMPTZ` / `DATE` or as a
`SMALLINT` / `INT` / `BIGINT`. The choice of integer value
must follow the type of the hypertable's partitioning column. Otherwise
the chunk creation time is used for the filtering.
When using just an interval type, the function assumes that
you are removing things _in the past_. If you want to remove data
in the future, for example to delete erroneous entries, use a timestamp.
When both `older_than` and `newer_than` arguments are used, the
function returns the intersection of the resulting two ranges. For
example, specifying `newer_than => 4 months` and `older_than => 3
months` drops all chunks between 3 and 4 months old.
Similarly, specifying `newer_than => '2017-01-01'` and `older_than
=> '2017-02-01'` drops all chunks between '2017-01-01' and
'2017-02-01'. Specifying parameters that do not result in an
overlapping intersection between two ranges results in an error.
When both `created_before` and `created_after` arguments are used, the
function returns the intersection of the resulting two ranges. For
example, specifying `created_after` => 4 months` and `created_before`=> 3
months` drops all chunks created between 3 and 4 months from now.
Similarly, specifying `created_after`=> '2017-01-01'` and `created_before`
=> '2017-02-01'` drops all chunks created between '2017-01-01' and
'2017-02-01'. Specifying parameters that do not result in an
overlapping intersection between two ranges results in an error.
The `created_before`/`created_after` parameters cannot be used together with
`older_than`/`newer_than`.
===== PAGE: https://docs.tigerdata.com/api/hypertable/detach_chunk/ =====
**Examples:**
Example 1 (sql):
```sql
SELECT drop_chunks('conditions', INTERVAL '3 months');
```
Example 2 (sql):
```sql
drop_chunks
----------------------------------------
_timescaledb_internal._hyper_3_5_chunk
_timescaledb_internal._hyper_3_6_chunk
_timescaledb_internal._hyper_3_7_chunk
_timescaledb_internal._hyper_3_8_chunk
_timescaledb_internal._hyper_3_9_chunk
(5 rows)
```
Example 3 (sql):
```sql
SELECT drop_chunks('conditions', created_before => now() - INTERVAL '3 months');
```
Example 4 (sql):
```sql
SELECT drop_chunks('conditions', newer_than => now() + interval '3 months');
```
---
## add_compression_policy()
**URL:** llms-txt#add_compression_policy()
**Contents:**
- Samples
- Required arguments
- Optional arguments
Old API since [TimescaleDB v2.18.0](https://github.com/timescale/timescaledb/releases/tag/2.18.0) Replaced by add_columnstore_policy().
Allows you to set a policy by which the system compresses a chunk
automatically in the background after it reaches a given age.
Compression policies can only be created on hypertables or continuous aggregates
that already have compression enabled. To set `timescaledb.compress` and other
configuration parameters for hypertables, use the
[`ALTER TABLE`][compression_alter-table]
command. To enable compression on continuous aggregates, use the
[`ALTER MATERIALIZED VIEW`][compression_continuous-aggregate]
command. To view the policies that you set or the policies that already exist,
see [informational views][informational-views].
Add a policy to compress chunks older than 60 days on the `cpu` hypertable.
Add a policy to compress chunks created 3 months before on the 'cpu' hypertable.
Note above that when `compress_after` is used then the time data range
present in the partitioning time column is used to select the target
chunks. Whereas, when `compress_created_before` is used then the chunks
which were created 3 months ago are selected.
Add a compress chunks policy to a hypertable with an integer-based time column:
Add a policy to compress chunks of a continuous aggregate called `cpu_weekly`, that are
older than eight weeks:
## Required arguments
|Name|Type|Description|
|-|-|-|
|`hypertable`|REGCLASS|Name of the hypertable or continuous aggregate|
|`compress_after`|INTERVAL or INTEGER|The age after which the policy job compresses chunks. `compress_after` is calculated relative to the current time, so chunks containing data older than `now - {compress_after}::interval` are compressed. This argument is mutually exclusive with `compress_created_before`.|
|`compress_created_before`|INTERVAL|Chunks with creation time older than this cut-off point are compressed. The cut-off point is computed as `now() - compress_created_before`. Defaults to `NULL`. Not supported for continuous aggregates yet. This argument is mutually exclusive with `compress_after`. |
The `compress_after` parameter should be specified differently depending
on the type of the time column of the hypertable or continuous aggregate:
* For hypertables with TIMESTAMP, TIMESTAMPTZ, and DATE time columns: the time
interval should be an INTERVAL type.
* For hypertables with integer-based timestamps: the time interval should be
an integer type (this requires the [integer_now_func][set_integer_now_func]
to be set).
## Optional arguments
|Name|Type|Description|
|-|-|-|
|`schedule_interval`|INTERVAL|The interval between the finish time of the last execution and the next start. Defaults to 12 hours for hyper tables with a `chunk_interval` >= 1 day and `chunk_interval / 2` for all other hypertables.|
|`initial_start`|TIMESTAMPTZ|Time the policy is first run. Defaults to NULL. If omitted, then the schedule interval is the interval from the finish time of the last execution to the next start. If provided, it serves as the origin with respect to which the next_start is calculated |
|`timezone`|TEXT|A valid time zone. If `initial_start` is also specified, subsequent executions of the compression policy are aligned on its initial start. However, daylight savings time (DST) changes may shift this alignment. Set to a valid time zone if this is an issue you want to mitigate. If omitted, UTC bucketing is performed. Defaults to `NULL`.|
|`if_not_exists`|BOOLEAN|Setting to `true` causes the command to fail with a warning instead of an error if a compression policy already exists on the hypertable. Defaults to false.|
===== PAGE: https://docs.tigerdata.com/api/compression/recompress_chunk/ =====
**Examples:**
Example 1 (unknown):
```unknown
Add a policy to compress chunks created 3 months before on the 'cpu' hypertable.
```
Example 2 (unknown):
```unknown
Note above that when `compress_after` is used then the time data range
present in the partitioning time column is used to select the target
chunks. Whereas, when `compress_created_before` is used then the chunks
which were created 3 months ago are selected.
Add a compress chunks policy to a hypertable with an integer-based time column:
```
Example 3 (unknown):
```unknown
Add a policy to compress chunks of a continuous aggregate called `cpu_weekly`, that are
older than eight weeks:
```
---
## Distributed hypertables
**URL:** llms-txt#distributed-hypertables
[Multi-node support is sunsetted][multi-node-deprecation].
TimescaleDB v2.13 is the last release that includes multi-node support for Postgres
versions 13, 14, and 15.
Distributed hypertables are hypertables that span multiple nodes. With
distributed hypertables, you can scale your data storage across multiple
machines and benefit from parallelized processing for some queries.
Many features of distributed hypertables work the same way as standard
hypertables. To learn how hypertables work in general, see the
[hypertables][hypertables] section.
* [Learn about distributed hypertables][about-distributed-hypertables] for
multi-node databases
* [Create a distributed hypertable][create]
* [Insert data][insert] into distributed hypertables
* [Query data][query] in distributed hypertables
* [Alter and drop][alter-drop] distributed hypertables
* [Create foreign keys][foreign-keys] on distributed hypertables
* [Set triggers][triggers] on distributed hypertables
===== PAGE: https://docs.tigerdata.com/mst/about-mst/ =====
---
## Manually drop chunks
**URL:** llms-txt#manually-drop-chunks
**Contents:**
- Drop chunks older than a certain date
- Drop chunks between 2 dates
- Drop chunks in the future
Drop chunks manually by time value. For example, drop chunks containing data
older than 30 days.
Dropping chunks manually is a one-time operation. To automatically drop chunks
as they age, set up a
[data retention policy](https://docs.tigerdata.com/use-timescale/latest/data-retention/create-a-retention-policy/).
## Drop chunks older than a certain date
To drop chunks older than a certain date, use the [`drop_chunks`][drop_chunks]
function. Provide the name of the hypertable to drop chunks from, and a time
interval beyond which to drop chunks.
For example, to drop chunks with data older than 24 hours:
## Drop chunks between 2 dates
You can also drop chunks between 2 dates. For example, drop chunks with data
between 3 and 4 months old.
Supply a second `INTERVAL` argument for the `newer_than` cutoff:
## Drop chunks in the future
You can also drop chunks in the future, for example, to correct data with the
wrong timestamp. To drop all chunks that are more than 3 months in the
future, from a hypertable called `conditions`:
===== PAGE: https://docs.tigerdata.com/use-timescale/data-retention/data-retention-with-continuous-aggregates/ =====
**Examples:**
Example 1 (sql):
```sql
SELECT drop_chunks('conditions', INTERVAL '24 hours');
```
Example 2 (sql):
```sql
SELECT drop_chunks(
'conditions',
older_than => INTERVAL '3 months',
newer_than => INTERVAL '4 months'
)
```
Example 3 (sql):
```sql
SELECT drop_chunks(
'conditions',
newer_than => now() + INTERVAL '3 months'
);
```
---
## timescaledb_information.chunks
**URL:** llms-txt#timescaledb_information.chunks
**Contents:**
- Samples
- Available columns
Get metadata about the chunks of hypertables.
This view shows metadata for the chunk's primary time-based dimension.
For information about a hypertable's secondary dimensions,
the [dimensions view][dimensions] should be used instead.
If the chunk's primary dimension is of a time datatype, `range_start` and
`range_end` are set. Otherwise, if the primary dimension type is integer based,
`range_start_integer` and `range_end_integer` are set.
Get information about the chunks of a hypertable.
Dimension builder `by_range` was introduced in TimescaleDB 2.13.
The `chunk_creation_time` metadata was introduced in TimescaleDB 2.13.
|Name|Type|Description|
|---|---|---|
| `hypertable_schema` | TEXT | Schema name of the hypertable |
| `hypertable_name` | TEXT | Table name of the hypertable |
| `chunk_schema` | TEXT | Schema name of the chunk |
| `chunk_name` | TEXT | Name of the chunk |
| `primary_dimension` | TEXT | Name of the column that is the primary dimension|
| `primary_dimension_type` | REGTYPE | Type of the column that is the primary dimension|
| `range_start` | TIMESTAMP WITH TIME ZONE | Start of the range for the chunk's dimension |
| `range_end` | TIMESTAMP WITH TIME ZONE | End of the range for the chunk's dimension |
| `range_start_integer` | BIGINT | Start of the range for the chunk's dimension, if the dimension type is integer based |
| `range_end_integer` | BIGINT | End of the range for the chunk's dimension, if the dimension type is integer based |
| `is_compressed` | BOOLEAN | Is the data in the chunk compressed?